A More Correct Horse Battery Staple

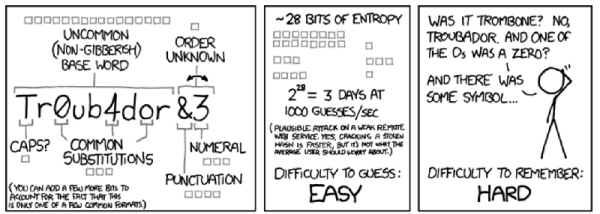
Passwords are terrible. The usual requirements of a number, capital letter, or punctuation mark force users to create unmemorable passwords, leading to post-it notes; the techniques that were supposed to make passwords more secure actually make us less secure, and yes, there is an xkcd for it.

[Randall Munroe] did offer us a solution: a Correct Horse Battery Staple. By memorizing a long phrase, a greater number of bits are more easily encoded in a user’s memory, making a password much harder to crack. ‘Correct Horse Battery Staple’ only provides a 44-bit password, though, and researchers at the University of Southern California have a better solution: prose and poetry. Just imagine what a man from Nantucket will do to a battery staple.

In their paper, the researchers set out to create random, memorable 60-bit passwords in an English word sequence. First, they created an xkcd password generator with a 2048-word dictionary to create passwords such as ‘photo bros nan plain’ and ’embarrass debating gaskell jennie’. This produced the results you would expect from a webcomic. The best ‘alternative’ result was found when creating poetry: passwords like “Sophisticated potentates / misrepresenting Emirates” and “The supervisor notified / the transportation nationwide” produced a 60-bit password that was at least as memorable as the xkcd method.

Image credit xkcd

Hackaday Links: October 25, 2015

There are dozens of different 3D printable cases out there for the Raspberry Pi, but the BeagleBone Black, as useful as it is, doesn’t have as many options. The folks at 3D hubs thought they could solve this with a portable electronics lab for the BBB. It opens like a book, fits a half-size breadboard inside, and looks very cool.

The guy who 3D printed his lawnmower has a very, very large 3D printer. He now added a hammock to it, just so he could hang out during the very long prints.

There’s a box somewhere in your attic, basement, or garage filled with IDE cables. Wouldn’t they be useful for projects? Yep, only not all the wires work; some are grounds tied together, some are not wired straight through, and some are missing. [esot.eric] has the definitive guide for 80-wire IDE cables.

Like case mods? Here’s a golden apple, made out of walnut. Yes, there are better woods he could have used. It’s a wooden replica of a Mac 128 with a Mac Mini and LCD stuffed inside. Want a video? Here you go.

If you have a 3D printer, you’re probably familiar with PEEK. It’s the plastic used as a thermal break in non-all-metal hotends. Now it’s a filament. An extraordinarily expensive filament at €900 per kilogram. Printing temperature is 370°C, so you’ll need an all-metal hotend.

It’s the Kickstarter that just keeps going and going and going. That’s not a bad thing, though: there really isn’t much of a market for new Amiga 1200 cases. We’ve featured this project before, but the last time was unsuccessful. Now, with seven days left and just over $14k to go, it might make it this time.

DIY Powder Coating

If you don’t yet have a toaster oven you can’t use with food, here’s yet another reason: DIY powder coating. Powder coating is much harder and more durable than paint – a property imbued to it by the fact that it’s baked on to a part. [Thomas] had a go at powder coating some skateboard trucks, and with the right tools, found the process downright easy.

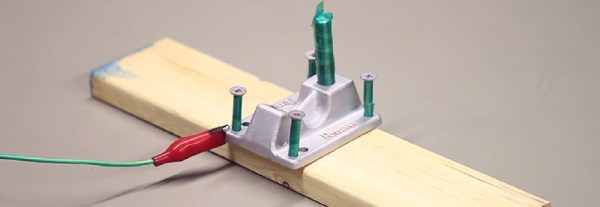
[Thomas] only needed a few things to powder coat his parts, the first and most important being a powder coat gun. A few years ago, Craftsman produced a powder coat gun that’s still available on Amazon and eBay for about $50. Powders are plentiful and cheap in small quantities. The only other tools needed were an N95 or better respirator, some high temperature tape for masking off the part and a toaster oven. If you want to coat big parts, there are DIY oven options for that.

After the part was sandblasted down to bare metal, [Thomas] masked off all the holes and threads of the part with polyimide tape. Any tape that’s capable of withstanding high temperatures will do, and most of us have a roll of Kapton sitting next to a 3D printer, anyway.

The part is coated with powder via an electrostatic charge, and this means attaching a ground lead from the gun to the part. After that, it’s just filling the gun with powder, putting it in the oven set at 450°F, and letting the powder liquefy.

In the video below, you can see [Thomas] sandblasting, powdering, and baking a set of aluminum skateboard trucks using his method. Compared to other methods of finishing metal parts – anodizing or plating, for instance, powder coating is remarkably easy and something anyone can do in a garage.

Thanks [Tyler] for sending this one in.

Continue reading “DIY Powder Coating”

Fitting 3D Prints On Eagle Boards

One of the hardest things you’ll ever do is mesh your electronic design with a mechanical design. Getting holes for switches in the right place is a pain, and if you do it enough, you’ll realize the beauty of panel mount jacks. This is especially true when using Eagle to design a PCB, but with a few tricks, it’s possible to build 3D printable pieces directly from Eagle designs.

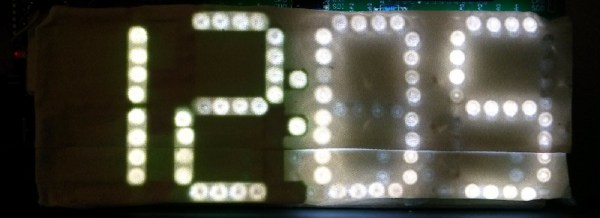
[Tyler] built a clock with a bunch of LEDs. While the clock worked great, there was a lot of light leakage around the segments of his custom seven-segment numbers. The solution is a light mask, and [Tyler] figured out how to make one in Eagle.

The first step is to draw a new layer on the Eagle board that defines the light mask. This is exported as an EPS file in the CAM processor that gives him a 2D drawing. At least it’s to scale.

The next step is to install Inkscape and install paths2openscad. This turns the two-dimensional drawing into a 2D object that can be rendered in OpenSCAD and exported as a 3D printable STL file.

Does the project work? The results are great – the entire light mask is a single-wall print, and since this light mask doesn’t need any mechanical strength, it should hold up well. The clock looks much better than before, and [Tyler] has a new technique for making 3D objects for his 2D PCBs.

Stuffing Macs Into FPGAs

A few years ago, [Steve] of Big Mess ‘O Wires fame stuffed one of the first Macintosh computers into an FPGA. While the project worked and was able to run System 6 on a virtual CPU, there were a few problems: it wasn’t exactly stable, and there was no support for a keyboard, sound, SCSI, or serial ports.

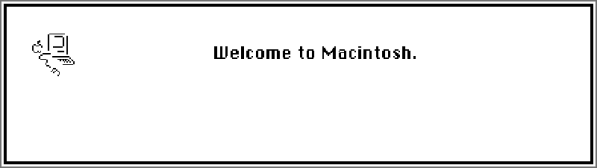
Now, there’s a new tiny FPGA board around, and this one is perfectly designed to fit the original Macintosh on it. It’s much more stable, and there is a floppy disk emulator on the horizon, just so you won’t have to deal with all those 400k 3.5″ disks anymore.

[Steve]’s brand new Mac Plus is based on the MiST board, an FPGA board that was originally designed to emulate the first Amigas and the Atari SE on an FPGA and a separate ARM CPU. There’s already been a lot of classic computers ported to the MiST, and the classic all-in-one Macs are the last project that’s left.

In the video below, you can see the MiST board running the classic System 6 at SVGA resolution. That means MacPaint and Shufflepuck in one compact board using modern hardware.

Continue reading “Stuffing Macs Into FPGAs”

Use The Esp As A Serial Adapter

One of the most useful tools in the hardware hackers toolbox is a USB to serial adapter. With this, you can flash new firmware to routers, and ply the vast binary seas of embedded hardware. The common form of the USB to Serial adapter is an FTDI breakout board. This requires drivers, though, and there is actually a simpler – and wireless – solution: the ESP8266 WiFi module.

Despite being the best little IoT device on the block, the ESP8266 was originally designed to be a USB to WiFi adapter. In our haste to build WiFi throwies, WiFi blinkies, and freaking WiFi server farms, we seem to have forgotten that there’s still a use for a device that turns a 3.3V TTL into a WiFi connection. It’s the perfect device for reflashing a cheap WiFI router with new firmware, or just providing you with wireless serial connections to go along with your wireless Internet.

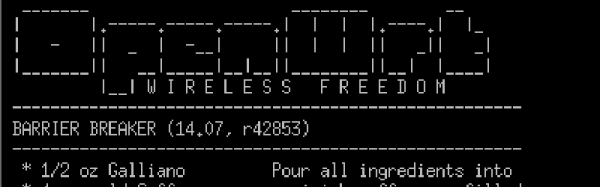
This project uses jeelabs’ ESP-link firmware for the ESP8266. It’s a simple bridge between WiFi and serial, and can function as an AVR programmer in a pinch. The web interface for this firmware is very nice, but you really don’t need it; the entire purpose of this firmware is to be even more transparent than an FTDI USB to serial adapter. For the next time you’re flashing a router with OpenWRT, don’t bother digging out the USB adapter; an ESP is all you need.

Atmel Introduces Rad Hard Microcontrollers

The Internet is full of extremely clever people, and most of the time they don’t realize how stupid they actually are. Every time there’s a rocket launch, there’s usually a few cubesats tucked away under a fairing. These cubesats were designed and built by university students around the globe, so whenever a few of these cubesats go up, Internet armchair EEs inevitably cut these students down: “That microcontroller isn’t going to last in space. There’s too much radiation. It’ll be dead in a day,” they say. This argument disregards the fact that iPods work for months aboard the space station, Thinkpads work for years, and the fact that putting commercial-grade microcontrollers in low earth orbit has been done thousands of times before with mountains of data to back up the practice.

For every problem, imagined or not, there’s a solution. Now, finally, Atmel has released a rad tolerant AVR for space applications. It’s the ATmegaS128, the space-grade version of the ‘mega128. This chip is in a 64-lead ceramic package, has all the features you would expect from the ATmega128 and is, like any ‘mega128, Arduino compatible.

Atmel has an oddly large space-rated rad-hard portfolio, with space-grade FPGAs, memories, communications ICs, ASICs, memories, and now microcontrollers in their lineup.

While microcontrollers that aren’t radiation tolerant have gone up in cubesats and larger commercial birds over the years, the commercial-grade stuff is usually reserved for low Earth orbit stuff. For venturing more than a few hundred miles above the Earth, into the range of GPS satellites and to geosynchronous orbit 25,000 miles above, radiation shielding is needed.

Will you ever need a space-grade, rad-hard Arduino? Probably not. This new announcement is rather cool, though, and we can’t wait for the first space grade Arduino clone to show up in the Hackaday tips line.