Hackaday Prize Entry: Recording RC Planes With Third Person View

With the latest advancements in small, cheap video transmitters, it’s no surprise First Person View remote-controlled aircraft are so popular. It’s the easiest way to get into a cockpit without having to spend thousands of dollars and fifty or so hours on a pilot’s license. Despite all the technical challenges of FPV flying, there’s still one underserved part of recording RC aircraft: third person view, or as it’s more commonly called, ‘handing a camcorder to your friend.’

[Walker Eric] would like to do something about that. He’s always wanted nice videos of him flying his plane, and he can’t film and fly at the same time. He can build a robot, though, and that’s his entry for The Hackaday Prize.

[Walker]’s project uses a base station with a camcorder mounted on a gimbal. The electronics for this setup are surprisingly simple – just a GPS beacon transmitting telemetry down to the base station. By comparing this data to a GPS receiver on the ground station, the direction of the plane can be computed.

There are a few problems with this setup. Altitude measurement with GPS isn’t very accurate, so [Walker] is using a pressure sensor as an altimeter on the GPS beacon. The current setup works great, and is a fantastic improvement over the OpenCV setup [Walker] tested out before moving to GPS.

[Walker] already has some incredible video of him flying some planes and quads around his local field shot with this system. You can check those out below.



The 2015 Hackaday Prize is sponsored by:

Continue reading “Hackaday Prize Entry: Recording RC Planes With Third Person View”

A Real Dash For A Truck Simulator

[Leon] plays Euro Truck Simulator 2, and like any good simulator, there are people out there building consoles, cockpits, and dashboards. In [Leon]’s case, he wanted a dashboard for his virtual trucks and cobbled one together out of a dash taken from a VW Polo.

This project was inspired by [Silas Parker] and his Arduino-based dashboard made out of a cardboard box, some servos, and a few LEDs. It worked, but [Leon] realized just about every dashboard made in the last decade or so has a CAN bus. You can just buy a CAN bus shield for an Arduino, and a dashboard can be easily found at any junkyard.

Right now, [Leon] is in the process of finding the CAN bus addresses of the relavent dials and LEDs on the dashboard. He found the tachometer at 0x280, and a bunch of indicator lights can be found at 0x470. Combined with a standard computer steering wheel and the telemetry SDK for Euro Truck Simulator 2, [Leon] has the beginnings of a virtual big rig on his desk.

Tracking Bitcoin With The ESP8266

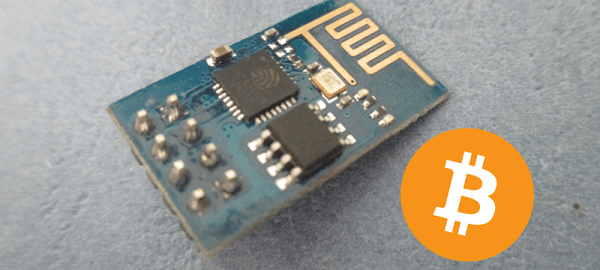
[Kendrick] was looking for something to do with an ESP8266 WiFi module, and since he loves Bitcoin and Arduino, the obvious solution was to make a Bitcoin price tracker.

The ESP8266 is a complete microcontroller with a WiFi chip and a few pins for a serial connection. It’s certainly possible to write some firmware for the ESP to get the current conversion rate of Bitcoin, but for simplicity’s sake, [Kendrick] chose to use an Arduino for this project. He’s using a 5V Arduino, and the ESP operates on 3.3V logic, but a few Zeners take care of the logic level conversion.

The code running on the Arduino checks the CoinDesk API minute, parses the JSON coming from the API, and prints the current Bitcoin price to the serial port. For tracking the current conversion rate of Bitcoin, it’s vastly overkill. This project could have a few interesting applications, from hooking up a few seven-segment displays, to an RGB LED mood lamp that keeps track of this magic Internet money.

The Trials Of Quadcopter Graffiti

Last April, graffiti artist [KATSU] strapped a can of red spray paint to a Phantom quadcopter, flew it up against one of the largest billboards in New York City, and pressed a button. Now, [KATSU], [Dan Moore], and Adafruit’s [Becky Stern] are trying to perfect a flying can of spraypaint, and they’ve met with some success and surely many broken props.

The team used an Iris+ for this project instead of the Phantom used by [KATSU] earlier this year, but the principle of the entire endeavor remains the same: fly up against a wall, flick a switch, and watch paint come out of a spray gun. To get the can spraying paint, they modified a can gun to accept a micro servo. This servo is connected to the trigger mechanism of the can gun, and the entire unit is slung under the quad.

Getting a quadcopter to put paint exactly where you want it is hard, even indoors. Luckily, the Pixhawk inside the Iris has sensor inputs and an ‘altitude hold’ mode that can accept a sonar sensor and can be programmed to stay a set distance away from a wall. These sensors are susceptible to interference, and a proper, shielded cable had to be made, but the sensor did work.

Flying the quad did not go as smoothly. The swinging can of paint changes the center of gravity of the quad, and even flying indoors proved difficult. Still, if you’d like to give it a go, [Becky] put up the instructions for their build. You can see the hover attempts in the video below.

Continue reading “The Trials Of Quadcopter Graffiti”

Hackaday Prize Entry: OpenBionics

For the last few years now, the 3D printing community has been searching for a groundbreaking application for out little boxes of plastic squirting goodness. On of the most interesting applications the community has stumbled upon is prosthetics.

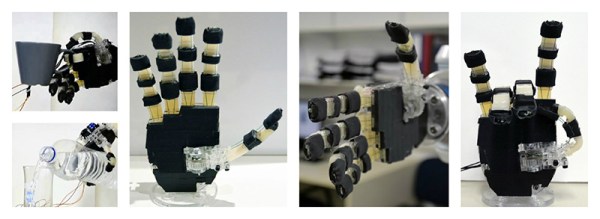
There have been a lot of people warming up their 3D printers and laser cutters to make prosthetic limbs in recent years. For [OpenBionics]’ entry for The Hackaday Prize, they’re building a prosthetic hand that costs less than $200, weighs less than 300 grams, and can be easily fabricated with 3D printers and laser cutters.

The human hand is the most complex end-effector on the planet, and emulating its range of motion is a difficult task. Still, the [OpenBionics] team is working hard to properly emulate a thumb with three degrees of freedom, putting 144 different grasps on the hand, and making their hand useful with soft fingertips.

Even with all this capability, [OpenBionic]’s robotic hand – motors and all – is about the same size as a normal human hand. That’s incredible, especially when you consider the motors for your hand – muscles – are all in your arm.

The team has put together a video demoing the capabilities of their hand. It’s somewhat remarkable, and able to do everything from lift a coffee cup to holding a pen. You can check that video out below.


The 2015 Hackaday Prize is sponsored by:

Continue reading “Hackaday Prize Entry: OpenBionics”

New Part Day: Indoor Location Systems

GPS is an enabling technology that does far more than the designers ever dreamed. If you want a quadcopter to fly to a waypoint, GPS does that. If you want directions on your phone, GPS does that. No one in the 70s or 80s could have dreamed this would be possible.

GPS, however, doesn’t work too well indoors. This is a problem, because we really don’t know what is possible if we can track an object to within 10cm indoors. Now there’s a module that does just that. It’s the decaWave DWM1000.

This module uses an 802.15 radio to track objects to within just a few centimeters of precision. It does this by sending time stamps to and from a set of base stations, or ‘anchors’. The module is also a small, and relatively high bandwidth (110kbps) radio for sensors and Internet of Things things makes it a very interesting part.

Some of the potential for this module is obvious: inventory management, and finding the remote and/or car keys. Like a lot of new technology, the most interesting applications are the ones no one has thought of yet. There are undoubtedly a lot of applications of this tech; just about every ball used in sports is bigger than 10cm, and if ESPN ever wanted even more cool visuals, just put one inside.

If you’d like to try out this module, decaWave has an eval kit available through distributors for about $600. Somehow, there’s also a Kickstarter for a board that uses the same module, Arduino compatible, of course.

Thanks [Roy] for the tip.

An Introduction To Zener Diodes

[Afroman] is back again with another great tutorial video on the basics of electronics. This time it’s zener diodes.

Page three or four of every ‘beginners guide to electronics’ covers a diode as, “a component that only allows current to flow in one direction.” This is true; a diode only allows current to flow in one direction. However, like any depth of knowledge, the dialectic of diodes quickly turns to a series of, ‘but..’ and ‘however…’ statements.

A zener diode is like a normal silicon diode, where a forward biased diode will pass current with a ~1 volt drop. When a zener diode is reversed biased, there’s a different voltage drop, annotated as Vz on the datasheet. When reversed biased, current cannot flow across the diode unless the voltage is above Vz. This is what makes zeners useful for a bunch of applications.

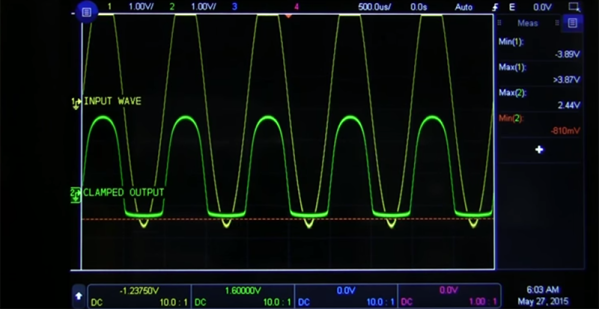
[Afroman] goes over a few of the most useful applications of zeners, including a diode clamping circuit. This circuit will clamp the voltage to a maximum of Vz, helpful when you’re feeding a signal into an analog input. This voltage clamping circuit can be used in some interesting applications. If you feed a sine wave or other signal though the circuit, you can clip the signal.

Zeners can also be used as a very crude, low current, low accuracy power supply. If you’re looking for a voltage regulator for a microcontroller that’s impossibly easy and you’re all out of 7805s, pick up a zener. It’s not the basis of a good power supply, but it does work.