The world’s leading expert on mechanical computers wasn’t [Charles Babbage]; sure, he could design stuff, but eventually you need to actually build something. We are now graced with the expertise of [Chris Fenton]. He’s built mechanical calculators, a mechanical digital computer, and now a mechanical display inspired by the Jacquard loom.
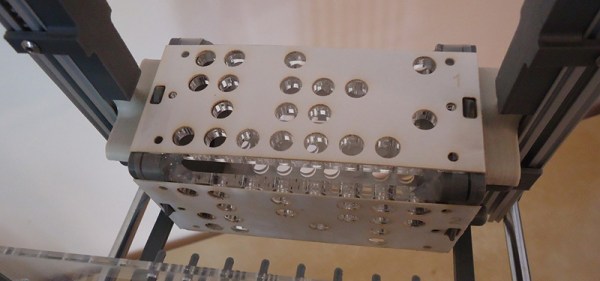
[Chris] calls his creation the PixelWeaver, and the name isn’t far from the truth; it’s a 32-hook Jacquard style punch card reader that could be mounted over a small loom. Instead of weaving rugs and fabric, the PixelWeaver controls a 6×5 black and white display.
The PixelWeaver is built out of t-slot aluminum, 3D printed parts, and a web of thread to transfer motion from rotating cams to ratchets and pixels. The display itself is heavily inspired by a Lego mechanical display, and the cards that store the data for the display are laser-cut plywood. Interestingly, there’s nothing in this machine that couldn’t have been made 150 years ago; it’s the same technology used to weave rugs, although the necessity of a bitmap display in the Victorian era is a bit questionable.
The world has a severe lack of robots, and the shortage of walking robots is untenable. We were promised flying cars and fusion reactors, yet here we are, 15 years into the twenty-first century without even a robotic pet spider.
[Radomir]’s entry for The Hackaday Prize aims to fix this bizarre oversight of scientific and technological progress. He’s designed a small, inexpensive, but very well designed quadrupod robot that will put full reverse kinematics on your desk for under $50.
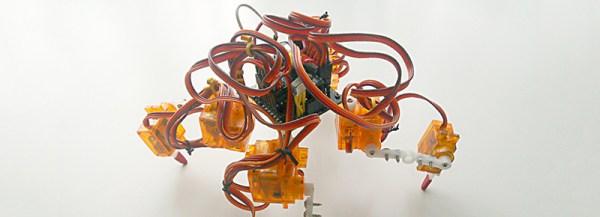
To solve humanity’s glaring lack of walking robots, [Radomir] designed Tote, a four-legged robot whose chassis is mostly composed of only 9 gram servos. There are twelve servos in total, three on each of its four legs. It’s an extension of his earlier µKubik robot. While the µKubik was powered by Python, the Tote is all Arduinofied, calculating the trajectories of each leg dozens of times a second with an Arduino Pro Mini.
This isn’t the only walking robot kit on hackaday.io; last year, [The Big One] created Stubby the Teaching Hexapod. Even though Stubby featured six legs, it’s still remarkably similar to Tote; 9 gram servos provide all the locomotion, and all the software is running on a relatively small ATMega microcontroller. Both are great introductions to walking robots, and both bots will surely be capable and just rulers of mankind after the robot apocalypse.
There are a lot of neat toys and accessories that rely on 3D printing filament. The 3Doodler is a 3D printing pen, or pretty much an extruder in a battery-powered portable package. You can make your own filament with a Filastruder, and of course 3D printers themselves use up a lot of filament. [Bodet]’s project for this year’s Hackaday Prize gives those tiny scraps of leftover filament a new life by welding filament together.
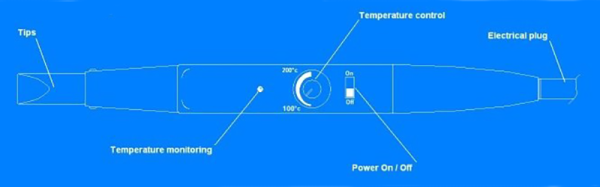
The EasyWelder [Bodet] is designing looks a little bit like a tiny hair straightener; it has a temperature control, a power switch, and two tips that grip 1.7 or 3mm diameter filament and weld them together. It works with ABS, PLA, HIPS, Nylon, NinjaFlex, and just about every other filament you can throw at a printer. By welding a few different colors of filament together, you can create objects with different colors or mechanical properties. It’s notas good as dual extrusion, but it does make good use of those tiny bits of filament left on a mostly used spool.
Since the EasyWelder can weld NinjaFlex and other flexible filaments, it’s also possible to weld NinjaFlex to itself. What does that mean? Custom sized O-rings, of course. You can see a video of that below.
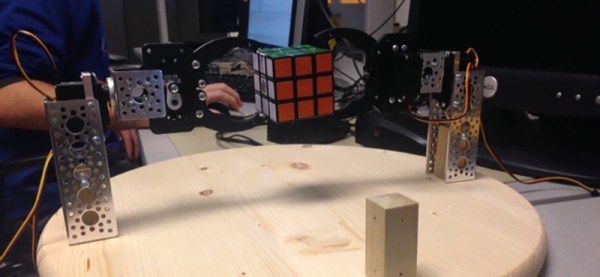
For their final project for ECE 5760 at Cornell, [Alex], [Sungjoon], and [Rameez] are solving Rubik’s Cubes. They’re doing it with an FPGA, with homebrew robot arms to twist and turn a rainbow cube into the correct position.
First, the mechanical portion of the build. The team are using a system of three robot arms positioned on the left, right, and back faces of the cube relative to a camera. When a cube is placed in the jaws of this robot, the NTSC camera data is fed into an FPGA, where a Nios II soft core handles the actual detection of the cube faces, the solver algorithm, and the controller to send servo commands to the robot arms.
The algorithm used for solving the cube is CFOP – solve the white cross, the white corners, the middle layer, the top face, and finally the entire cube. In practice, the robot ended up taking between 60-70 moves. This is not the most efficient algorithm; the Thistethwaite algorithm only requires 52 moves. There’s a reason for this apparent inefficiency – the Thistlethwaite algorithm requires large look-up tables.
Once the cube is scanned and the correct moves are computed, the soft core in sends commands out through the FPGA’s GPIO pins. Each cube can be solved in under three minutes after it has been scanned, but the team ran into problems with scanning accuracy. It’s a problem that can be fixed with the right lighting setup and better aberrant cubie detection, and a great final project using FPGAs.
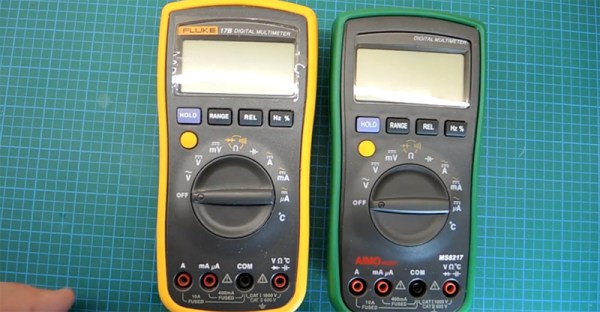
Need a good multimeter? The Fluke 17B is an excellent basic meter that will last your entire career. It’s also $100 USD. Need something cheaper? Allow me to introduce the AIMOmeter MS8217. On the outside, it’s a direct copy of the Fluke 17b, right down to the screen printing but understandably lacking the yellow enclosure. $30 USD will get you an exact copy of a Fluke 17B, it would seem. Right? Not a chance. [electronupdate] did a teardown of the AIMOmeter, and while this meter looks like a Fluke on the outside, it’s probably going to kill somebody.
The teardown begins with a look at the ratings on the back of this off-brand meter. It does have two fuses, but the engraving on the back strangely claims ‘Wrrebt insurance limit’. If anyone has any idea what a ‘wrrebt’ is, please leave a note in the comments. The only references to this word in Google are mis-OCRed blackletter type in a book from the early 1800s.
Opening up the meter reveals – surprisingly – two real fuses in the meter. There were no markings on the bigger fuse, which could be a problem for verifying if the fuse is of the proper value. That’s not really a problem, though: the fuse isn’t even between ground and the amp probe socket. Yes, this fuse is completely useless, and testing the resistance with the fuse out of the circuit confirms this.
After putting the meter back together, [electron] tests the accuracy of the meter. With a 1 mA current source, the mA setting seems to work, but when testing the larger Amp range of this meter, the results display in milliVolts. Don’t worry, there’s an easy fix for that: just press the dial down just right and the correct setting will be displayed. Wow.
You get what you pay for, and if you only ever use an AIMOmeter for measuring Arduinos and batteries, you might – might – be alright. This is not the kind of meter you want to measure line voltage, motors, or anything else with, though.
The Zero to Product workshop, held at the Hackaday Design Lab in Pasadena two weeks ago, was a packed house of talented people seeking to expand their skill set with professional PCB layout tips and tricks. [Matt Berggren] didn’t disappoint, bringing his professional experience to the table in a way that anyone with basic electronic knowledge can grasp. Learning the things that make a board reliable and manufacturable can be done with a simple design. In the case, the culmination of the workshop is development board to host the ESP8266 WiFi modules that have been so popular over the last half-year.
This isn’t the first time we’ve pulled off a massive hardware hackathon and meetup, and it certainly won’t be the last. You have another chance to participate in the workshop in San Francisco on June 13th. If you can’t catch that one, we’ll be in Shenzhen for the Shenzhen Maker Fare, a Zero to Product workshop, and a meetup.
The completed ESP8266 breakout presented during the talk
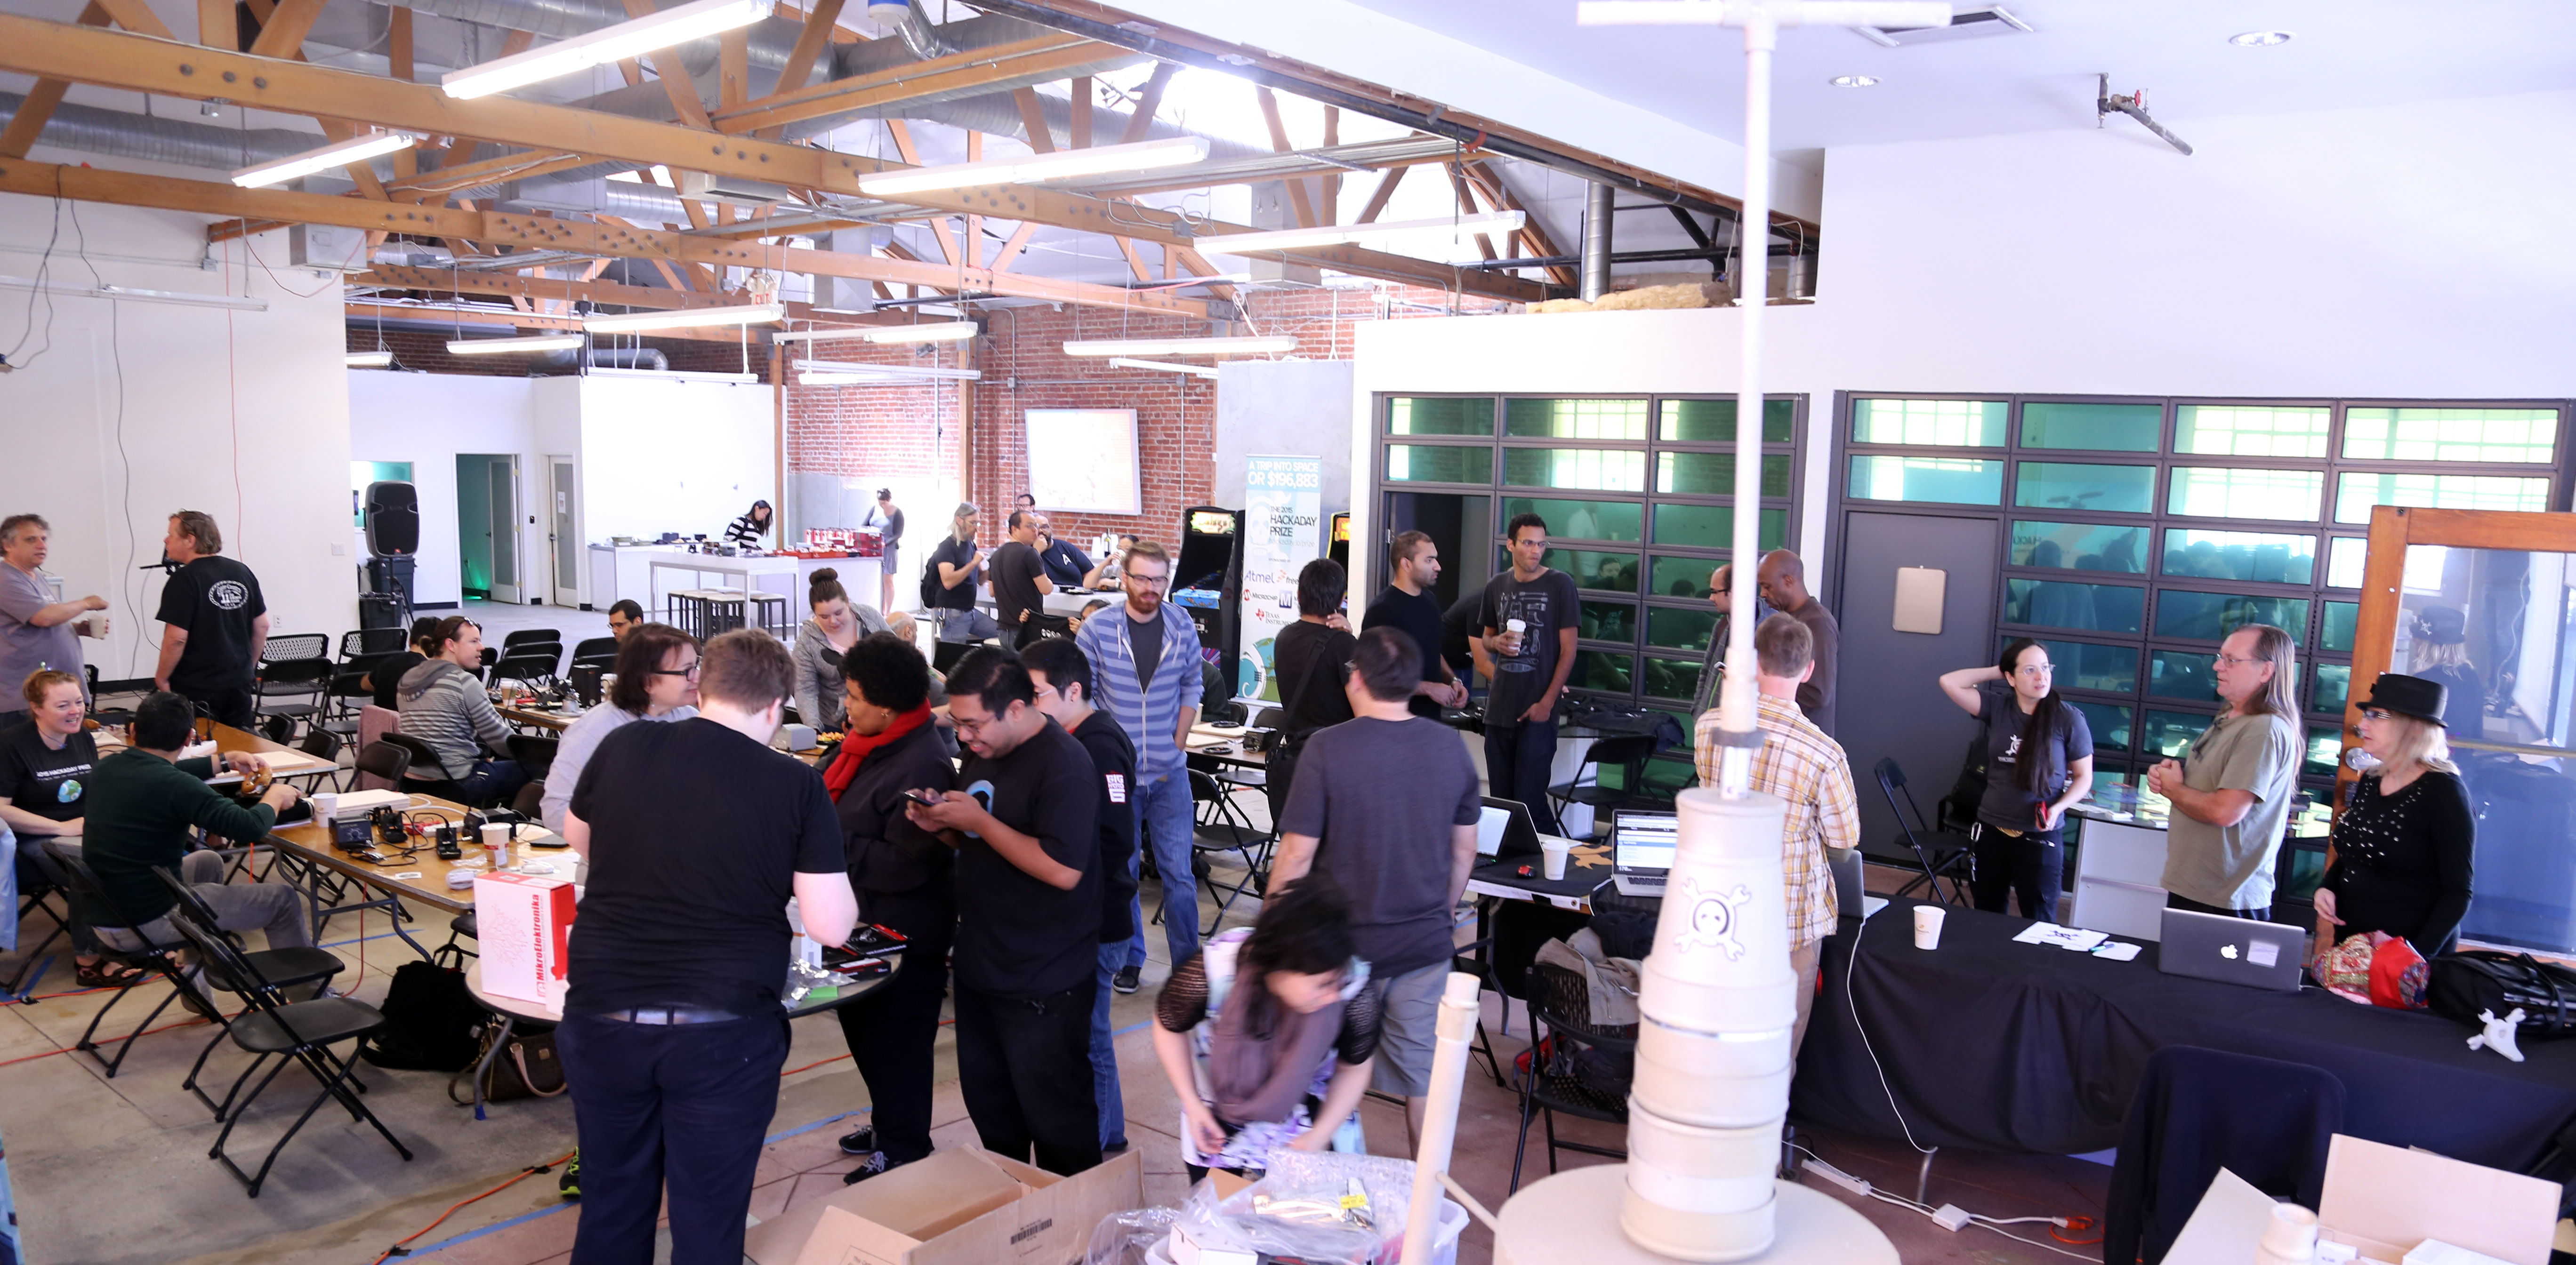
Of course Hackaday events are never “all work and no play”. The day crept into night and the the chairs were cleared out for hightop tables and tasty beverages. The atmosphere was festive and everyone still made it back early the next morning for an entire day of hardware hacking, tinkering, and general futzing around with circuits and electrons. If you check out [Rich Hogben]’s photo log of the weekend, you’ll find some an impressive collection of hackers were there. I see at least one person who’s job is flying space probes, a Hackaday Prize judge, and a security researcher who can crack a Master Lock in 30 seconds.
The display for [Steve]’s LIDAR
Bar-time Show and Tell
The meetup Saturday night wasn’t technically a bring-a-hack event, but we walwasy want to see people’s latest and greatest contraptions. [Steve Collins] brought a homebrew LIDAR. This project was based on a SparkFun Time of Flight breakout board that scans the room with a cheap hobby servo, reads the data into an Arduino and displays the rangefinding data on a small TFT. The LIDAR is good enough to scan the entire Hackaday Design Lab, with more than enough resolution for any robotics project you have in mind.
Also at the Saturday night gathering was our very own mythical creature [Sophi Kravitz], [Elecia White] who is and embedded.fm podcaster, engineer, and Hackaday Prize judge two years in a row, and [Samy Kamkar] known for his privacy and security research and for building the KeySweeper. They gave a series of lightning talks about the latest things they’re working on:
We rented Galaga and Ms. Pac Man machines for the entire weekend, but that wasn’t the only electronic entertainment for the party. Two Bit Circus was there with a game that could only be described as highly disorganized electronic chess. FLED, the exceedingly large, high-resolution RGB LED display was behind the bar, and Deezmaker took over a room to 3D scan people and print out miniature clones on a pair of 3D printers.
The Hackathon
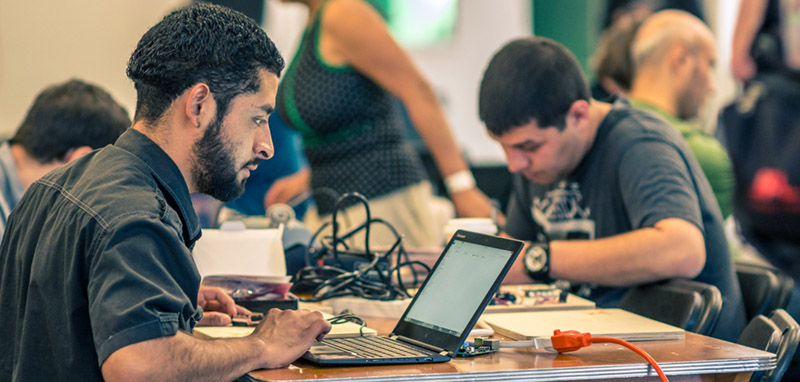
The events continued on until Sunday evening with a hardware hackathon. This isn’t your run-of-the-mill software hackathon where people sit behind their MacBooks the entire time; we had soldering irons, components, solder, solder wick (important!) and dozens of hardware hackers tinkering away at their latest electronic doodad.
Foreground: A moisture vaporatorA vast assortment of dev boards
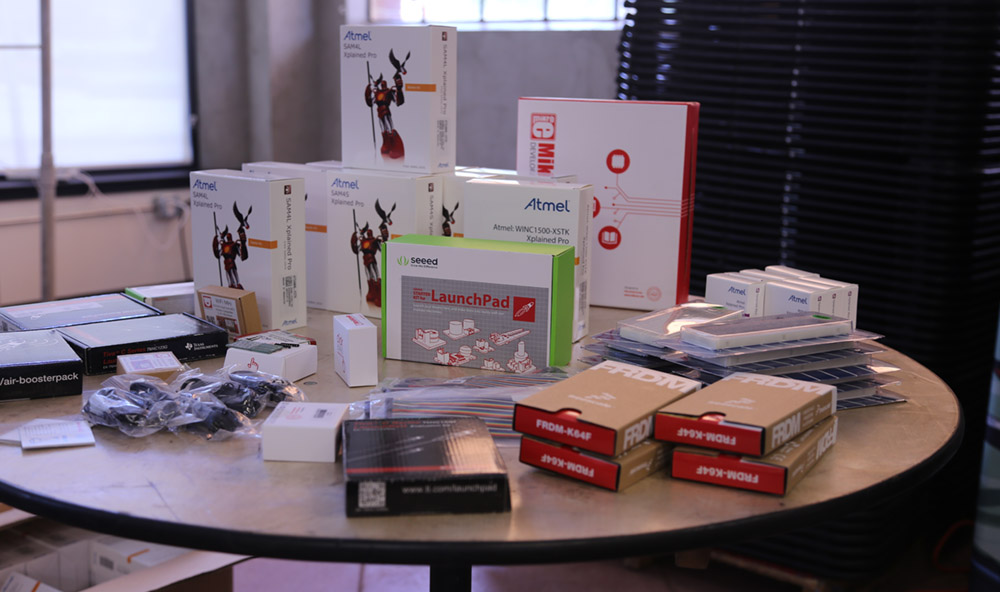
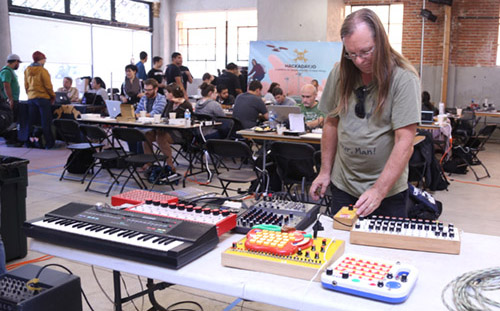
The amount of hardware on hand was spectacular. Hackaday Prize sponsors Atmel, Freescale, Microchip, and TI all provided some hardware. Everything from ATMega328 boards from Atmel, TI Launchpads bristling with goodies like the Sharp Memory Display booster packs, Seeed Studio starter packs, to insanely powerful Freescale Freedom boards were available to build on at the event. The Sunday hackathon also had several gigantic boxes from Mouser filled to the brim with components and breadboards available to everyone to clobber into submission, letting their inner electronics geek shine. When taking a break from the build there was plenty to look at. People were showing off already completed projects they brought along with them. [Jeff] from Circuitry & Poetry was there with a bunch of circuit bent synths. A number of people were also finishing up the ESP8266 breakout boards that were presented the day before; some soldering and some laying out a PCB in Eagle. It was an incredible event, with dozens of groups going off to do their own thing, but still welcoming to anyone else who wanted to tinker. This type of community isn’t found everywhere and we’re thankful for the people that make Hackaday events like this one so special.
We need to take the time to give a big shoutout to SGVHAK. We honestly couldn’t have done this event without them. I’d personally like to thank [Michael Proctor-Smith] for bringing his amazing livestreaming box. He is the reason I am not currently (still) editing down seven hours of video from the PCB design workshop and the lightning talks. Big ups to [Lan], [Scoops] and everyone else who helped out. If you came to the Hackaday event, check out their meetups. If you’re in the area, we also have regular informal meetups somewhere around the hackerspace. Come on out!
The theme of this year’s Hackaday Prize is. ‘build something that matters.’ A noble goal, but there’s also a second prize – the Best Product prize – that is giving $100k to one lucky team who can appeal to people with open jaws and wallets. It’s a fabulous prize that also includes a six month residency at the Hackaday Design Lab, but right now there aren’t many contenders for this part of The Hackaday Prize.
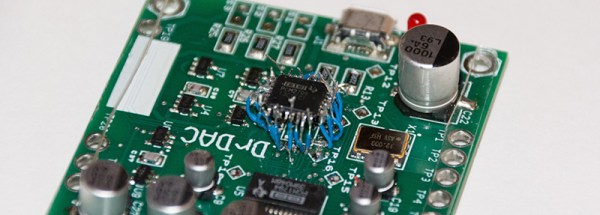
[drewrisinger]’s DrDAC USB Audio DAC is one of those project that’s in the running for the Best Product prize. He’s solving the problem of terrible low-quality built-in soundcards that seem to be everywhere. Yes, it’s a simple idea, but the execution is great.
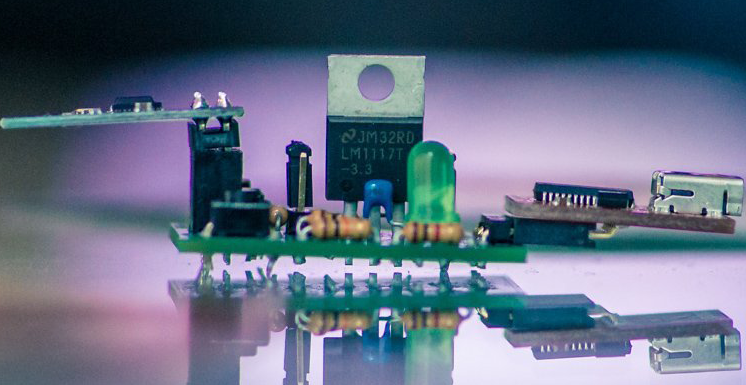
The electronics for DrDAC are pretty much what you would expect for a DIY audio sound card; A PCM2706 takes USB audio and sends it out over I2S. A PCM1794 converts the I2S to analog audio, and an OPA2836 amplifies it and sends everything out through a 1/8″ jack or a pair of RCA plugs.
[drewrisinger] started DrDAC as a school project, and after receiving the PCBs, he noticed a problem. MultiSim’s footprint for a TQFP-32 package was too small, meaning the IC simply wouldn’t fit on the board. It was too late in the semester to order a new board, meaning some sort of rework needed to happen. [drew] fixed this problem by soldering jumper wires between the pads to the leads of the chip. Yes, it looks crazy, but apparently it works. You can check out a video of that whole process below.







![The display for [Steve]'s LIDAR](https://hackaday.com/wp-content/uploads/2015/05/lidar1.jpg)