Driving 1000 NeoPixels With 1k Of Arduino RAM

timing

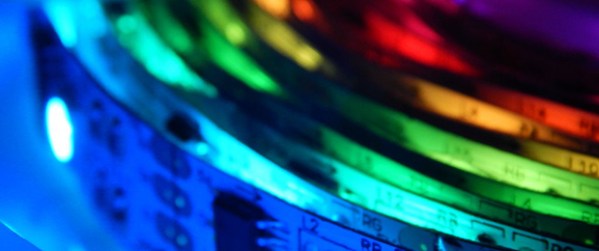
NeoPixels, or WS2812 RGB LEDs, are the display device du jour for impressive and blinding lighting projects. Commonly known for very tight timing requirements, [Josh] discovered this is, in fact, usually unnecessary. The timing requirements for NeoPixels aren’t as bad as they seem, once you get to know them.

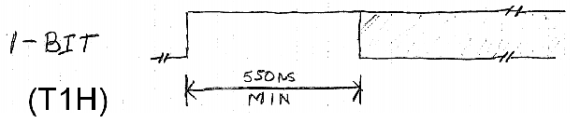
The official WS2812 timing specs give values that are fairly constraining for anyone writing a library to drive these RGB LED pixels, but simplifying the timing diagram by assuming a 50% duty cycle on the data lines and ignoring the longer maximum times results in a surprising conclusion: the only tight timing parameter for NeoPixel signaling is the maximum width of the 0-bit pulse.

Realizing this, [Josh] wrote a simple demo program to drive over 1000 NeoPixels – an 11 meter long strip – using 1K of RAM on an Arduino. The trick comes by simply delaying the bitbanging a set number of cycles. No obtuse assembly required.

There is only one problem with [Josh]’s method of driving a nearly unlimited amount of NeoPixels – building a display where every NeoPixel is an element in a larger image, such as in a video display, is impossible on systems with limited amounts of RAM. The code writes values to the NeoPixel strip algorithmically, so if you can’t build your animation with for loops, you’re out of luck. Still, Driving this many NeoPixels is a migraine trigger, and we have to give [Josh] credit for doing this with 1K of RAM.

Check out the video of [Josh]’s extreme NeoPixel strip below.

Continue reading “Driving 1000 NeoPixels With 1k Of Arduino RAM”

Emulating Touchscreens In Python

DOS

Software, especially DOS-based software meant for CNC control lasts forever, but hardware most certainly does not. When faced with aged and decrepit hardware meant for controlling a CNC machine that was slowly dying, [Oliver] needed something that would emulate 3M Microtouch touchscreen. Not wanting to go the hardware route, he decided to emulate a touch screen in Python.

The Python code is fairly simple, taking mouse input and translating it to the serial protocol the 3M Microtouch, and thus the old DOS CNC app, uses. Writing the Python to capture mouse clicks was only half of the problem, though. [Oliver] also needed a way to send these mouse clicks to an old DOS application. Virtualizing an old machine running DOS created a few timing problems, but a solution was eventually found with DOSBox and the Virtual Serial Port Emulator that can connect two applications with serial ports.

[Oliver] was finally able to get everything working, bringing this equipment back to life for at least another 30 years. Let’s just hope all the code is well documented and archived for the next guy.

Hackaday Links: May 18, 2014

hackaday-links-chain

Think the original Pong is cool? How about point to point Pong? [v8ltd] did it in three months, soldering all the leads directly to the chip pins. No sockets required. It’s insane, awesome, a masterpiece of craftsmanship, and surprising it works.

[Jeremy Cook] is building a servo-powered light graffiti thing and needed a laser diode. How do you control a laser pointer with a microcontroller? Here’s how. They’re finicky little buggers, but if you get the three-pack from Amazon like [Jeremy] did, you get three chances to get it right.

NFC tags in everything! [Becky] at Adafruit is putting them in everything. Inside 3D printed rings, glued onto rings, and something really clever: glued to your thumbnail with nail polish. Now you can unlock your phone with your thumb instead of your index finger.

Photographs capture still frames, but wouldn’t it be great if a camera could capture moving images? No, we’re not talking about video because this is the Internet where every possible emotion, reaction, and situation can be expressed with an animated GIF. Meet OTTO, the camera that captures animated GIFs! It’s powered by the Raspberry Pi compute module, so that’s interesting.

[Nate] was getting tired of end mills rolling around his bench. That’s a bad thing. He came up with a solution, though: Mill a piece of plywood into a tray to hold end mills.

The Da Vinci printer, a printer that only costs $500 because they’re banking on the Gillette model, has been cracked wide open by resetting the DRM, getting rid of the proprietary host software, and unbricking the device. Now there’s a concerted effort to develop custom firmware for the Da Vinci printer. It’s extraordinarily bare bones right now, but the pins on the microcontroller are mapped, and RepRap firmwares are extremely modular.

Firmware For Cheap Bluetooth Modules

Ibluetooth
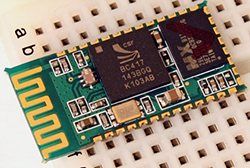
f you’ve ever built anything with a microcontroller, some sort of sensor, and a connection to the outside world, you’re probably wondering how those places in China can pump out cheap electronics for a mere percentage of what it costs you to pull a DIY. It’s not just volume – it’s engineering; if something has Bluetooth, you find a Bluetooth module with a built-in microcontroller so you can write firmware to it.

The BC417 is the System on Chip found in the very popular BlueCore4-Ext Bluetooth module featuring 8Mbits of Flash (75% of which is used for Bluetooth related stuff), somewhere around 12 kB of RAM, with everything run in a virtual machine. [pfalcon] wrote an extremely experimental firmware for this device that allows anyone to create a wireless sensor node for peanuts. These devices are almost as cheap as a bare ATMega, so the possibilities are interesting, to say the least.

At this point, the hardest part of putting custom firmware on these devices is programming them. For that, [Elastic Sheep] comes to the rescue with a parallel port to SPI interface. There’s also a firmware dumper and some breakout boards available. These modules are pretty cheap, and the pitch isn’t too bad, so you might be able to etch your own boards should you want to experiment a little.

Thanks [Peter] for sending this in.

Hyperspectral Imaging With A DSLR

It’s a relatively simple task to find evidence of helium by just looking at the sun; all you need is a prism, diffraction grating, and a web cam. DIY spectrometers have been around for ages, but most of them only produce a spectrum, not a full image complete with spectral data. Now it’s possible to take an image of an object, complete with that objects spectra using a DSLR, some lenses, a PVC pipe, and the same diffraction grating from your DIY interferometer.

The idea behind a hyperspectral imager is to gather the spectral data of each pixel of an image. The spectral data is then assembled into a 3D data cube, with two dimensions dedicated to the image, and the third dimension used to represent wavelength. There are a surprising number of applications for this technique, ranging from agriculture and medicine to some extremely creepy surveillance systems.

The authors of this paper (freakin’ huge PDF) used a piece of PVC pipe, three camera lenses, a diffraction grating, and a small paper aperture to construct their hyperspectral imager. Images are captured using a standard, multi exposure HDR method, assembling the raw data from the camera into a hyperspectral image with MATLAB.

There’s a ton of awesome info in the PDF, covering how the authors calibrated their system for different lighting conditions, interpreted the RGGB Bayer sensor in the camera, and a few examples of what kind of image can be constructed with this kind of data. That’s a recommended read, right there.

Thanks [Yannick] for the tip.

A Raspi Ambilight With HDMI Input

With the Raspberry Pi now most famously known as a $30 media PC, it only makes sense that the best uses for the GPIO pins on the Pi are used for an Ambilight. [Great Scott Labs] put up a great video on using the Pi as a uniquely configurable Ambilight with Hyperion and just about any video input imaginable.

This isn’t the first Ambilight clone [Great Scott] has put together, but for the first version the Ambilight functioned only under Raspbian and not any random HDMI input. The new version solves this by using an HDMI splitter box, feeding into an HDMI to composite converter, and finally into a USB composite capture dongle attached to the Raspi.

With the software in the instructions, the Raspi effectively mirrors the video coming from the video capture dongle. The Pi is running Hyperion to control a strip of WS2801 RGB LEDs, making the back of any TV glowey and blinkey.

Since [Great Scott] is using a component video signal as an input, the adapters necessary to have any device work with this Ambilight are readily available. We’d honestly like to see this build working with the old Commodore disk access screen border going nuts, so be sure to send that in if you ever get that working.

Continue reading “A Raspi Ambilight With HDMI Input”

Johnny Mnemonic, Broken Columns, And Pinball Repair

johnny

[Quinn Dunki] has come to realize the pinball machines of her youth aren’t the lame games she remembered. They’re actually quite marvelous in terms of electronics, mechanics, engineering and the all important hackability. Wanting to pick up a 90s dot matrix display pinball machine and being a [William Gibson] fan, [Quinn] picked up an old Johnny Mnemonic machine. She’s already looked into replacing the incandescent bulbs with LEDs, and has just wrapped up troubleshooting a broken plasma dot matrix display.

dots
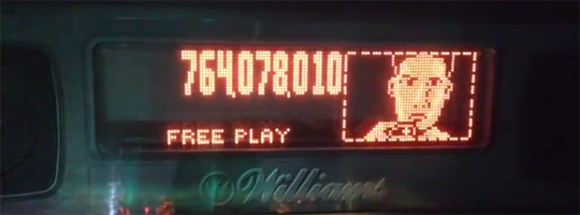
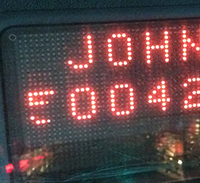
The neon dot matrix displays in pinball machines of this era are finicky devices with a lot of stuff that can go wrong. On powering the display up, [Quinn] noticed a few columns on the left side of the display weren’t working. These machines have great diagnostic menus, so running a test that displays a single column at a time revealed two broken columns. However, when a solid fill test was run, all the columns work, save for a few dots in the upper left corner. This is an odd problem to troubleshoot, but after more tests [Quinn] realized dots in column five and six only work iff both adjacent dots in the same row are lit.

The power supply seemed okay, leaving the problem to either a logic problem, or something wrong in the glass. With a meter, [Quinn] deduced there was a short between the two broken columns, and tracing every thing out revealed a problem in the hermetically sealed display filled with noble gasses. A replacement display was ordered.

While [Quinn] was replacing the display, she decided it would be a good time to rehab the almost-but-not-quite out of spec driver board for the display. The power resistors had scorched the PCB, but didn’t damage any traces. Replacing the parts with modern components with a higher power rating brought the board back to spec with components that should last longer than the 20-year-old parts previously inhabiting the driver board.

It was a lot of effort, but now [Quinn] has a brand new display for her pinball machine and is ready to move on to the next phase of her restoration.