Testing DRAM From A Commodore 64

dram

A few months ago, [Josh] was given an old Commodore 64. He needed to make an AV cable and find a new power supply, and even after testing these new parts out, [Josh] found it still wouldn’t boot. Not one to look a gift horse in the mouth — or perhaps he enjoys the challenge — he set out on restoring a thirty year old circuit board.

He replaced a few chips and the caps, but found he had no way to test the DRAM chips. Compared to SRAM or Static RAM used by other computers of the era, DRAM is a bit harder to interface, requiring a capacitor in each memory cell to be refreshed a few dozen times every second. With a bit of help from his good friend [CNLohr], [Josh] figured out a circuit to read and write to his chips and build a small board based on the ATmega8U2 microcontroller for testing purposes.

An Open Source GPU

Unless you’re bit-banging a CRT interface or using a bunch of resistors to connect a VGA monitor to your project, odds are you’re using proprietary hardware as a graphics engine. The GPU on the Raspberry Pi is locked up under an NDA, and the dream of an open source graphics processor has yet to be realized. [Frank Bruno] at Silicon Spectrum thinks he has the solution to that: a completely open source GPU implemented on an FPGA.

Right now, [Frank] has a very lightweight 2D and 3D engine well-suited for everything from servers to embedded devices. If their Kickstarter meets its goal, they’ll release their project to the world, giving every developer and hardware hacker out there a complete, fully functional, open source GPU.

Given the difficulties [Bunnie] had finding a GPU that doesn’t require an NDA to develop for, we’re thinking this is an awesome project that gets away from the closed-source binary blobs found on the Raspberry Pi and other ARM dev boards.

Extremely Precise Positional Tracking

lumi

A few folks over at Carnegie Mellon have come up with a very simple way to do high-speed motion tracking (PDF) with little more than a flashlight. It’s called Lumitrack, and while it looks like a Wiimote on the surface, it is in reality much more accurate and precise.

The system works by projecting structured light onto two linear optical sensors. The pattern of the light is an m-sequence – basically a barcode where every subset of the m-sequence is unique. By shining this light onto a linear sensor, Lumitrack can calculate where the light is coming from, and thus the position of whatever is holding the light.

Even though the entire system consists of only an ARM microcontroller (in the form of a Maple Mini board), two linear optical sensors, and a flashlight with an m-sequence gel, it’s very accurate and very, very fast. The team is able to read the position at over 1000 frames/second, nearly the limit of what can be done with the Maple’s serial connection.

Already there are some interesting applications for this system – game controllers, including swords, flight yokes, and toy cars, and also more artistic endeavors such as a virtual can of spray paint. It’s an interesting piece of tech, and with the right parts, something any of us can build at home.

You can see the Lumitrack demo video below.

Continue reading “Extremely Precise Positional Tracking”

SCARA Arm Becomes Enormous 3D Printer

SCARA

When you find an old, disused 80s-era SCARA arm in a lab, there’s really not much more you can do than make a giant 3D printer with it.

The last time we saw [Dane]’s salvaged SCARA arm, he had reconstructed the electronics by building his own servo motor controllers and feedback sensors. There were a few initial test prints, but the new upgrades to this printer make it much more useful, make it look even more kludged together, and made the prints even more accurate.

The largest upgrade to the new machine is an updated heated build plate. The previous plate used six 30W resistors. Good enough, but with two additional 245W membrane heaters, [Dane] can now keep his build plate at a constant 65 degrees C. Keeping such a large area warm requires a heated build chamber, so [Dane] came up with a giant semi-hexagonal box of warm made from aluminum extrusion, laser-cut parts, and acrylic frames.

Compared to earlier prints, the SCARA arm is printing some very nice parts including a battery holder for 40 LiFePO4 cells, and a beautiful propeller for a 3D printed boat. It’s an impressive build, made even more so by the fact this robotic arm was found during a lab cleanup.

3D Printering: You Want UV Resin?

printering

Just a few short months ago, 3D printing with stereolithography was an uncommon and very expensive proposition. Consumer-oriented SLA machines such as the Form1 and the B9Creator are as expensive as the upper echelons of squirting plastic printers and the community behind these machines isn’t even as diverse as the forums for the fly-by-night printers featured on Kickstarter every week.

This may be about to change with last month’s reveal of the Peachy Printer, a remarkably clever stereolithography printer that requires no special equipment, hardly any electronics, and costs $100. Even if the folks behind Peachy never ship a single unit, their clever engineering ensures that stereolithography will be a staple in the makers toolbox in the near future.

There is, of course, the problem of material. While plastic filament can be bought  just about everywhere, UV curing resin is a little harder to come by and much more expensive per kilogram or liter. Where then does the stereolithography experimenter get their hands on some of this magical material from the future?

Before we get to the article…

I’ve been writing a 3D Printing column once a week for a few months now, and I’m running out of ideas. If you have something in the 3D printer world you’d like to see covered in a little more depth than the standard Hackaday post, send in a tip. I’ll send you a few Hackaday stickers if it’s a good idea.

Continue reading “3D Printering: You Want UV Resin?”

A Motherboard For A WiFi Enabled SD Card

Over the last few months, a few very capable hackers have had a hand in cracking open a Transcend WiFi-enable SD card that just happens to be running a small Linux system inside. The possibilities for a wireless Linux device you can lose in your pocket are immense, but so far no one has gotten any IO enabled on this neat piece of hardware. [CNLohr] just did us all a favor with his motherboard for these Transcend WiFi SD cards, allowing the small Linux systems to communicate with I2C devices.

This build is based upon [Dmitry]’s custom kernel for the Transcend WiFiSD card. [CNLohr] did some poking around with this system and found he could use an AVR to speak to the card in its custom 4-bit protocol.

The ‘motherboard’ consists of some sort of ATMega, an AVR programming header, a power supply, and a breakout for the I2C bus. [Lohr] wired up a LED array to the I2C bus and used it to display some configuration settings for the WiFi card before connecting to the card over WiFi and issuing commands directly to the Linux system on the card. The end result was, obviously, a bunch of blinking LEDs.

While this is by far the most complex and overwrought way to blink a LED we’ve ever seen, this is a great proof of concept that makes the Transcend cards extremely interesting for a variety of hardware projects. If you want your own Transcend motherboard, [CNLohr] put all the files up for anyone who wants to etch their own board.

How The Game Genie Works

Those of us old enough to remember blowing into cartridges will probably remember the Game Genie – a device that plugs in to an NES, SNES, Sega Genesis, or Game Boy that gives the player extra lives, items, changes the difficulty, or otherwise modifies the gameplay. To someone who doesn’t yet know where the 1-up is in the first level of Super Mario Bros., the Game Genie seems magical. There is, of course, a rhyme and reason behind the Genie and [The Mighty Mike Master] put together a great walkthrough of how the Game Genie works.

There are two varieties of Game Genie codes – 6-character codes and 8-character codes. Both these types of codes translate into a 15-bit address in the game ROM (from 0x8000 to 0xFFFF for the 6502-based NES) and a data byte. For the 6-character codes, whenever the address referenced by the Game Genie code is accessed, a specific data byte is returned. Thus, infinite lives become a reality with just a 6-character code.

Some games, especially ones made in the late years of their respective systems, use memory mapping to increase the code and data provided on the cartridges. Since areas of data are constantly being taken in and out of the CPU’s address space, merely returning a set value whenever a specific address is accessed would be disastrous. For this bank-switching setup, the Game Genie uses an 8-bit code; it’s just like the 6-bit code, only with the addition of a ‘compare’ byte. Using an 8-bit code, the Game Genie returns a specific byte if the compare bytes are equal. Otherwise, the Genie lets hands off the original data to the CPU.

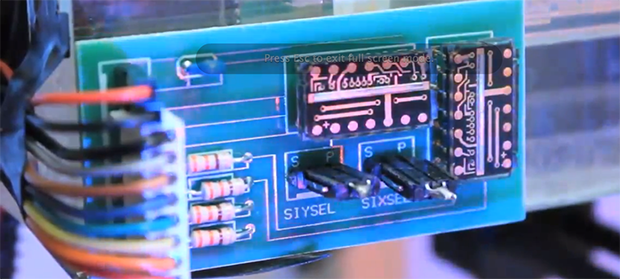
Of course, all this information could be gleaned from the original patent for the Game Genie. As for the circuitry inside the Game Genie, there’s really not much aside from an un-Googleable GAL (general array logic) and a tiny epoxied microcontroller. It’s an amazingly simple device for all the amazement it imbued in our young impressionable minds.

Continue reading “How The Game Genie Works”