Hackaday Links: December 3, 2011

Honey, would you like some cheese? WHIRRRRRRRRR

[The Timmy] broke his manual cheese grater. It would be a waste to throw away a perfectly functional tool that’s only missing a handle, so he kicked it up a notch with a cordless drill. Now [Tim], “can grate with incredible speed and power for even the toughest of cheeses.” Anyone have a broken pepper mill?

The most adorable oscilloscope
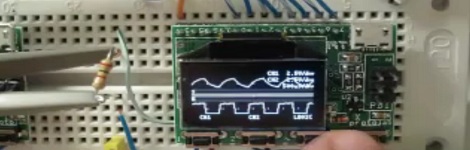
We’re not much for plugging products, but this scope is really cool. It’s designed to fit on a breadboard and is smaller than some ICs we’ve seen (68000, so yes, it is). We’re wondering why there hasn’t been a homebrew version of this yet.

Now do an R/C castle

Here’s a minifig-sized R/C LEGO car made by [brickmodder]. It has a custom drive train and steering mechanism that uses the smallest servos [brickmodder] could find. How about an R/C pirate ship next?

It’s probably an ad for something

Here’s some sort of code thing that asks the question, “Can you crack it?” Apparently, it’s for UK cryptanalyst recruiting. You won’t get a 00-designation, but woo Bletchley Park.

Inverting an inverter
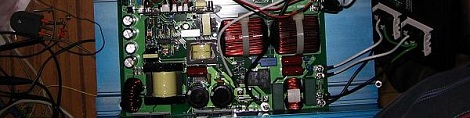
[Manfred] is putting an alternative energy setup on his land. Of course he needed an inverter to charge his batteries, so he went with a highly regarded (high price) box. What he got was anything but. You’re going to need at least ten minutes to go through this hilariously sad teardown of a high quality Taiwanese inverter. Oh, [Manfred] is awesome. Just look at his microhydro plant.
A Solar Clock That Isn’t A Sundial

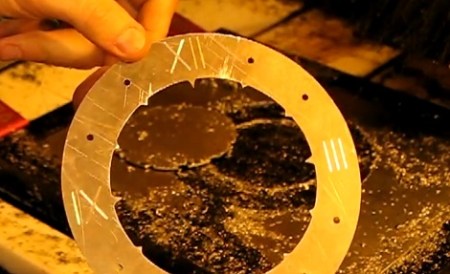
Hack a Day’s very own [Jack Buffington] is throwing his hat into the ring for the Buildlounge laser cutter giveaway with his solar clock that isn’t a sundial.

The theory behind [Jack]’s clock is pretty simple. The light from the sun will be captured by a camera obscura/pinhole camera. The sun’s rays shine on dozens of optical fibers that lead indoors and up to the clock. These glass fibers go to pinholes in the face of the clock which light up, showing the time.

[Jack] already cut out the face of the clock on his (awesome) home-made CNC router. He hasn’t gotten around to cutting out the mechanics of the clock face so the clock can be adjusted throughout the year. We’re okay with that, because we’re really not ready to see [Jack] fiddle with his gnomon. At least before [Jack] gets his hand on the Buildlounge laser.

The next major hurdle of the build is the solar collector that collects light into different optical fibers. That’s going to involve a lot of math using the equatorial coordinate system. Help is available, though.

Check out [Jack] cutting the clock face on his router after the break.

Continue reading “A Solar Clock That Isn’t A Sundial”

Trying To Measure The Speed Of Light With An Arduino

We know that measuring the speed of light with an Arduino is possible. It’s just that the implementation is hard.

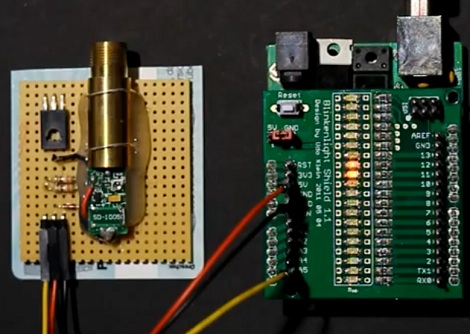
Last month we saw [Udo]’s blinkenlight shield that can be used as a line scan camera. It’s a neat piece of kit, but [Udo] really wants to submit something for the Buildlounge laser cutter giveaway, so he figured measuring the speed of light would be an easy project. If a kid and a chocolate bar can do it, surely it can’t be too hard.

[Udo] hit upon the idea of pulsing a laser pointer and measuring the time of the reflection. Because his blinkenlight shield can be used as a light sensor, all that’s needed is a mirror and a pretty long line of sight. There’s a few problems with the setup though: with the Arduino running at 16 MHz, a photon will travel 19 meters in one clock cycle.

Even with some very clever coding, we’re not really sure detecting an emitted photon is possible at such (relatively) slow clock speeds. We’re thinking [Udo] could source a few hundred meters of optic fiber so the entire experiment could fit on a desk, but feel free to drop a note in the comments if you’ve got a better idea. [Udo]’s demo of his blinkenlight/laser mashup is after the break.

Continue reading “Trying To Measure The Speed Of Light With An Arduino”

An Introduction To Stepper Motors

If you’ve been reading Hack a Day for long enough, you know about our infatuation with stepper motors. These precious little devices put the oomph into our CNC routers, 3D printers, robots, and other miscellaneous projects. Steppers aren’t your run-of-the-mill motors, though. [Steaky] posted a great introduction to stepper motors that lets you hit the ground running building any moving project you could imagine.

Apart from identifying a stepper and figuring out if it works, [Steaky] goes over how to make these motors turn. The theory behind an H-bridge is easy enough, but theory isn’t something often presented in schematics or stepper driver datasheets.

We’ve pulled more than our fair share of steppers from flatbed scanners and old printers. There’s nothing wrong with scavenging old parts, and whether you’re making a robot band to play your kid’s birthday party, robochess, or one of the many 3D printers or CNC machines, there’s going to be a stepper motor in your future.

Graphical Programming With The Arduino IDE

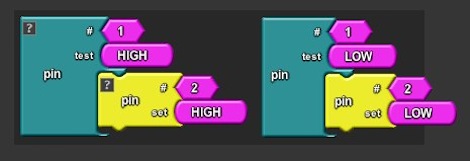
The Arduino is an excellent first embedded development kit, provides a great introduction to electronics, and has the potential to get children into programming. [David] thinks throwing C at non-programmers isn’t the best way to learn programming, so he developed ArduBlock , a graphical programming language for the Arduino.

We’ve seen a number of graphical, block-based programming languages in our time, most notably Scratch. [David] found a project called OpenBlocks that serves as the basis for Android App Inventor.

[David] forked the OpenBlocks project and started working on his new graphical programming language. ArduBlocks uses the Arduino IDE, so everything possible in C with an Arduino should be possible with ArduBlocks. There’s a lot of thought put into the design of the blocks – the first iteration was far too ‘busy,’ but [David] cleaned it up and made the projects understandable.

For an absolute beginner, we couldn’t imagine anything better. ArduBlocks would be great for children, and we can’t wait to see a proper implementation of ArduBlocks with a touch screen.

Funtendo Connects All Your Nintendo Controllers To A PC

For those of us who can’t be bothered to dig out or N64 whenever we want to play Ocarina of Time or our NES whenever we get the urge to play Battletoads, emulators are a godsend. There is a problem, though. A keyboard doesn’t provide the right experience as a the classic NES ‘brick’ or the N64 tritopus controllers. Enter the Funtendo, a breakout box that converts all your well-loved controllers to USB.

The Funtendo uses the Gadget Gangster Propeller Platform with a terminal block module. Putting together the electronics is fairly easy; just strip the ends of the controllers and screw them down to the terminal blocks. N64, NES and Wii Classic Controllers are supported by the Funtendo. Going for the Classic Controller over a Super Nintendo controller reduces the complexity of the build. The Classic Controller can play SNES games and uses an I2C bus, making it easier to wire.

For interfacing the controllers to the computer, the Parallax Propeller Tool, Parallax serial terminal, and PPJoy convert button mashing into readable buttons for the emulator. The build may take more time than pulling an NES out of the attic, but even with a large project box it takes up much less space.

Check out the demo of the Funtendo after the break.

Continue reading “Funtendo Connects All Your Nintendo Controllers To A PC”

Extreme Finger Painting With A Router

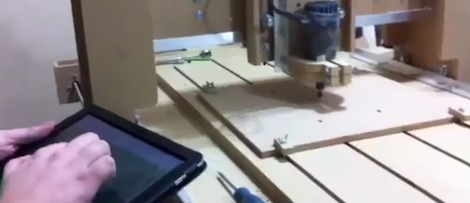
Most of the time, CNC machines are used for very precise and exacting. There is another way that allows for a more “hands on” approach to routers and mills that allows for a lot more creativity and freedom. The touchCNC these guys whipped up allows anyone to finger paint with a friggin router.

From the forum post the guys sent in, they wrote a simple Android app for a tablet that allows for router control via a touch interface. There are three parts to the software. An Android app sends finger positions to a java server running on the CNC computer. This server dumps gcode into a text file. A vbscript inside the router software keeps reading from the specified file. With all this, finger movements are translated directly into machine movements.

The controls are fairly simple, like a real-life representation of Microsoft Paint. Of course there’s a ‘tap GOTO’ command that moves the router to a specified position. The router bit is lowered onto the work piece with a ‘long tap’ and stays lowered until the finger is released.

You can check out the code for touchCNC, but the guys are working on a few additional features like converting the tablets gyro output to gcode. Until then, enjoy the videos the guys posted after the break.

Continue reading “Extreme Finger Painting With A Router”