Retrotechtacular: The CURTA Mechanical Calculator

The CURTA mechanical calculator literally saved its inventor’s life. [Curt Herzstark] had been working on the calculator in the 1930s until the Nazis forced him to focus on building other tools for the German army. He was taken by the Nazis in 1943 and ended up in Buchenwald concentration camp. There, he told the officers about his plans for the CURTA. They were impressed and interested enough to let him continue work on it so they could present it as a gift to the Führer.

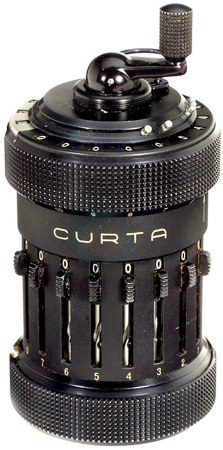
This four-banger pepper mill can also perform square root calculation with some finessing. To add two numbers together, each must be entered on the digit setting sliders and sent to the result counter around the top by moving the crank clockwise for one full rotation. Subtraction is as easy as pulling out the crank until the red indicator appears. The CURTA performs subtraction using nine’s complement arithmetic. Multiplication and division are possible through successive additions and subtractions and use of the powers of ten carriage, which is the top knurled portion.

Operation of the CURTA is based on [Gottfried Leibniz]’s stepped cylinder design. A cylinder with cogs of increasing lengths drives a toothed gear up and down a shaft. [Herzstark]’s design interleaves a normal set of cogs for addition with a nine’s complement set. When the crank is pulled out to reveal the red subtraction indicator, the drum is switching between the two sets.

Several helper mechanisms are in place to enhance the interface. The user is prevented from ever turning the crank counter-clockwise. The crank mechanism provides tactile feedback at the end of each full rotation. There is also a lock that disallows switching between addition and subtraction while turning the crank—switching is only possible with the crank in the home position. There is a turns counter on the top which can be set to increment or decrement.

You may recall seeing Hackaday alum [Jeremy Cook]’s 2012 post about the CURTA which we linked to. A great deal of information about the CURTA and a couple of different simulators are available at curta.org. Make the jump to see an in-depth demonstration of the inner workings of a CURTA Type I using the YACS CURTA simulator.

Continue reading “Retrotechtacular: The CURTA Mechanical Calculator”

Fail Of The Week: This Inanimate Titanium Rod

You saw [Chris] cast aluminium on the cheap using Kinetic Sand a few weeks ago, didn’t you? He recently got his meaty hands on some titanium through the magic of modern transactional methods and was bowled over by its strength, hardness, and poor heat transfer.

He thought he would cast it into a nice, strong bottle opener. As you can probably guess, that didn’t go so well. First off, it wasn’t easy to saw through the thin rod. Once he did get it split in twain, it was surprisingly cool to the touch except at the tip. This is nasty foreshadowing, no?

[Chris] takes a moment to help us absorb the gravity of what he’s about to do, which of course is to send several hundred amps through that poor rod using a DC arc welder. Special precautions are necessary due to the reaction between oxygen and heated titanium. His trusty graphite crucible is grounded to the bottom of a big aluminium tub, and a cozy blanket of argon from a TIG welder will shield the titanium from burnination.

Well . . . the titanium didn’t melt. Furthermore, the crucible is toast. On the up side, vise-enabled cross-sectional examination of the crucible proved that there was still gold in them there walls.

Do you have any (constructive, on-topic) suggestions for [Chris]? Let him know below.

Continue reading “Fail Of The Week: This Inanimate Titanium Rod”

Retrotechtacular: There’s More Than One Way To Escape A Submarine

And this 1953 United States Navy training film describes two ways to do so: collective escape via rescue chamber, and individual escape using SEAs.

The film first follows a fellow named [Baxter] and his men in the aft torpedo room.  His sub has failed to surface as scheduled. There are no officers present at the time of distress, so [Baxter, Torpedoman First] is in charge. His first directive is that [Johnson] extinguish his Chesterfield. There’ll be time enough for smoking on the rescue ship, [Johnson].

[Baxter] releases a marker buoy because it is daytime and the weather is fair. Had other conditions prevailed, [Baxter] would send up flares and bang on the hull to provide a sonic beacon for rescuers. Next, he checks the forward compartments. If they are clear, he leaves the hatches open to give his men more air. He checks the air purity and engages [Brooklyn] to pull down some COabsorbent.

[Baxter] and his men will be okay for a while. They have plenty of drinking water, food, juice, supplemental oxygen, and COabsorbent. Their best move is to take it easy and wait for the rescue chamber. That way, they’ll avoid drowning, exposure, and COpoisoning.

Elsewhere in the forward torpedo chamber, there’s a chlorine leak and it can’t be stopped. These nameless sailors have to work quickly to escape the noxious gas. First, they pass around the SEAs and turn them into respirators. Soda lime will filter out the chlorine gas from their lungs and eyes. They too will release a marker buoy, but the first order of business is to move to the escape trunk.

Communicating through gestures, the lead man assigns three men to break out the life raft. The men move to the trunk with the buoy, raft, ascending line, and a divers’ knife. They also take a battle lantern, hand tools, and spare SEAs, but leave their shoes behind. After equalizing the pressure in the trunk, they can get going on their escape. They open the hatch, float the buoy, and tie it off. Now the raft can be floated up the buoy line. Since they are 100 feet down, they send a man every ten seconds up the buoy line and he is to move approximately one foot per second. First man to surface inflates the raft, and Bob’s your uncle. Now, they just have to prevent sunburn and tell stories until the rescue ship finds them.

Continue reading “Retrotechtacular: There’s More Than One Way To Escape A Submarine”

DIY UV Lamp Is The Cure For Nails And More

We must admit to wondering how Adafruit’s [Becky Stern] gets anything done with those fingernails of hers. They’re always long and beautifully painted without any chips, dings, or dents. As it turns out, she uses UV gel nail polish. It’s much more durable than standard air-dry polishes, but it requires UV light to cure. [Becky] bought a lamp to use at home, but it’s very bulky and must be plugged into the wall. She knew there was a better way and devised her DIY UV mini manicure lamp.

She really thought of everything. The open source 3D-printed enclosure includes a small compartment in the top for cuticle sticks, emery boards, and tweezers. The Li-poly battery is rechargeable over USB in conjunction with Adafruit’s PowerBoost 500c. The lamp itself is made from 30 UV LEDs and 100Ω resistors. [Becky] lined the inside of hers with silver sticky paper to help distribute the UV light evenly.

You know, this can also be used to erase EPROMs or to cure small DLP 3D prints. Do you have another use for it? Tell us in the comments. Introductory and partially hyperlapsed video after the break.

Continue reading “DIY UV Lamp Is The Cure For Nails And More”

Retrotechtacular: Time For Coffee

If you ask us, it’s almost always a good time for coffee. In the spotlight this week is an educational/promotional film made by A&P, who started in the 1800s as with a chain of shops offering coffee and tea. By the 1950s, they were operating full self-serve grocery stores with a trail of shuttered mom and pop operations in their wake.

This is the story of coffee as it goes from the nursery to the field to the shelves of your local A&P. It covers the growing, cultivation, and distribution of coffee from South American crops that at the time covered more than one million square miles of Brazil alone.

Coffee trees leave the nursery at two years old and are planted in nutrient-rich red soil. Two to three years later, they bear their first crop. Coffee blossoms appear first, and the fruit ripens over the next 8-9 months. Skilled workers pick the berries by hand. We are told that the average tree produces one pound of roasted coffee per year.

sun dried beans
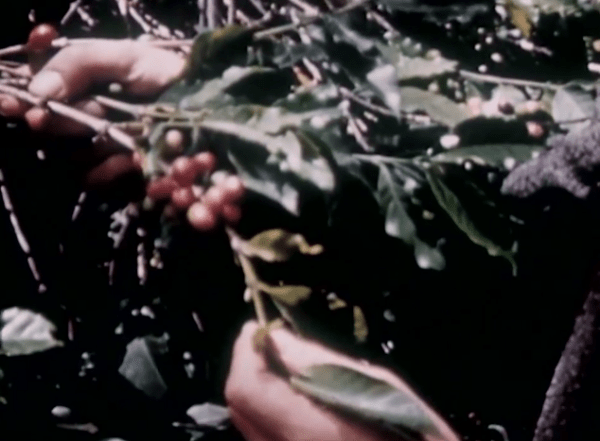
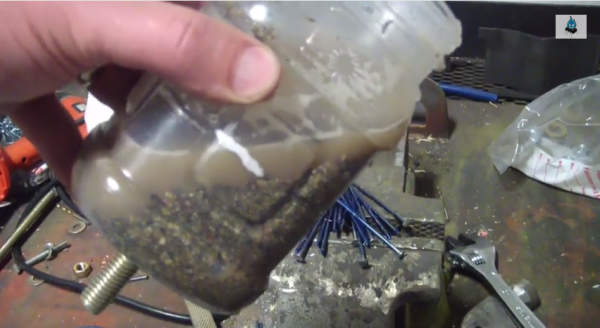
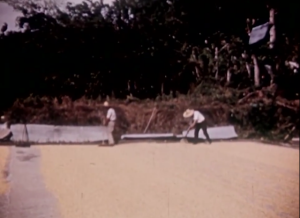
The day’s harvest is collected, weighed, and bagged for further production. The fruits are crushed to remove each bean from its red jacket. Then, the beans are washed and spread out in the sun for 8-10 days. They are frequently rotated so they dry evenly. The dried coffee is packed in bags and sent into the city.

bag stabbing
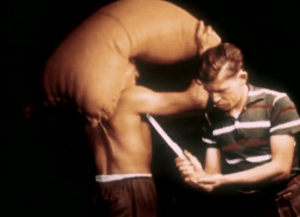
At a warehouse, the coffee is inspected, sorted, and graded. Bags are stamped with the coffee’s country of origin and intended destination before going to the seaport. A very important step happens here. As each bag walks by on the shoulders of a worker, another guy stabs it to get a sample of the beans. The on-site A&P officials take over at this point and do their own inspections, sending samples to the US. Here, the coffees are roasted and taste tested for both strength and flavor from a giant lazy Susan full of porcelain cups. taste testing

The film takes a brief detour to tell us that the great cities of Latin America were built upon the labors of coffee exportation. We see a montage of vistas, skylines, and shorelines, which bring it back to the subject of shipping the coffee to various ports of call. At the dock, bags are tumbled onto large nets to be loaded on the ship. As coffee is susceptible to moisture, special care is taken to avoid the ill effects of traveling out of the tropics.

Continue reading “Retrotechtacular: Time For Coffee”

A Peach Of A Homemade Parts Tumbler

[Chris] finds the average price of rock tumblers insulting. Almost as insulting, in fact, as prepackaged fruit salad made with Chinese peaches. While there may be little he can do about the peaches, he has given the finger to lapidary pricing by making his own tumbler on the very cheap.

Simply put, he drilled a hole in bottom of the peach vessel and then stuck a threaded rod through it. He held the rod in place with a nut and a washer. After securing the proper permits to source sand and water from his property, he put both in the jar along with some old nails that had paint and crud on them. [Chris] put the rod in the chuck of his drill and clamped the drill in his bench vise. Half an hour later, he had some nice, shiny nails. Make the jump to be amazed and entertained. If you prefer using balls, check out this homemade mill.

Continue reading “A Peach Of A Homemade Parts Tumbler”

Voices From The Past: Recovering Audio From Wire Recordings

wire recorder setup
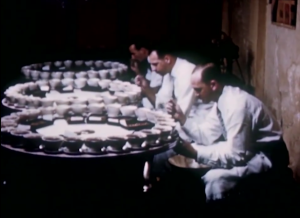
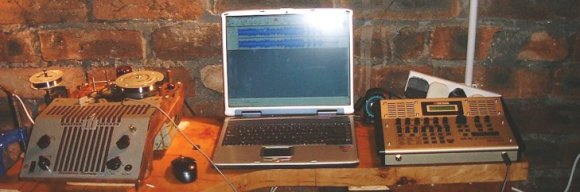
[Nick]’s grandfather was quite the old school hacker. In the 1940s, he built his own wire recorder and microphone to capture everything from his children’s Chirstmas wishes to his favorite songs and programs from the radio. Only 20 or so spools have survived and were doomed to silence until [Nick] was able to find a vintage wire recorder, restore it, and feed digitized audio into Audacity.

Once he restored one of the two machines that he was able to get his hands on, [Nick] was in business. Since his grandfather also rolled his own spools, [Nick] had to build a playback spindle that would hold them. His uncle found an old mechanical counter to do the job, which [Nick] secured to the workbench. He fed the output from the wire recorder’s playback head into a guitar pre-amp, effectively digitizing the audio for recording in Audacity.

After playing all the spools, he adjusted the levels where necessary and cleaned up the recordings. His biggest challenge was feeding the wires back on to their original spools, which he managed with an electric drill and a rubber grommet. Be sure to check out the mp3 clips on [Nick]’s page. If you’re in the mood for old audio hacking stories, here’s one about building a tape recorder in 1949.