What do SQL injection attacks have in common with the nuances of GPT-3 prompting? More than one might think, it turns out.
Many security exploits hinge on getting user-supplied data incorrectly treated as instruction. With that in mind, read on to see [Simon Willison] explain how GPT-3 — a natural-language AI — can be made to act incorrectly via what he’s calling prompt injection attacks.
This all started with a fascinating tweet from [Riley Goodside] demonstrating the ability to exploit GPT-3 prompts with malicious instructions that order the model to behave differently than one would expect.
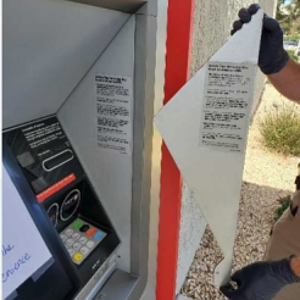
ATM skimmers are electronic devices designed to read financial card information, and they are usually paired with a camera to capture a user’s PIN. These devices always have to hide their presence, and their design has been a bit of an arms race. Skimmers designed to be inserted into a card slot like a parasite have been around for several years, but [Brian Krebs] shows pictures of recently captured skimmer hardware only a fraction of a millimeter thick. And that’s including the battery.
As hardware gets smaller, cameras to capture PIN entry are more easily hidden in things like fake panels.
The goal of these skimmers is to read and log a card’s magnetic strip data. All by itself, that data is not enough to do anything dastardly. That’s why the hardware is complemented by a separate device that captures a user’s PIN as they type it in, and this is usually accomplished with a camera. These are also getting smaller and thinner, which makes them easier to conceal. With a copy of the card’s magnetic strip data and the owner’s PIN, criminals have all they need to create a cloned card that can be used to make withdrawals. (They don’t this so themselves, of course. They coerce or dupe third parties into doing it for them.)
Here’s a neat resource from [MSRaynsford] that is worth bookmarking for anyone who gets creative with laser engravers, CNC routers, or drawing robots: SVGFonts are single-line symbol fonts that [MSRaynsford] created for his laser-cut and engraved cryptex puzzle boxes. They provide an easy way to engrave text as symbols.
Single-line fonts for engraving that include a runic-looking alphabet, a Greek-inspired set, and two symbol sets based on Flag Semaphore.
CNC engraving of letters and symbols is one of those things that seems simple, but is actually more complex than it may appear. It is often desirable to use a tool to engrave symbols with a single line, in much the same way a person would write them if using a pen. But fonts and art for letters and numbers aren’t normally a single line. Thankfully there is a solution in the form of Hershey text, an extension for which is included in Inkscape. It turns out that Hershey Fonts have their origin back in the 1960s, when the changing landscape of electronics and industry opened new opportunities and demanded new solutions.
That’s why, when [MSRaynsford] needed fonts in different styles and symbols for creating his puzzle boxes, he had to design them himself and they had to be single-line vector art, just like Hershey Text. The small collection includes English letters designed to resemble a runic alphabet, a Greek-inspired series, and two coded alphabets based on flag semaphore.
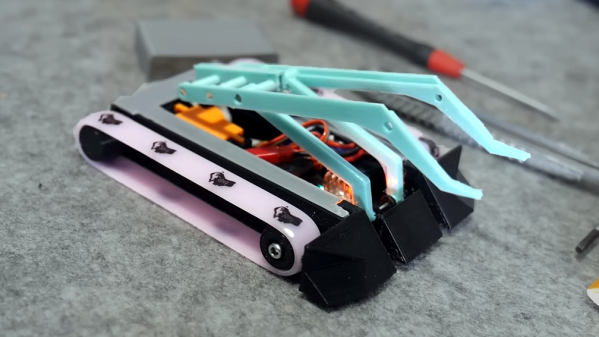
[Angus] at Maker’s Muse recently created a new and tiny antweight combat robot (video, embedded below) and it has some wonderfully clever design elements we’d like to highlight. In particular: how to keep a tracked robot’s wheel belt where it belongs, and prevent it from slipping or becoming dislodged. In a way, this problem was elegantly solved during the era of the steam engine and industrial revolution. The solution? A crowned pulley.
Silicone bracelet and crowned pulley result in a self-centering belt with a minimum of parts.
A crowned pulley is a way of automatically keeping a flat belt centered by having a slight hump in the center of the pulley, which tapers off on either side. Back when steam engines ran everything, spinning axles along the ceiling transferred their power to machinery on the shop floor via flat belts on pulleys. Crowned pulleys kept those flat belts centered without any need for rims or similar additions.
The reason this worked so well for [Angus]’s robot is partly its simplicity, and partly the fact that it works fantastically with the silicone wrist bracelets he uses as treads. These bracelets are like thick rubber bands, and make excellent wheel substitutes. They have great grip, are cheap and plentiful, and work beautifully with crowned pulleys as the hubs. It’s a great solution for a tiny robot, and you can how it self-centers in the image here.
Antweight robots are limited to 150 grams which means every bit counts, and that constraint leads to some pretty inventive design choices. For example, [Angus]’s new robot also has a clever lifter mechanism that uses a 4-bar linkage designed to lever opponents up using only a single motor for power. Watch [Angus] explain and demonstrate everything in his usual concise and clear manner in the video, embedded below.
Any software that accepts user input must take some effort to sanitize incoming data, lest unexpected and unwelcome things happen. Here to make that easier is the Big List of Naughty Strings, an evolving list of edge cases, unusual characters, script-injection fragments, and all-around nonstandard stuff aimed at QA testers, developers, and the curious. It’s a big list that has grown over the years, and every piece of it is still (technically) just a string.
These strings have a high probability of surfacing any problems with handling user input. They won’t necessarily break anything, but they may cause unexpected things to happen and help point out any issues that need fixing. After all, many attacks hinge on being able to send unexpected inputs that don’t get properly sanitized.
Finding bad inputs is not always entirely straightforward, but at least the Big List of Naughty Strings is available in a variety of formats to make it easy to use. [Max Woolf] has been maintaining the list for years, but if you haven’t heard of it yet and think it might come in useful, now’s the time to give it a look. Now you can help ensure your system can handle things like someone registering a company named ; DROP TABLE “COMPANIES”;– LTD.
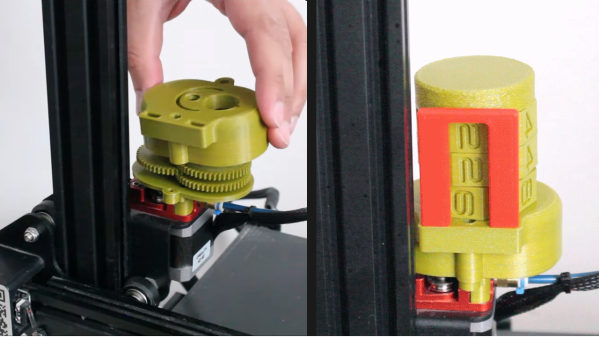
[ArduinoNmore] took an interesting approach to designing a counter intended to accurately display how many meters of filament a 3D printer has used. The Filamentmeter looks a little bit like a 3D printed handheld tally counter (or lap counter) but instead of a button to advance each digit, the readout represents how many meters of filament have gone through the extruder.
Driving the digit rotation from the extruder motor itself means that even retractions are accounted for.
At first glance it may look like there is a motor hidden inside, or that the device is somehow sensing the filament directly. But it’s actually the movement of the extruder motor that drives the device. A small spur gear attached to the printer’s extruder drives a series of gears that advance the digits. This means that retractions — small reverses of the extruder motor during printing — are properly accounted for in the total, which is a nice touch.
[ArduinoNmore] designed this for the Ender 3, and the Filamentmeter relies on a specific extruder design and orientation to work properly. Of course, since it’s 3D printed, modifying the design for your own purposes should be pretty straightforward.
Curious? The design is being sold for a few bucks, and there is a free test piece one can print and use to confirm whether the design will work before mashing the buy button. Non-free printable 3D models can be a world of buyer beware, but test pieces and solid documentation are good ways to give buyers confidence in your work.
The insides of the unit are really quite intricate, with a clockwork-type elegance to them. You can see it all in the short video, embedded below.
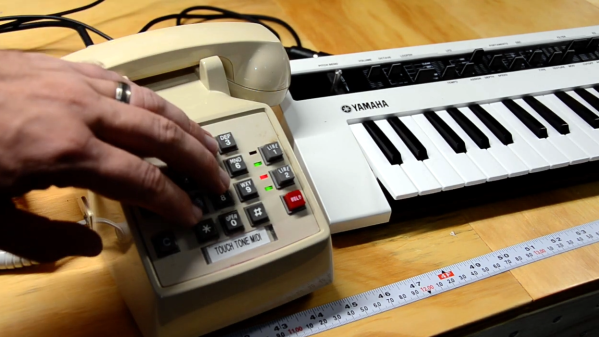
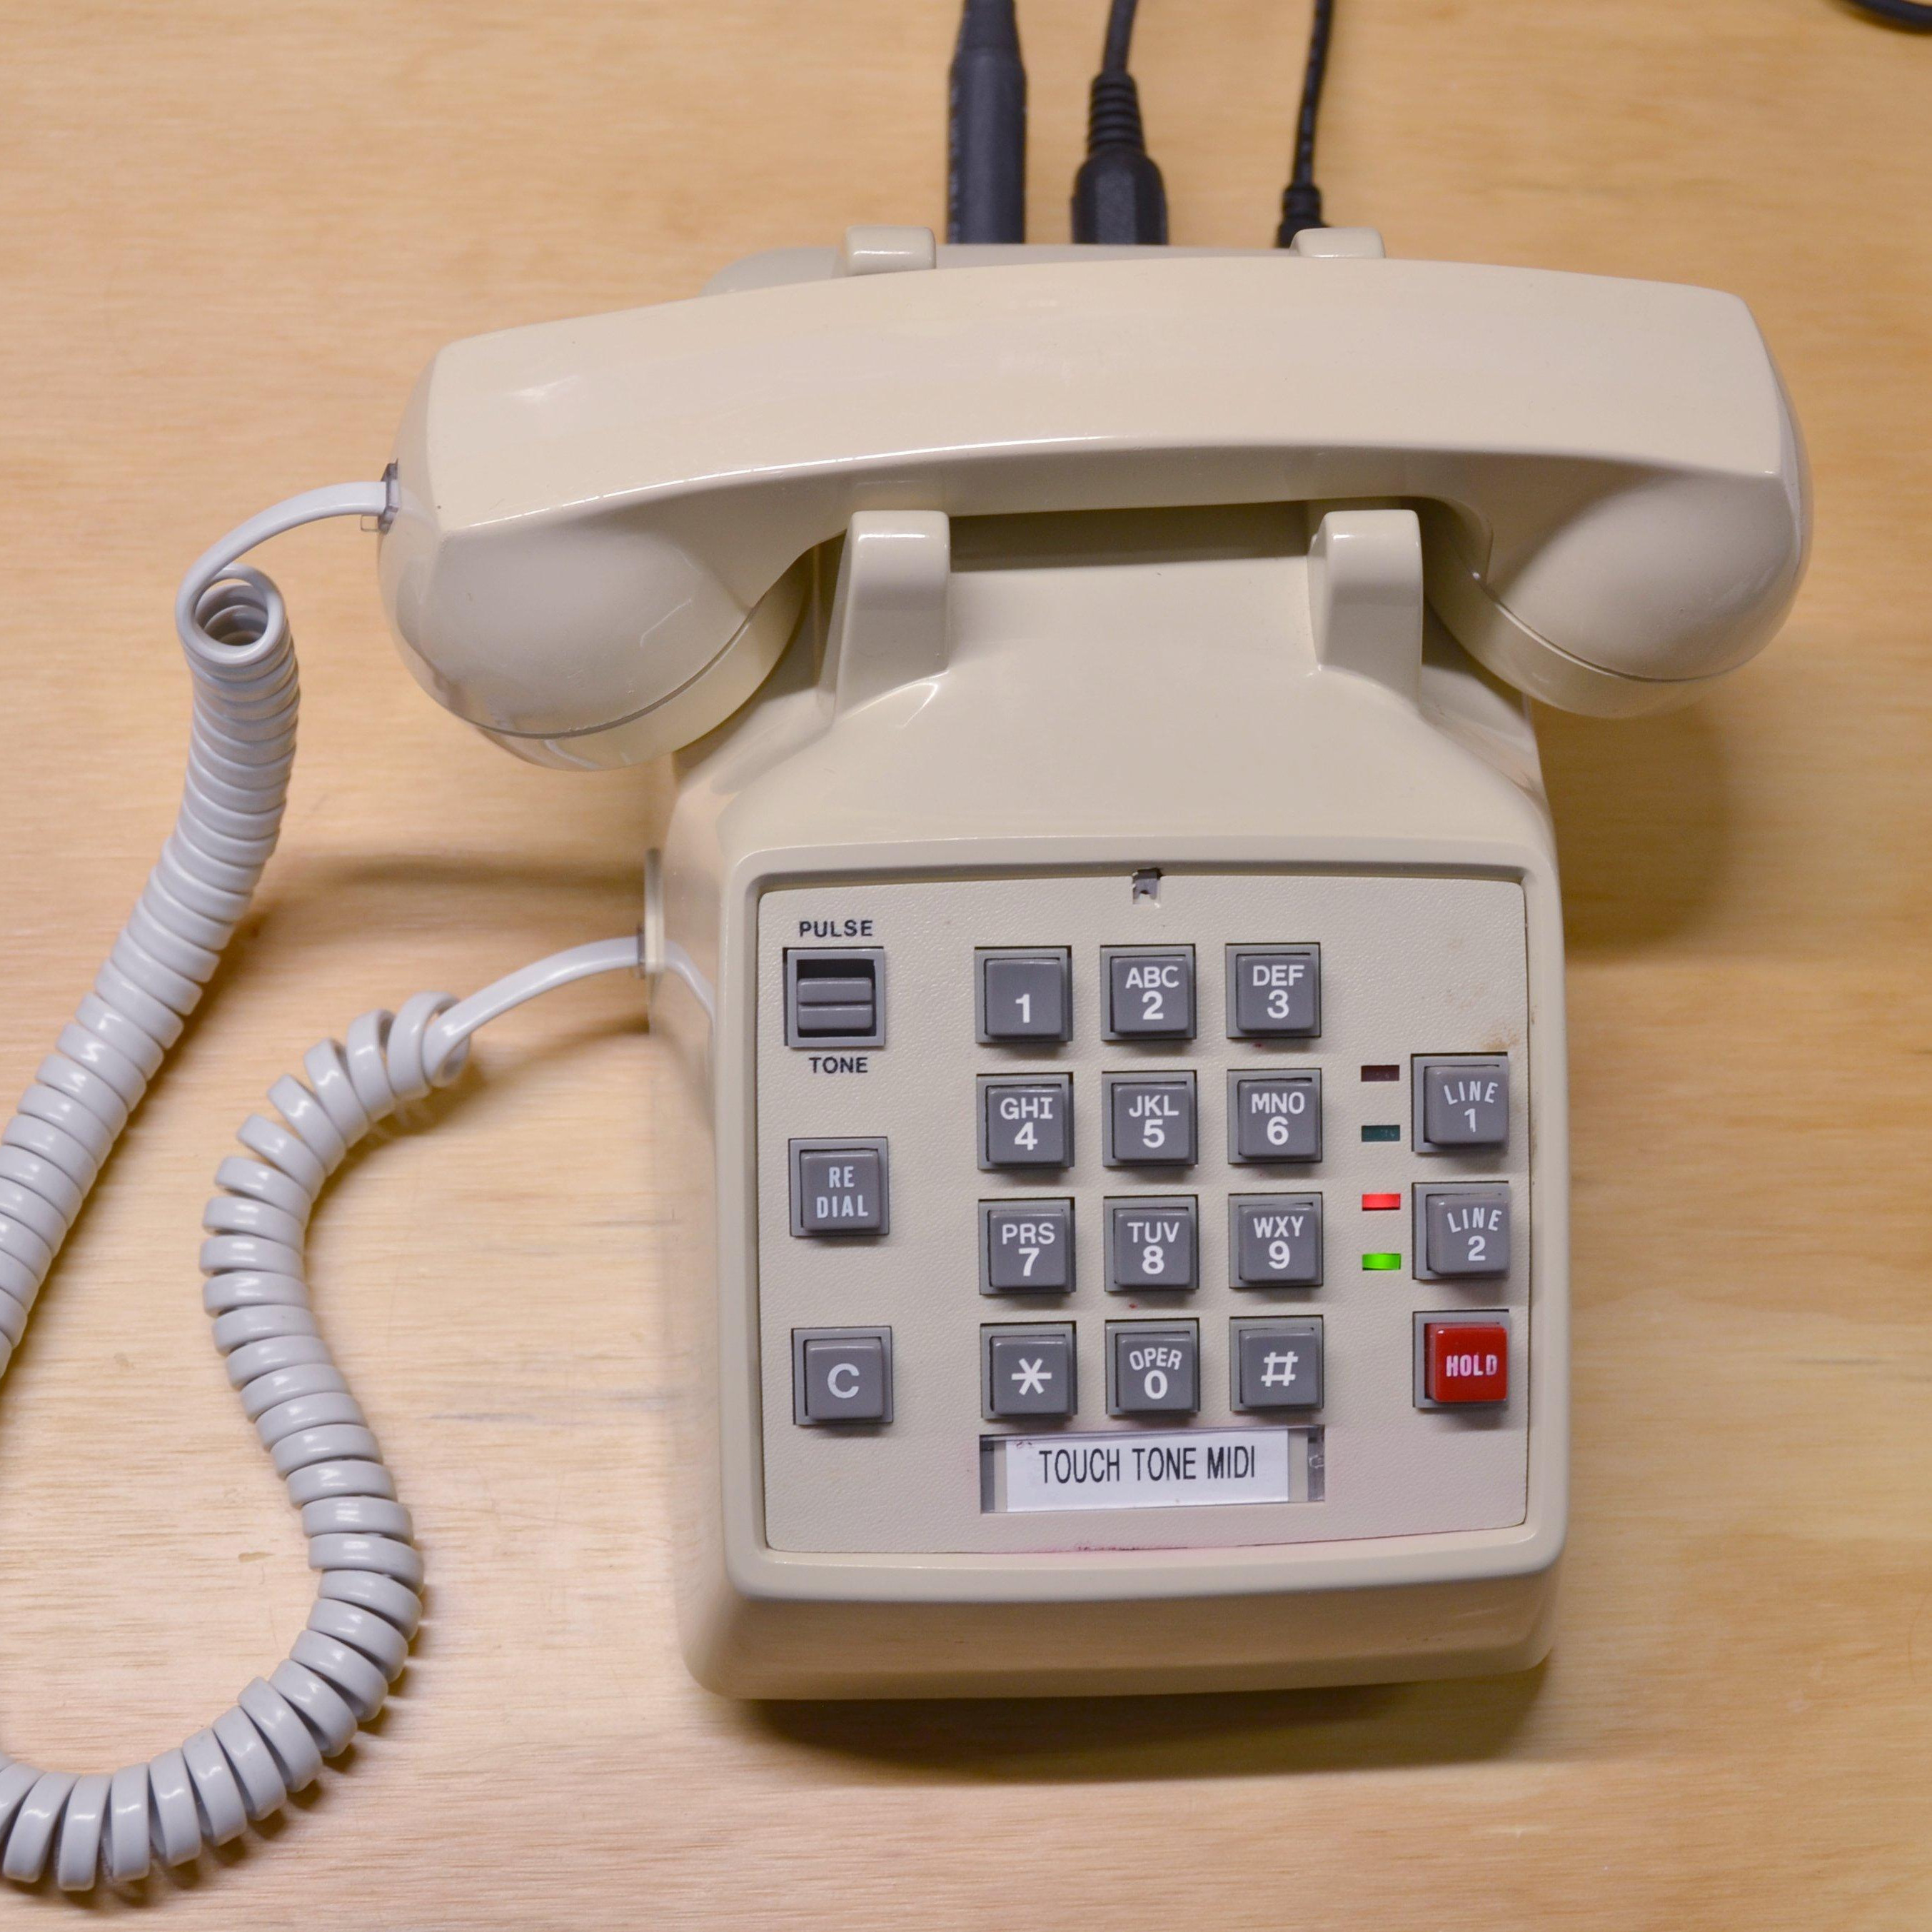
[poprhythm]’s Touch Tone MIDI Phone is a fantastic conversion of an old touch tone phone into a MIDI instrument complete with intact microphone, but this project isn’t just about showing off the result. [poprhythm] details everything about how he interfaced to the keypad, how he used that with an Arduino to create a working MIDI interface, and exactly how he decided — musically speaking — what each button should do. The LEDs on the phone are even repurposed to blink happily depending on what is going on, which is a nice touch.
Of course, it doesn’t end there. [poprhythm] also makes use of the microphone in the phone’s handset. Since the phone is now a MIDI instrument with both a microphone and note inputs, it’s possible to use them together as the inputs to vocoder software, which he demonstrates by covering Around the World by Daft Punk (video).
We love how [poprhythm] explains how he interfaced to everything because hardware work is all about such details, and finding the right resources. Here’s the GitHub repository for the Arduino code and a few links to other resources.
You can admire [poprhythm]’s Touch Tone MIDI Phone in action in the short videos embedded below, with each one showing off a different aspect of the build. It’s great work!