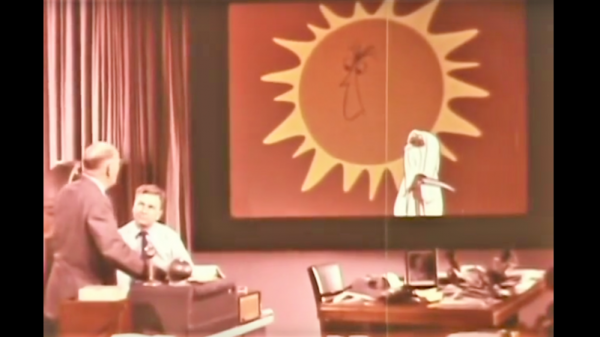
Retrotechtacular: The Bell Laboratory Science Series

For those of a certain vintage, no better day at school could be had than the days when the teacher decided to take it easy and put on a film. The familiar green-blue Bell+Howell 16mm projector in the center of the classroom, the dimmed lights, the chance to spend an hour doing something other than the normal drudgery — it all contributed to a palpable excitement, no matter what the content on that reel of film.

But the best days of all (at least for me) were when one of the Bell Laboratory Science Series films was queued up. The films may look a bit schlocky to the 21st-century eye, but they were groundbreaking at the time. Produced as TV specials to be aired during the “family hour,” each film is a combination of live-action for the grown-ups and animation for the kiddies that covers a specific scientific topic ranging from solar physics with the series premiere Our Mr. Sun to human psychology in Gateways to the Mind. The series even took a stab at explaining genetics with Thread of Life in 1960, an ambitious effort given that Watson and Crick had only published their model of DNA in 1953 and were still two years shy of their Nobel Prize.

Produced between 1956 and 1964, the series enlisted some really big Hollywood names. Frank Capra, director of Christmas staple It’s a Wonderful Life, helmed the first four films. The series featured exposition by “Dr. Research,” played by Dr. Frank Baxter, an English professor. His sidekick was usually referred to as “Mr. Fiction Writer” and first played by Eddie Albert of Green Acres fame. A list of voice actors and animators for the series reads like a who’s who of the golden age of animation: Daws Butler, Hans Conried, Sterling Halloway, Chuck Jones, Maurice Noble, Bob McKimson, Friz Freleng, and queen and king themselves, June Foray and Mel Blanc. Later films were produced by Warner Brothers and Walt Disney Studios, with Disney starring in the final film. The combined star power really helped propel the films and help Bell Labs deliver their message.

Continue reading “Retrotechtacular: The Bell Laboratory Science Series”

Eclipse Megamovie: Thousands Of Cameras For Citizen Science

On August 21, 2017, the Moon will cast its shadow across the entire breadth of the United States for the first time in almost a century. It is estimated that 12 million people live within the path in which the sun will be blotted out, and many millions more are expected to pour into the area to experience the wonders of totality.

We’d really love it if you would tell us where you’ll be during the eclipse by creating your own event page, but that’s not what this article’s about. With millions gathered in a narrow swath from Oregon to South Carolina, and with the eclipse falling on a Monday so that the prior two weekend days will be filled with campouts at prime viewing locations, I expect that Eclipse 2017 will be one big coast-to-coast party. This is an event that will attract people of all stripes, from those with no interest in astronomy that have only the faintest idea of what’s actually happening celestially, to those so steeped in the science that they’ll be calling out the exact beginning of totality and when to expect Baily’s Beads to appear.

I suspect our readership leans closer to the latter than the former, and some may want to add to the eclipse experience by participating in a little citizen science. Here’s how you can get involved.

Continue reading “Eclipse Megamovie: Thousands Of Cameras For Citizen Science”

Shoot The Eclipse With A Phone And Do Not Go Blind

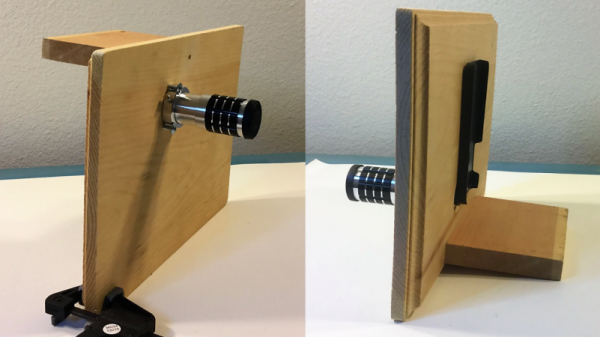
So you want to photograph Eclipse 2017 but you don’t want to rush out and buy an expensive DSLR just for the event? Not a problem, if you build this simple smartphone filter and occluder.

It all started innocently enough for [Paul Bryson] with his iPhone and a lens from those cheap cardboard eclipse glasses we’re starting to see everywhere. Thinking that just taping the filter over the stock lens would do, [Paul] got a painful faceful of sunshine when he tried framing a shot. Turns out the phone body was not big enough to blot out the sun, and besides, the stock lens doesn’t exactly make for a great shot. So with an iPhone telephoto lens affixed to a scrap of wood and a properly positioned filter, [Paul] has a simple rig that’ll let him get some great pre-totality shots of the eclipse, and it’ll be easy to bust out the phone for two minutes of totality selfies. Looks like this setup would be easy to adapt to other phones, too.

We’re all over Eclipse 2017, from Hackaday Eclipse Meetups in at least four different points along the path of totality to experiments on relativity to citizen science efforts so you can get in on the action too. Mark your calendars – August 21 will be here before you know it.

Intro To The North American Traffic Signal

Traffic lights are so ubiquitous that we hardly give them a second thought, except to curse their existence when they impede us on our daily drive. But no matter how much it seems like traffic lights have the ability to read our minds and tell when we’re running late, they’re really not much more than a set of lights and a programmable controller. Simple in practice, but as usual, the devil is in the details, and for a system that needs to work as close to 100% of the time as possible, the details are important. Let’s explore the inner workings of traffic signals.

Electromechanical Timing

The traffic lights and crosswalk signals at an intersection are only the public user interface, of course. The interesting stuff is going on in the control box. There’s at least one at every intersection, usually a plain metal cabinet set back from the road, sometimes camouflaged with public bills or graffiti. But inside are the guts of what makes an intersection work and keeps vehicle and foot traffic moving smoothly and safely.

Unsurprisingly, most traffic signal controls started out as purely electromechanical devices. Cabinets were chock full of synchronous motors turning timing wheels with cams to cycle the intersection’s lights through the proper sequence. One old time controller that was common up until recently was made by Econolite, and the insides are a paragon of sturdy design.

Continue reading “Intro To The North American Traffic Signal”

Condom And Catheter Team Up To Save New Mothers’ Lives

The title is sure to draw a snicker from some readers, but the purpose of this field-expedient treatment for postpartum hemorrhage is deadly serious, and a true medical hack that has the potential to save the lives of new mothers.

Postpartum hemorrhage is the leading cause of death during pregnancy, claiming about 86,000 women every year. While it can occur up to six weeks after giving birth, PPH is most serious immediately after delivery and can require aggressive treatment to prevent hypovolemic shock and eventual death. A fully equipped obstetrical suite will have access to an array of medications and devices to staunch the flow, including a uterine balloon tamponade (UBT) kit. But at $400 a kit, these devices are hard to come by in the developing world.

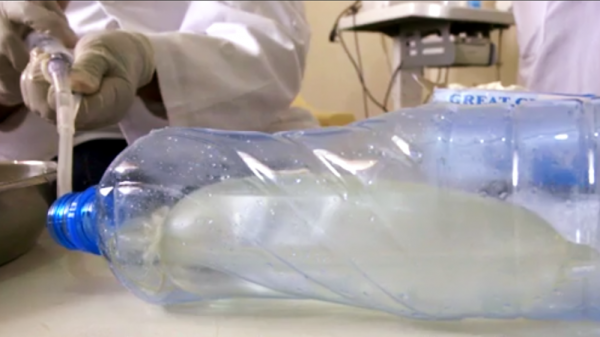
Not to be dissuaded, midwife [Anne Mulinge] from Nairobi, Kenya created a simple, cheap substitute using common items. A common urinary catheter is covered with an ordinary condom, the end of which is secured around the catheter with twine. Once inserted into the woman’s uterus, the condom is filled with saline solution through the catheter, expanding the condom and applying direct pressure to the bleeding uterine walls. The pressure allows the mother’s clotting mechanism to catch up with the decreased blood flow.

So far, [Anne] claims the device has saved three new mothers, and other midwives are being trained in the technique. Here’s hoping that more lives are saved with this simple hack, and perhaps with this more complex one designed to get blood to remote clinics as fast as possible.

Thanks to [LP Bing] for the tip.

Ink-Filled Machine Badges Score Respect For Your Gear

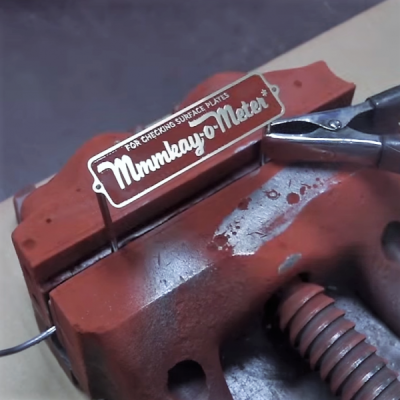
Remember the good old days when machines had a stout metal badge instead of cheap vinyl decals, and nameplates on motors were engraved in metal rather than printed on a label with a QR code? Neither do we, but these raised brass labels with color filled backgrounds look great, they’re surprisingly easy to make, and just the thing your gear needs to demand respect as a cherished piece of gear.

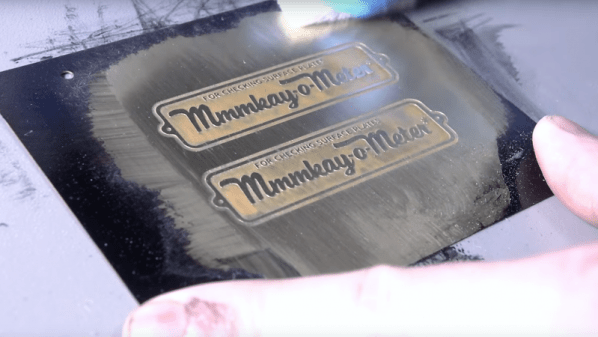
The ‘easy’ part of this only comes if you have access to a machine shop like [John] at NYC CNC does. To be fair, the only key machine for making these plates is a laser cutter, and even a guy like [John] needed to farm that out. The process is very straightforward — a brass plate is cleaned and coated with lacquer, which is then removed by the laser in the areas that are to be etched. The plate is dipped in an electrolyte solution for etching, cleaned, and powder coated. After curing the powder coat with a heat gun rather than an oven — a tip worth the price of admission by itself — the paint is sanded off the raised areas, the metal is polished, and a clear coat applied to protect the badge.


Plates like these would look great for a little retro-flair on a new build like this Nixie power meter, or allow you to restore a vintage machine like this classic forge blower.

Continue reading “Ink-Filled Machine Badges Score Respect For Your Gear”

Know The Load With This Simple Microcontroller CPU Meter

How do you tell how much load is on a CPU? On a desktop or laptop, the OS usually has some kind of gadget to display the basics. On a microcontroller, though, you’ll have to roll your own CPU load meter with a few parts, some code, and a voltmeter.

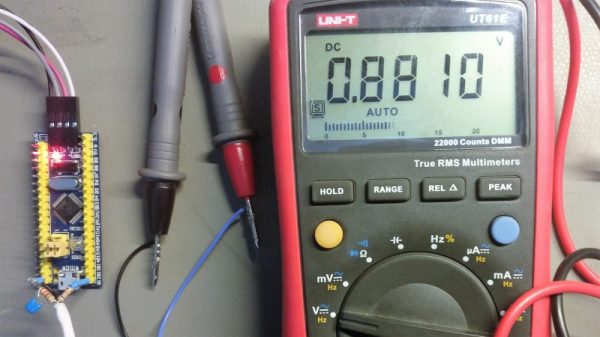
We like [Dave Marples]’s simple approach to quantifying something as complex as CPU load. His technique relies on the fact that most embedded controllers are just looping endlessly waiting for something to do. By strategically placing commands that latch an output on while the CPU is busy and then turn it off again when idle, a PWM signal with a duty cycle proportional to the CPU load is created. A voltage divider then scales the maximum output to 1.0 volt, and a capacitor smooths out the signal so the load is represented by a value between 0 and 1 volt. How you display the load is your own choice; [Dave] just used a voltmeter, but anything from an LED strip to some kind of audio feedback would work too.

Still just looking for a load meter for your desktop? Take your pick: an LED matrixold-time meters, or even Dekatrons.