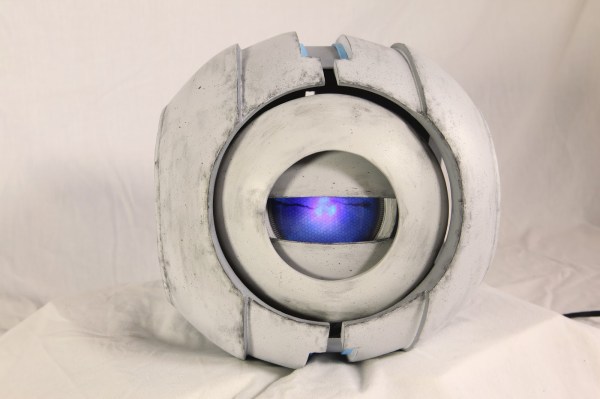
A Robotic Wheatley Replica created by Evie Bee

Robotic Wheatley From Portal 2

It’s been over 4 years since Portal 2 launched, but Wheatley, the AI character with a British accent, remains a captivating character. [Evie Bee] built a Wheatley replica complete with sound, movement, and one glowing eye.

The body of Wheatley is made out of blue insulation foam, also called XPS foam, laminated together with UHU Polyurethane glue. This formed a sphere, which was then cut into a detailed body. Papier mache clay was used to strengthen the thin foam.

The electronics for this build provide light, motion, and sound. The eye is moved by a total of 3 Arduino controlled servos: two for the movement of the eye, and one to allow it to open and close. Movement is controlled by two joysticks. Sound is provided by the Adafruit Sound Board, which connects to a speaker and a Velleman Sound to Light Kit. This kit controls the LEDs that light the eye, making it react to the voice of Wheatley.

You can watch this Wheatley rant at you after the break. Of course if you’re going to have a Wheatley you need a GLaDOS potato as well.

Continue reading “Robotic Wheatley From Portal 2”

Review: Voltera V-One PCB Printer

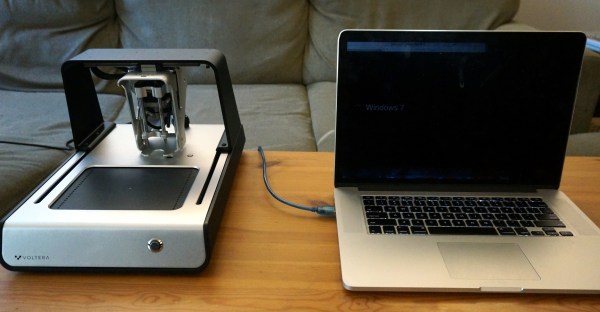
Back in Feburary, I was one of the first people to throw some cash at the Voltera V-One circuit board printer on Kickstarter. With an anticipated delivery date of Q4 2015, I sat back and waited. This week, my V-One arrived!

I’ll preface this article by pointing out that I do know the folks at Voltera as we went to university together. That being said, I did put down my own cash for the device, so I’ve bought the right to be critical. I also have no relationship with their company. In this article, we’ll go through unboxing and printing, then get into a review of the V-One based on what we’ve seen so far.

Continue reading “Review: Voltera V-One PCB Printer”

Crowdsourcing Reference Designs From Github

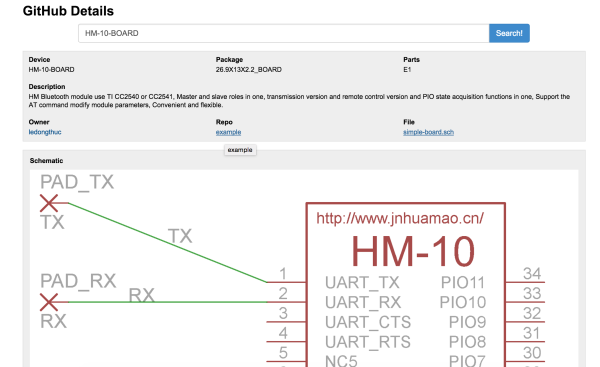
A ton of open source hardware projects make their way onto Github, and Eagle is one of the most popular tools for these designs. [TomKeddie] came up with the idea of searching Github for Eagle files containing specific parts at Hacker Camp Shenzhen, and a method of scraping useful ones.

The folks over at Dangerous Prototypes used this to build the Github Hardware Search tool. Simply enter a part number, like “ATmega328P”, and you’ll receive a list of the designs using that part. You can then study the design and use it as a reference for your own project. You can also snag library files for the parts.

Of course, there are some limitations to this. The most obvious one is the lack of quality control. There’s no guarantee that the design you find works, or has even been built. Also, it only works for Eagle 6+ files, since prior versions were not XML. You can read more about the design of the tool over on Dangerous Prototypes.

A Modern 386 Development Board

Some readers out there probably have nostalgic feelings for their first 386 based PC, the beeps and hisses of the modem, and the classic sound of a floppy drive’s stepper motor. Perhaps that turbo button that we could never quite figure out.

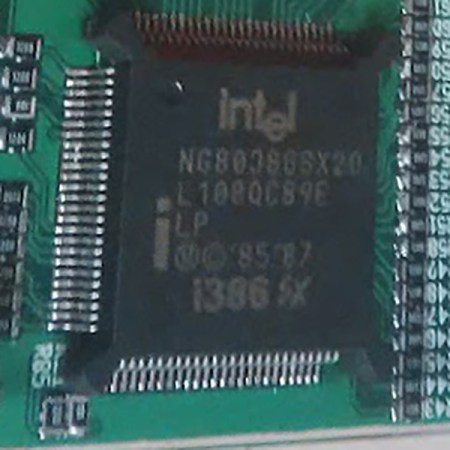
If you want the power of a 386 processor today, you’re in luck: [Pierre Surply] has developed a modern development board for the 80386SX CPU. This board is based on a 386 processor that comes in a LQFP package for “easy” soldering, and an Altera Cyclone IV FPGA.

To allow the CPU to run, the FPGA emulates the chipset you would usually find on a PC motherboard. The FPGA acts as both a bus controller and a memory controller for the CPU. On the board, there’s an SRAM chip and internal memory on the FPGA, which can be accessed through the 386’s bus access protocol.

The FPGA also provides debugging features. A supervisor application running on the FPGA gives debugging functionality via a FTDI USB to UART chip. This lets you control operation of the CPU from a PC for debugging purposes. The FPGA’s memory can be programmed through a JTAG interface.

The project is very well documented, and is a great read if you’re wondering how your old 386 actually worked. It can even be hand soldered, so the adventurous can grab the design files and give it a go. The francophones reading can also watch the talk in the video below.

Continue reading “A Modern 386 Development Board”

The E-Traces Shoes

Visualizing Ballet Movements With E-Traces

When we think of wearable technologies, ballet shoes aren’t the first devices that come to mind. In fact, the E-Traces pointé shoes by [Lesia Trubat] may be the first ever “connected ballet shoe.” This project captures the movement and pressure of the dancer’s feet and provides this data to a phone over Bluetooth.

The shoes are based on the Lilypad Arduino clone, which is designed for sewing into wearables. It appears that 3 force sensitive resistors are used as analog pressure sensors, measuring the force applied on the ground by the dancer’s feet. A Lilypad Accelerometer measures the acceleration of the feet.

This data is combined in an app running on an iPhone, which allows the dancer to “draw” patterns based on their dance movements. This creates a video of the motion based on the dance performed, and also collects data that can be used to analyze the dance movements after the fact.

While these shoes are focused on ballet, [Lesia] points out that the same technique could be extended to other forms of dance for both training and visualization purposes.

WiFi Power Monitor Based on ESP8266

WiFi Power Monitor

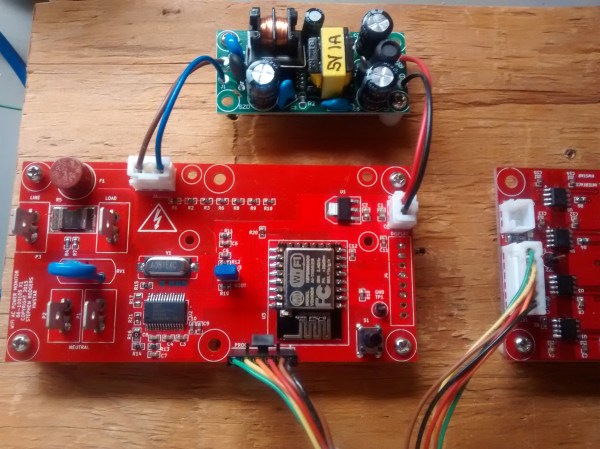
Building your own hardware to measure AC power isn’t a simple task. There’s a number of things to measure, including voltage, current, power, and power factor. The Atmel 90E24 is a single chip solution designed for this exact purpose. Connect a few components, and all the power data is available to a microcontroller over SPI.

[hwstar] built a custom power monitoring board based on this IC. His AC-Emeter will give you all the measurements you’d want, and includes an ESP12 module for data collection and WiFi connectivity. Aside from the Atmel 90E24 device, a high power and low resistance resistor is needed for shunt sense current measurement. An external module is used to convert mains voltage down to 5V to power the board.

Of course, working with mains voltages can be a dangerous endeavour. Fortunately, [hwstar] provides some tips on how to prevent “equipment from being BLOWN UP” along with the open source hardware and firmware.

[via Embedded Lab]

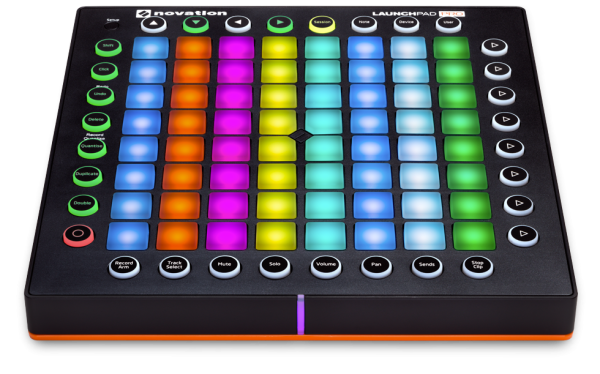
The Launchpad Pro, which now has an open-source API

Novation Launchpad MIDI Controller Moves Toward Open Source

The Novation Launchpad is a MIDI controller, most commonly used with the Ableton Live digital audio workstation. It’s an eight by eight grid of buttons with RGB LED backlights that sends MIDI commands to your PC over USB. It’s often used to trigger clips, which is demonstrated by the artist Madeon in this video.

The Launchpad is useful as a MIDI input device, but that’s about all it used to do. But now, Novation has released an open source API for the Novation Pro. This makes it possible to write your own code to run on the controller, which can be flashed using a USB bootloader. An API gives you access to the hardware, and example code is provided.

[Jason Hotchkiss], who gave us the tip on this, has been hacking around with the API. The Launchpad Pro has a good old 5 pin MIDI output, which can be connected directly to a synth. [Jason]’s custom firmware uses the Launchpad Pro as a standalone MIDI sequencer. You can check out a video of this after the break.

Unfortunately, Novation didn’t open source the factory firmware. However, this open API is a welcome change to the usual closed-source nature of audio devices.

Continue reading “Novation Launchpad MIDI Controller Moves Toward Open Source”