The Raspberry Pi 3 does Eddystone!

Turn Your RPi 3 Into A BLE Beacon

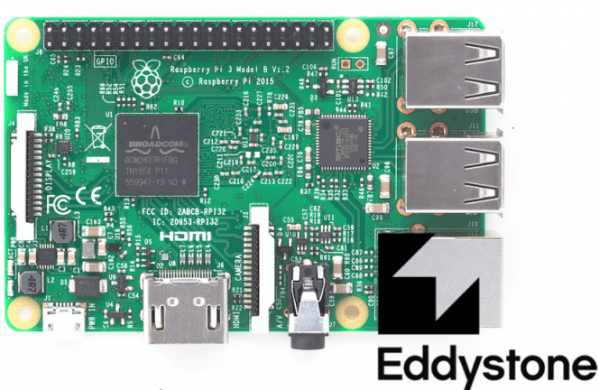
With the launch of the Raspberry Pi 3, Bluetooth Low Energy (BLE) is now at our disposal. With BLE, there are a few technologies for implementing one-way beacons that broadcast data. Apple has been pushing iBeacon since 2013, and Google just launched their Eddystone solution last year.

If you’re looking to target Google’s Eddystone on your RPi 3, [Yamir] has you covered. He’s put together a guide on setting up an Eddystone-URL beacon within Raspbian. This type of beacon just broadcasts a URL. Users within range will get a notification that the URL is available, and can navigate through to it. Eddystone-URL works on both iOS and Android.

The process for setting this up is pretty simple. The hciconfig and hcitool commands do all the work. [Yamir] was even nice enough to make a calculator tool that generates the hcitool command for your own URL. While is hack is a simple one, it’s a nice five-minute project. It’s also handy for broadcasting the URL of your Raspberry Pi if it’s running a web server as part of a more intricate hack.

Modifications to a Razor E300 motor controller to remove limits

Converting An Electric Scooter To Lithium Batteries And Disabling The Safeties

There’s a bunch of different electric scooters available nowadays, including those hoverboards that keep catching fire. [TK] had an older Razor E300 that uses lead acid batteries. After getting tired of the low speeds and 12 hour charge times, [TK] decided it was time to swap for lithium batteries.

The new batteries were sourced from a Ryobi drill. Each provides 18 V, giving 36 V in series. The original batteries only ran at 24 V, which caused some issues with the motor controller. It refused to start up with the higher voltage. The solution: disable the safety shutdown relay on the motor controller by bridging it with a wire.

With the voltage issue sorted out, it was time for the current limit to be modified. This motor controller uses a TI TL494 to generate the PWM waveforms that drive a MOSFET to provide variable power to the motor. Cutting the trace to the TL494’s current sense pin removed the current limit all together.

We’re not saying it’s advisable to disable all current and voltage limits on your scooter, but it seems to be working out for [TK]. The $200 scooter now does 28 km/h, up from 22 km/h and charges much faster. With gearing mods, he’s hoping to eke out some more performance.

After the break, the full conversion video.

Continue reading “Converting An Electric Scooter To Lithium Batteries And Disabling The Safeties”

Icestudio: An Open Source Graphical FPGA Tool

If you’ve ever worked with FPGAs, you’ve dealt with the massive IDEs provided by the vendors. Xilinx’s ISE takes about 6 gigabytes, and Altera’s Quartus clocks in at over 10 gigs. That’s a lot of downloading proprietary software just to make an LED blink.

[Jesús Arroyo]’s Icestudio is a new, graphical tool that lets you generate Verilog code from block diagrams and run it on the Lattice Semi iCEstick development board. A drag and drop interface lets you connect IOs, logic gates, dividers, and other elements. Once your block diagram is ready, a single button press downloads the code to the iCEstick.

Under the hood, Icestudio uses IceStorm, which we’ve discussed on HaD in the past, including this great talk by [Clifford], Icestorm’s lead. For the GUI, Icestudio uses nw.js, which spits out JSON based on the block diagram. This JSON is converted into a Verilog file and a PCF file. The Verilog is used to create the logic on the FPGA, and the PCF is used to define the pin configuration for the device. Clicking on selected modules reveals the generated Verilog if you want to know what’s actually going on.

It’s experimental, but this looks like a neat way to get started on FPGAs without learning a new language or downloading many gigs of toolchains. We’re hoping Icestudio continues to grow into a useful tool for education and FPGA development. A demo follows after the break.

[Thanks to Nils for the tip!]

Continue reading “Icestudio: An Open Source Graphical FPGA Tool”

Sony VTR with replacement foam brushes

Resurrecting A 1960’s VTR With Foam

Nearly fifty years back, Sony launched the DVC-2400, their first consumer grade video camera. This unit weighed in at 10 pounds, and recorded only 20 minutes of footage per reel. It left something to be desired for $1250, or nearly $9000 in today’s dollars.

[NeXT] got his hands on one of these camera kits, and began bringing it back to life. While all the pieces were included, the Video Tape Recorder (VTR), which is used to play back the footage, didn’t power up. A little poking found a dead transistor. After determining a modern replacement part, the voltages checked out. However, the drum still wasn’t spinning.

Further disassembly found that the drum’s DC motor was made on the cheap, using a foam instead of springs to apply pressure on the brushes. This foam had worn out and lost its springy qualities, so no electrical contact was made. New foam was cut out as a replacement. Once reassembled, the drum spun successfully. After some adjustment, the VTR was running at the correct speed once again.

With this working, the VTR should be ready to go. However, camera still isn’t working, so we’re awaiting a part 2.

Audio Streaming On The Cheap With An RPi Zero

The minuscule size of the Raspberry Pi Zero makes it perfect for hacks where size is a factor. For example, a small, standalone device for getting streaming audio into your speakers. The RPi Zero doesn’t have an audio output on board, so PolyVection paired it up with their PlainDAC to build a minimal audio streaming device.

Their build uses a few lines from the GPIO header to drive an I2S digital to analog converter. The DAC is a PCM5142 from Texas Instruments that provides high quality sound output, and contains a built in programmable DSP.

The hardware fits into a 3D printed case, coming in at 68 mm by 48 mm. There’s no WiFi inside, but this can be added with an external USB device for wireless streaming. The DAC used is supported by the Linux kernel, so a simple configuration is all that’s needed to pipe audio out.

Once you have a device like this assembled, you can install a server like Music Player Daemon to remotely control the device and cue up internet radio channels.

Is Via Rail On Time?

Personally, I’m a fan of trains. They’re a nice, albeit slow, way to get around the country. Canada isn’t the best candidate for rail transit, given the rather large space between coasts, but Via Rail does operate regular train service in their corridor between Windsor and Quebec City.

Unfortunately, passenger rail has to yield to commercial rail in Canada which often causes delays. After noticing that some trains have very frequent delays, it seemed like it would be useful to know the average performance of each Via train. Via does not provide this data publicly.

However, they do provide some data about arrival and departure times. Digging into the data available through any browser viewing the Via Rail site, it was possible to query for past scheduled/actual arrival data. The result is TrainStats.ca, a display of Via’s on time performance. Join me after the break as I discuss how this all works, and how to pick a winner when buying your next train ticket.

Continue reading “Is Via Rail On Time?”

Audio Effects On The Intel Edison

With the ability to run a full Linux operating system, the Intel Edison board has more than enough computing power for real-time digital audio processing. [Navin] used the Atom based module to build Effecter: a digital effects processor.

Effecter is written in C, and makes use of two libraries. The MRAA library from Intel provides an API for accessing the I/O ports on the Edison module. PortAudio is the library used for capturing and playing back audio samples.

F9GW4Y4IGQFYP23.MEDIUMTo allow for audio input and output, a sound card is needed. A cheap USB sound card takes care of this, since the Edison does not have built-in hardware for audio. The Edison itself is mounted on the Edison Arduino Breakout Board, and combined with a Grove shield from Seeed. Using the Grove system, a button, potentiometer, and LCD were added for control.

The code is available on Github, and is pretty easy to follow. PortAudio calls the audioCallback function in effecter.cc when it needs samples to play. This function takes samples from the input buffer, runs them through an effect’s function, and spits the resulting samples into the output buffer. All of the effect code can be found in the ‘effects’ folder.

You can check out a demo Effecter applying effects to a keyboard after the break. If you want to build your own, an Instructable gives all the steps.

Continue reading “Audio Effects On The Intel Edison”