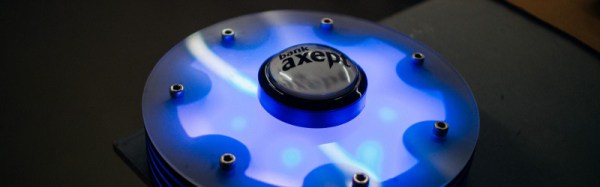
Arcade Button Pressing Game

When every month brings out a fresh console blockbuster game that breaks new boundaries of cinematic immersion in its gameplay, it’s easy to forget that sometimes the simplest of game interfaces can be rewarding.

Hele Norges Knapp” (“All of Norway’s Button”), is a good example. As you might expect, it’s a button, a large arcade-style one, and the gameplay is simple. Press the button as many times as you can in 30 seconds. It’s a project from Norwegian Creations, and it was produced as a promotion that toured the country for one of Norway’s debit card payment systems.

The blog post and video is frustratingly light on hardware or software details, and their is nothing about it in their GitHub presence. But they tell us that at its heart is a Teensy 3.2 with an audio board, driving the big 7-segment displays for the scoreboard and the WS2801 LED lighting.

The button itself is Adafruit’s 100mm Massive Arcade Button, and given that it was pressed over a million times by eager Norwegians it would seem this project has proved its robustness.

The video below the break has details of construction and of the game in action, and there is another far more corporate promotional video on Facebook featuring a host of Bright Young People honing their button action in a sun-kissed Norway that looks almost tropical. The game itself does look as though it could be an amusing diversion in the same vein as those fairground strength tests.
Continue reading “Arcade Button Pressing Game”

Ask Hackaday: Help Me Choose A ‘Scope

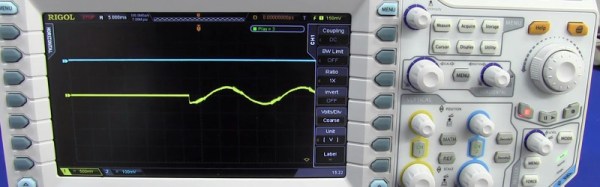
If there is one instrument that makes an electronic engineer’s bench, it is the oscilloscope. The ability to track voltages in the time domain and measure their period and amplitude is one akin to a light in the darkness, it turns a mere tinkerer with circuits into one in command of them. Straightforward add-on circuits can transform a basic oscilloscope into a curve tracer, frequency response display, and much more, and modern oscilloscopes offer a dizzying array of useful measurement features unimaginable to engineers only a few years ago. And I need your help to pick a new one.

Continue reading “Ask Hackaday: Help Me Choose A ‘Scope”

Hackaday Prize Entry: Mouse Controlled Microscope

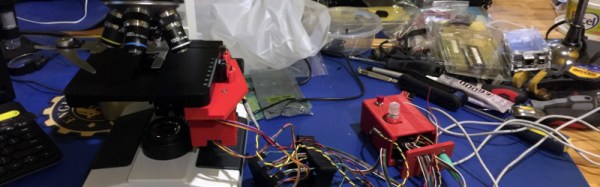
You might imagine that all one should need to operate a microscope would be a good set of eyes. Unfortunately if you are an amputee that may not be the case. Veterinary lab work for example requires control of focus, as well as the ability to move the sample in both X and Y directions, and these are not tasks that can easily be performed simultaneously with only a single hand.

[ksk]’s solution to this problem is to use geared stepper motors and an Arduino Mega to allow the manual functions of the microscope to be controlled from a computer mouse or trackball. The motors are mounted on the microscope controls with a custom 3D-printed housing. A rotary selector on the control box containing the Arduino allows the user to select a slow or fast mode for fine or coarse adjustment.

It’s fair to say that this project is still a work in progress, we’re featuring it in our series of posts looking at Hackaday Prize entries. However judging by the progress reported so far it’s clear that this is a project with significant potential, and we can see the finished product could be of use to anyone operating the microscope.

We’ve featured one or two mouse controlled projects over the years, though not controlling microscopes. Here’s one mouse controlled robot arm, and we’ve covered another arm with a 3D mouse.

A Robotic 808 Drum Machine

If you spent the 1980s hanging out at your local record store, and you don’t have a hankering for spandex and bouffant rock-god hairstyles, the chances are you’ll have more than a few pieces of electronic music from the period in your collection. The proliferation of electronica during that era came through the arrival of relatively inexpensive mass-market digital polyphonic instruments, edging out the sounds of monophonic analog synthesisers for a subsequent generation to rediscover in a later decade. Individual instrument models became icons and entered the musical vernacular of the day, the Ensoniq Mirage sampling synthesiser, the Yamaha DX7 FM synthesiser, or the Roland TR-808 drum machine.

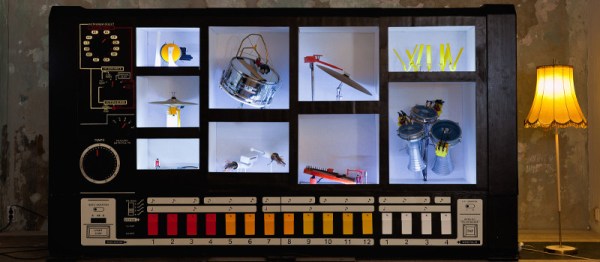
It is the Roland TR-808 that inspired today’s subject, the MR-808 robotic drum machine, from [Moritz Simon Geist]. A percussion sequencer featuring real instruments all built into a cabinet styled to resemble a huge Roland 808. Originally built as a performance instrument, but since reinvented as a piece of installation artwork that visitors can program for themselves.

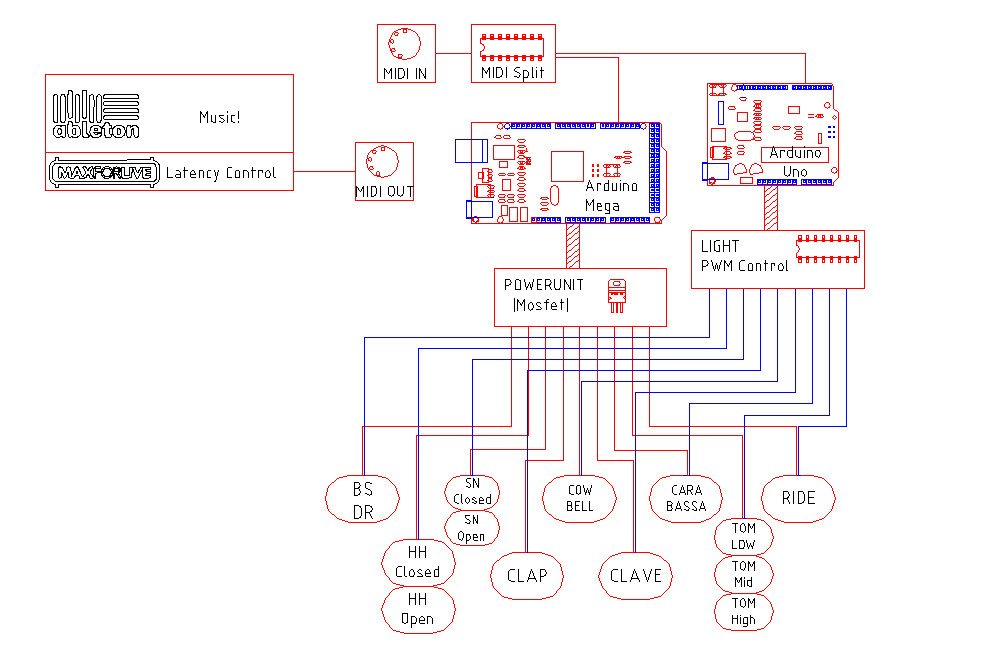
Block diagram of the MR-808

There is a comprehensive description of the machine’s design and build on the creator’s website, as well as a more high-level introduction. A significant amount of effort was put in to creating mechanical instruments as close as possible to the Roland sounds, with each instrument being operated by solenoids driven by a MIDI-controlled Arduino Mega. A second Arduino, this time an Uno, controls lighting that follows the instruments.

The interactive part of the installation comes from a sequencer front-end running in a web browser on a Nexus 7 tablet, this appears to be served from a Raspberry Pi which supplies MIDI to the MR-808.

The results can be seen in the video below the break, and judging by the reaction of the audience the machine is rather popular.

Continue reading “A Robotic 808 Drum Machine”

Clustering A Lot Of Raspberry Pi Zeros

It became something of a cliché a few years ago in online discussions, whenever a new single board computer was mentioned someone would pop up and say something like “Imagine a Beowulf cluster…“. Back then it was said largely in jest, but with the current generation of boards it’s a distinct possibility. Who hasn’t looked at a Raspberry Pi and idly thought about a cluster of them, or even created one!

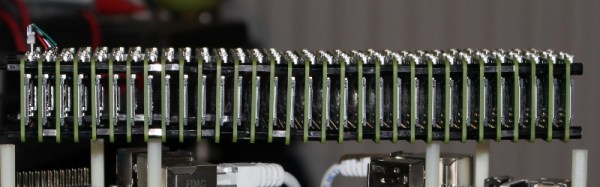
[Electronoob] did just that, creating a variety of Raspberry Pi cluster configurations, the most impressive of which is a stack of 32 Pi Zeros mounted together with stand-offs. The plan was to network it via USB, for which he initially considered building a backplane, but was put off by the cost of vertical USB connectors and instead went for a wired approach. If there is a lesson to be learned from his experiences it is that buying very cheap USB cables is a minefield: his pile of eBay specials turned out to have significant numbers of faults. He’s now faced with a stark choice, solder  32 sets of USB pads on the base of each Zero or buy better cables.

The stack of Zeros is pretty impressive, but so what, you think. It’s still not working properly. But the Zero cluster isn’t his only work. He’s also created a set of very nicely executed Ethernet clusters using the larger Pi boards, and the way he’s mounted them on top of compact Ethernet switches sets them apart from some of the more spaghetti-like Pi clusters.

It’s true a Pi cluster won’t cut it in the world of supercomputers, you could almost certainly buy more bang for your buck without too much effort. But it does represent a very accessible way to learn about cluster computing, and you have to admit it a stack of Zeros does look rather impressive.

We’ve seen quite a few Pi clusters here since 2012, the biggest of which is probably this 120 node behemoth, complete with screens.

Vacuum Exposure Unit Gives Better PCB Etching Results

PCB etching seems to be a subject that sharply divides our community into those who are experts in it and etch themselves every PCB they use, and those who have significant quantities of ferric chloride stained clothing in their past and for whom the advent of cheap commercial PCB manufacture and CNC milled PCB prototyping have been the best thing since sliced bread.

Your likely success when etching your own boards is most dependent on the quality of your preparation and your equipment. If you began your PCB career with etch-resist transfers and a permanent marker with a Tupperware tub of etchant, then later progressed to laser toner or photographic masking and a bubble etcher, you’ll understand this.

[Jana Marie Hemsing] has drawn our attention to this very nicely built PCB etching suite (Translation, German original) at the Warpzone hackerspace (Translation, German original) in Münster, Germany. The foil pattern is printed on transparency and exposed to UV light over a photoresist coated board with a vacuum pump arrangement to ensure as good a contact as possible to the board for the sharpest result. They have two exposers, one for single sided and the other for double-sided boards, both are very well-built from what looks like plywood.

The attention to detail continues with a home-made magnetic stirrer and heated bubble etching tank Their etchant of choice is sodium persulphate, so there are none of those brown ferric chloride stains.

PCB etching is nothing new, indeed we have covered the subject extensively over the years. But we think you’ll agree, if you’re going to etch your own PCBs you should have as good a set-up as you can, and Warpzone’s PCB suite is rather well put together. Those of us in spaces with lesser facilities should be getting ideas from it.

Hackaday Prize Entry: AutoFan Saves Tired Drivers With Face Recognition

Long distance driving can be tedious at times. The glare of the sun and the greenhouse effect of all your car’s windows make it hot and dry. You turn on the fan, or air conditioning if you have it, and that brings relief. Soon enough you’ve got another problem, the cold dry air is uncomfortable on your eyes. Eventually as you become more tired, you find yourself needing the air on your face more and more as you stay alert. You thus spend most of the journey fiddling with your vents or adjusting the climate controls. Wouldn’t it be great if the car could do all that for you?

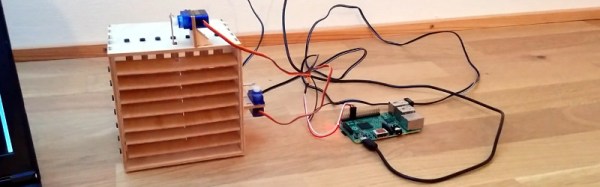
AutoFan is a project from [hanno] that aims to automate this process intelligently. It has a fan with steerable louvres, driven by a Raspberry Pi 2 with attached webcam. The Pi computes the position of the driver’s face, and ensures the air from the fan is directed to one side of it. If it sees the driver’s blink rate increasing it directs the air to their face, having detected that they are becoming tired.

The build logs go into detail on the mathematics of calculating servo angles and correcting for camera lens distortion in OpenCV. They also discuss the Python code used to take advantage of the multicore architecture, and to control the servos. The prototype fan housing can be seen in the video below the break, complete with an unimpressed-looking cat. For those of you interested in the code, he has made it available in a GitHub repository.

Continue reading “Hackaday Prize Entry: AutoFan Saves Tired Drivers With Face Recognition”