Open Source Fader Bank Modulates Our Hearts

Here at Hackaday, we love knobs and buttons. So what could be better than one button? How about 16! No deep philosophy about the true nature of Making here; [infovore], [tehn], and [shellfritsch] put together a very slick, very adaptable bank of 16 analog faders for controlling music synthesis. If you don’t recognize those names it might help to mention that [tehn] is one of the folks behind monome, a company built on their iconic grid controller. Monome now produces a variety of lovingly crafted music creation tools.

Over the years we’ve written about some of the many clones and DIY versions of the monome grid controller, so it’s exciting to see an open source hardware release by the creators themselves!
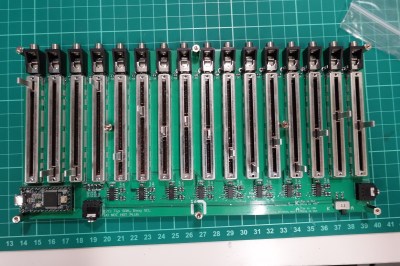
The unambiguously named 16n follows in the footsteps of the monome grid in the sense that it’s not really for something specific. The grid is a musical instrument insofar as it can be connected to a computer (or a modular synth, etc) and used as a control input for another tool that creates sound. Likewise, the 16n is designed to be easily integrated into a music creation workflow. It can speak a variety of interfaces, like purely analog control voltage (it has one jack per fader), or i2c to connect to certain other monome devices like Ansible and Teletype. Under the hood, the 16n is actually a Teensy, so it’s fluent in MIDI over USB and nearly anything else you can imagine.

Continue reading “Open Source Fader Bank Modulates Our Hearts”

Cool Tools: A Little Filesystem That Keeps Your Bits On Lock

Filesystems for computers are not the best bet for embedded systems. Even those who know this fragment of truth still fall into the trap and pay for it later on while surrounded by the rubble that once was a functioning project. Here’s how it happens.

The project starts small, with modest storage needs. It’s just a temperature logger and you want to store that data, so you stick on a little EEPROM. That works pretty well! But you need to store a little more data so the EEPROM gets paired with a small blob of NOR flash which is much larger but still pretty easy to work with. Device settings go to EEPROM, data logs go to NOR. That works for a time but then you remember that people on the Internet are all about the Internet of Things so it’s time to add WiFi. You start serving a few static pages with that surprisingly capable processor and bump into storage problems again so the NOR flash gets replaced with an SD card and now the logs go there too. Suddenly you’re dealing with multiple files and want access on a computer so a real filesystem is in order. FAT is easy, so the card grows a FAT filesystem. Everything is great, but you start to notice patches missing from the logs. Then the SD card gets totally corrupted. What’s going on? Let’s take a look at the problem, and how to reach embedded file nirvana.

Continue reading “Cool Tools: A Little Filesystem That Keeps Your Bits On Lock”

Deep Discounts Yield Deep Reverse Engineering Of Biotech Hardware

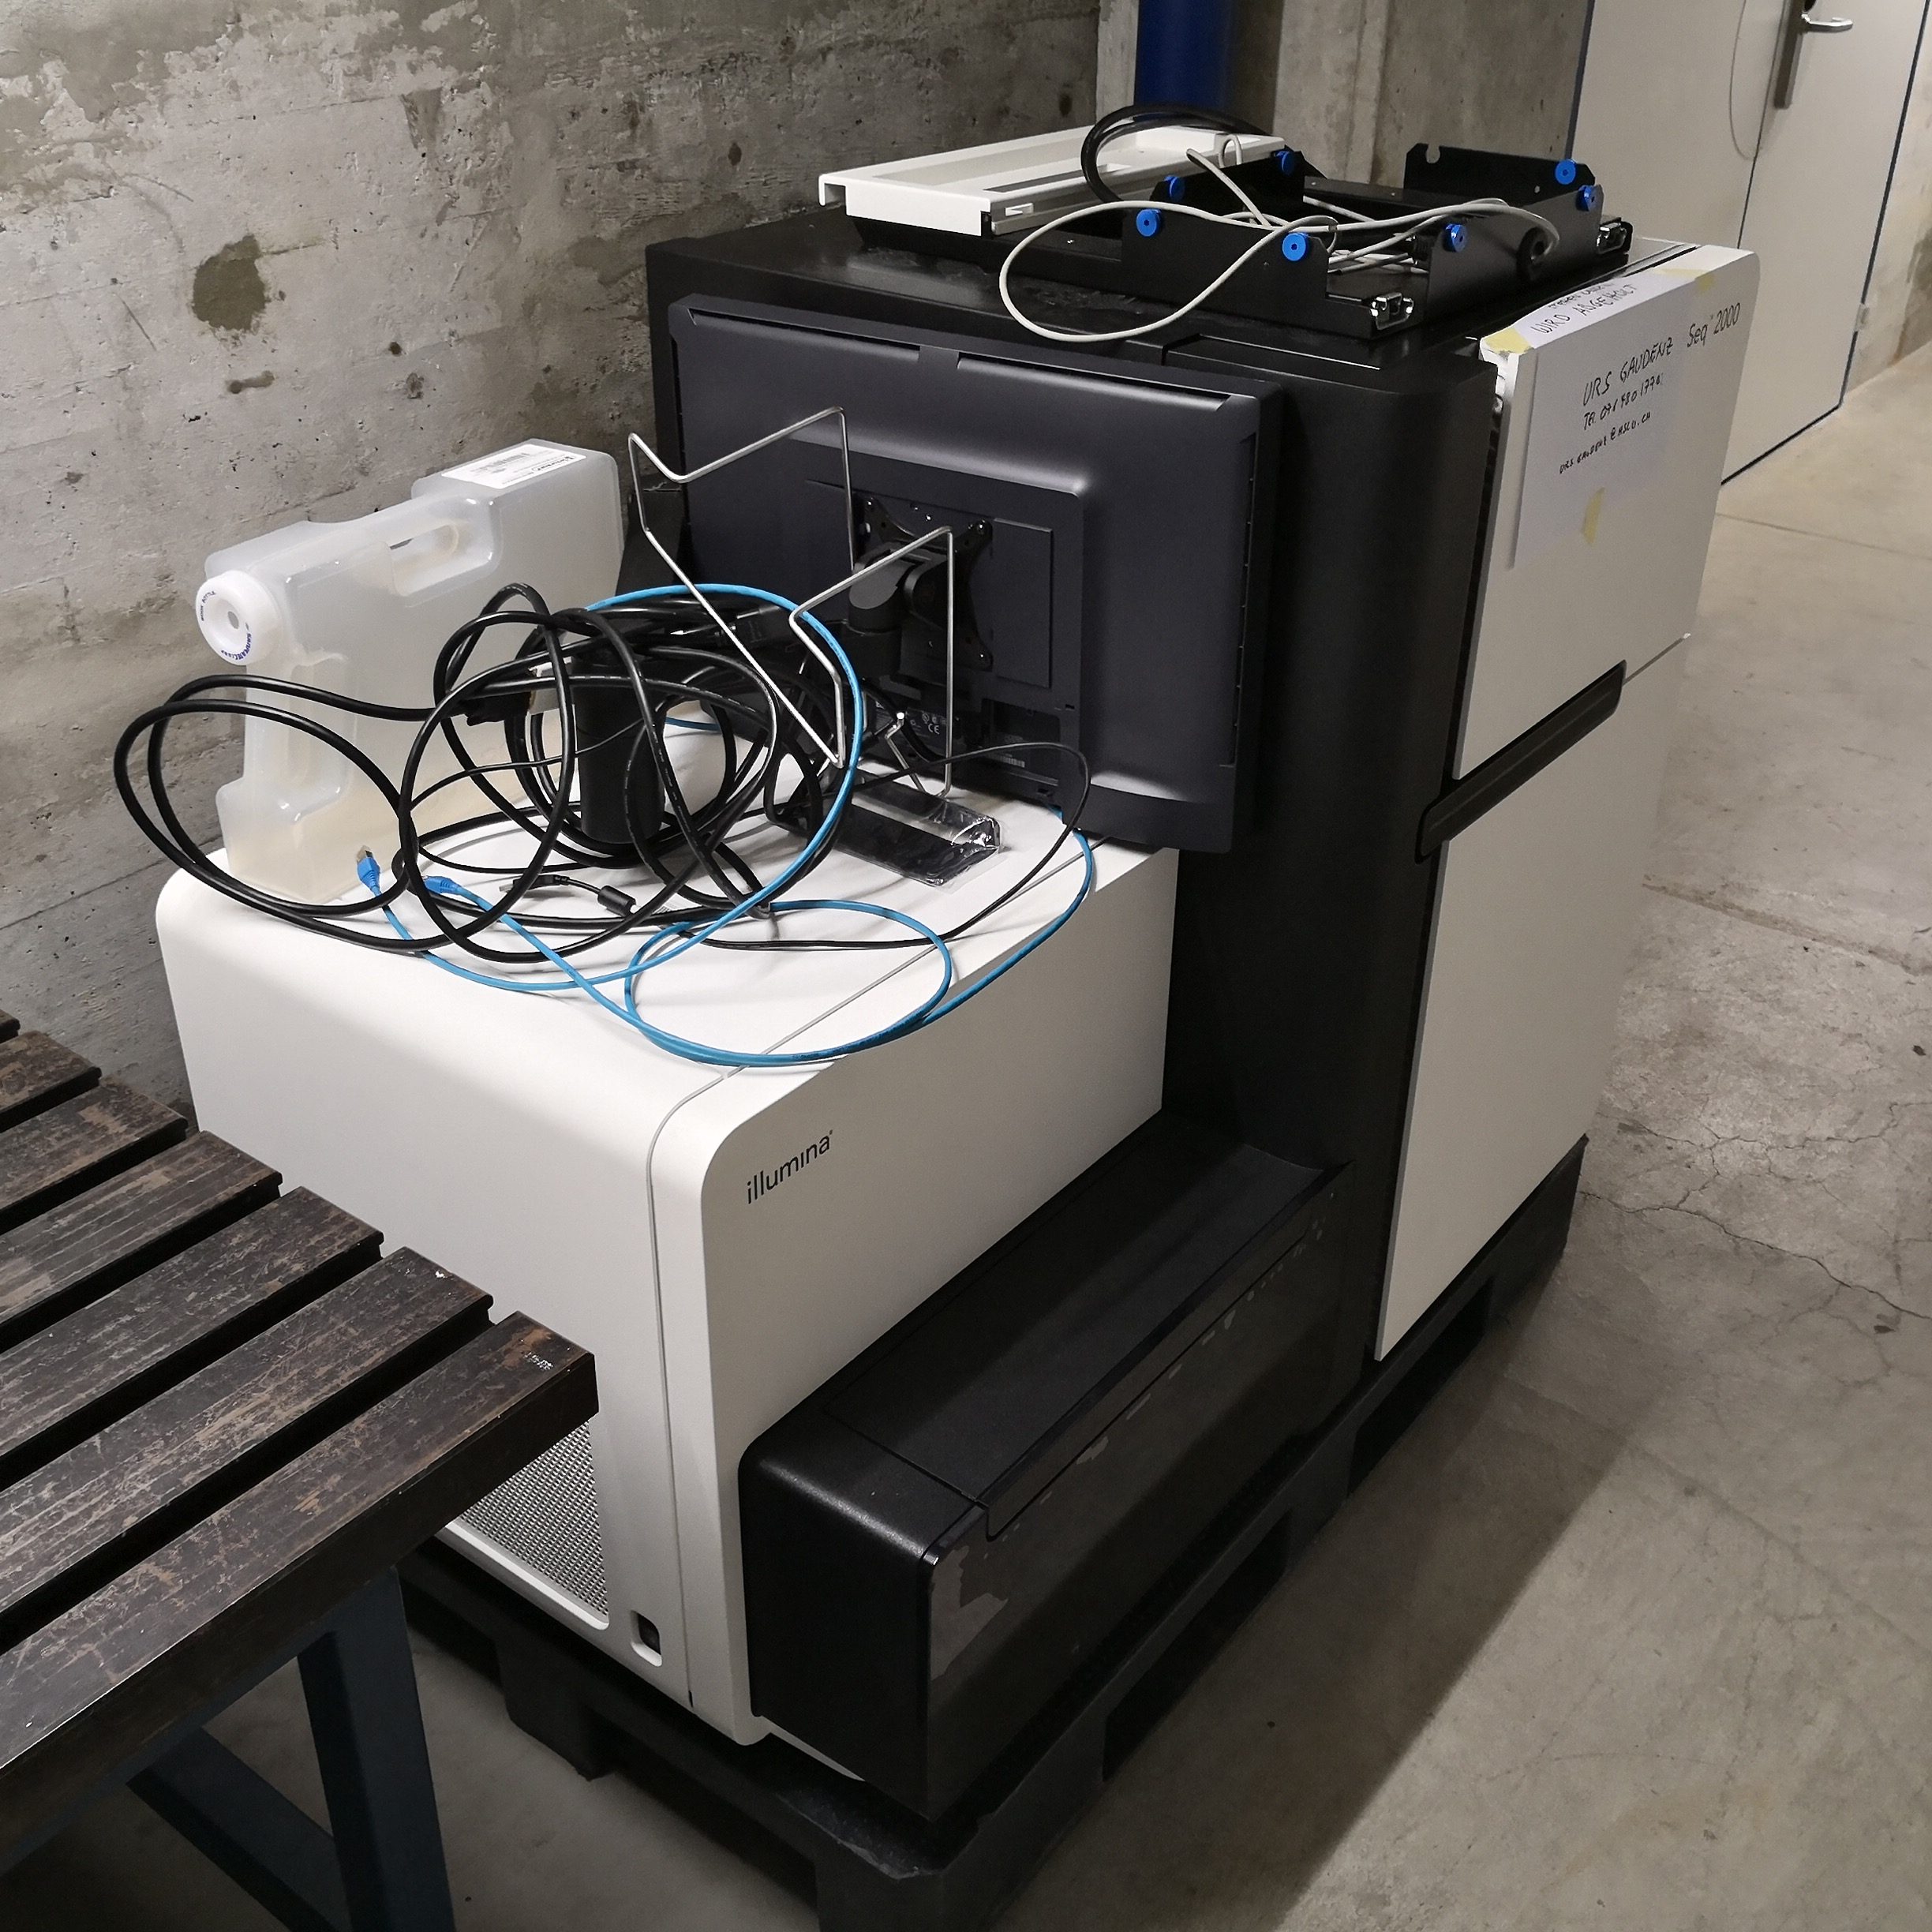
Hitting the electronic surplus shop is probably old hat to most of our readership. Somewhere, everyone’s got that little festering pile of hardware they’re definitely going to use some day. An old fax is one thing, but how would your partner feel if you took home an entire pallet-sized gene sequencing rig? Our friend [kaspar] sent along an interesting note that the folks at Swiss hackerspace Hackteria got their hands on an Illumina HiSeq 2000 last year (see funny “look what we got!” photo at top) and have generated a huge amount of open documentation about whats inside and how to use it.

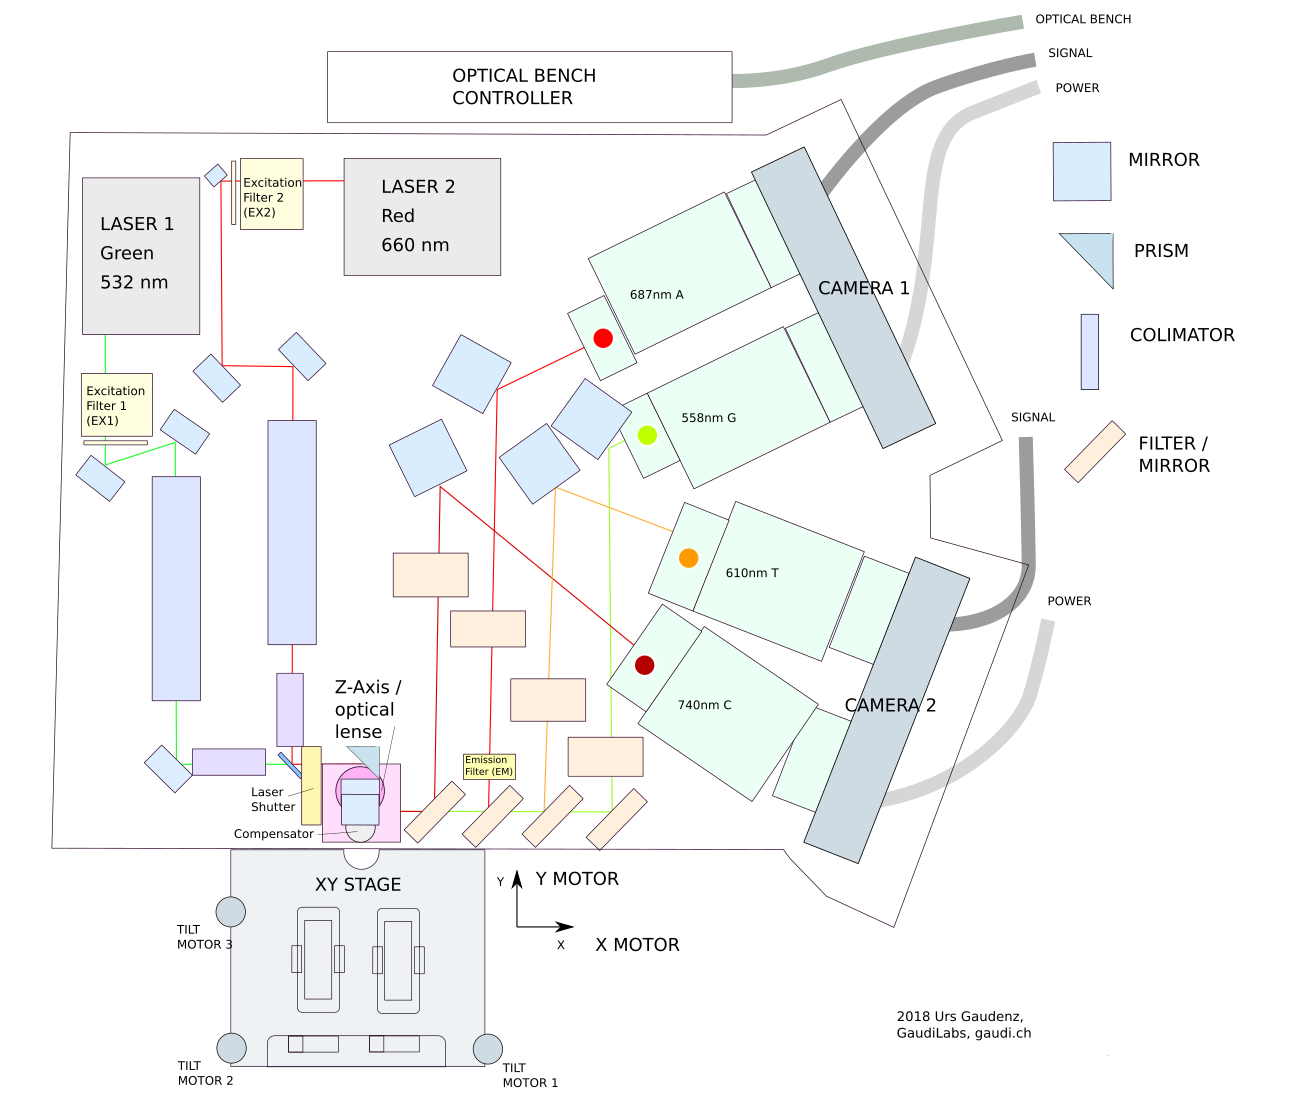
Okay first off, what the heck is this machine anyway? The HiSeq is designed to automatically perform the sequencing step of Illumina’s proprietary multi step gene sequencing process (see manufacturer’s glossy for more), and to do so with minimal human intervention. That means that the unit contains a microfluidics system to manipulate samples, an extremely high performance optical scan system complete with controllable stage, imager, fluorescence modes, etc, and lots of other things this author isn’t sufficiently trained to guess at.

The folks at Hackteria have done a pretty thorough teardown of the system and produced block diagrams of most of its modules. They’ve also run some of the tools and recorded logs of what they were up to, including the serial commands sent to and from the machine to control certain subsystems. Of course a tool like this was meant to be driven by Illumina’s specific software, but unusually those are available and surprisingly usable which is how the aforementioned logs were captured. Right now it looks like Hackteria has put together tools to use the system as a fluorescent microscope.

Oddly the most interesting thing here might be how available these systems are. It appears that they’re being replaced en masse and have become easily available in the range of thousands of dollars on the secondary market. At that price point they’re almost worth snapping up for the enclosure and parts! But we prefer Hackteria’s goal of enabling the Citizen Scientist to make use of these incredible machines for their intended purpose. Who knows what exciting projects we’ll find when hackers start sequencing their cats!

Thanks for the tip [kaspar]!

Being An SPI Slave Can Be Trickier Than It Appears

Interfacing with the outside world is a fairly common microcontroller task. Outside of certain use cases microcontrollers are arguably primarily useful because of how easily they can interface with other devices. If we just wanted to read and write some data we wouldn’t have gotten that Arduino! But some tasks are more common than others; for instance we’re used to being on the master side of the interface equation, not the slave side. (That’s the job for the TI engineer who designed the temperature sensor, right?) As [Pat] discovered when mocking out a missing SPI GPIO extender, sometimes playing the other role can contain unexpected difficulties.

The simple case for a SPI slave is exactly that: simple. SPI can be wonderful in its apparent simplicity. Unlike I2C there are no weird addressing schemes, read/write bits, stop and start clock conditions. You toggle a clock line and a bit of data comes out, as long as you have the right polarity schemes of course. As a slave device the basic algorithm is of commensurate complexity. Setup an interrupt on the clock pin, wait for your chip select to be asserted, and on each clock edge shift out the next bit of the current word. Check out [Pat]’s eminently readable code to see how simple it can be.

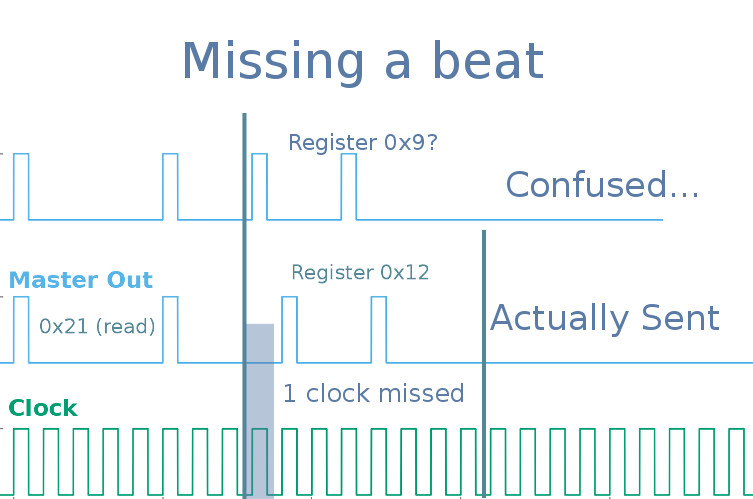
But that last little bit is where the complexity lies. When you’re the master it’s like being the apex predator, the king of the jungle, the head program manager. You dictate the tempo and everyone on the bus dances to the beat of your clock edge. Sure the datasheet for that SRAM says it can’t run faster than 8 MHz but do you really believe it? Not until you try driving that clock a little quicker to see if there’s not a speedier transfer to be had! When you’re the slave you have to have a bit ready every clock edge. Period. Missing even a single bit due to, say, an errant print statement will trash the rest of transaction in ways which are hard to detect and recover from. And your slave code needs to be able to detect those problems in order to reset for the next transaction. Getting stuck waiting to send the 8th bit of a transaction that has ended won’t do.

Check out [Pat]’s very friendly post for a nice refresher on SPI and their discoveries working through the problems of building a SPI slave. There are some helpful tips about how to keep things responsive in a device performing other tasks.

Finding The Goldilocks Cell Module

If adding a cell modem is dealing with a drama queen of a hardware component, then choosing from among the many types of modules available turns the designer into an electronics Goldilocks. There are endless options for packaging and features all designed to make your life easier (or not!) so you-the-designer needs to have a clear understanding of the forces at work to come to a reasonable decision. How else will Widget D’lux® finally ship? You are still working on Widget D’lux®, aren’t you?

OK, quick recap from last time. Cell modems can be used to add that great feature known as The Internet to your product, which is a necessary part of the Internet of Things, and thus Good. So you’re adding a cell modem! But “adding a cell modem” can mean almost anything. Are you aiming to be Qualcomm and sue Apple build modems from scratch? Probably not. What about sticking a Particle Electron inside to bolt something together quickly? Or talk to Telit and put a bare modem on a board? Unless you’re expecting to need extremely high volume and have a healthy appetite for certification glee, I bet you’ve chosen to get a modem with as many existing certifications as possible, which takes us to where we are today. Go read the previous post if you want a much more elaborate discussion of your modem-packaging options and some of the trade offs involved. Continue reading “Finding The Goldilocks Cell Module”

Open Source Company Gives Us A Peek At Financial Innards

Here at Hackaday we are willing to bet that in a universe free of all monetary constraints, many of our readers would leave their day jobs in order to pursue their hardware hobbies full time. Obviously this is only practical for a lucky minority of people (for a wide variety of reasons) but we’re willing to bet that a significant stumbling block is figuring how to do it in the first place. You quit your job, but then what? If more information about starting and sustaining small hardware business’ was available more people would take the plunge to start one. There are software companies with salary transparency but this is only part of the picture and we can’t think of many hardware companies that offer the same. What we really want is to get an image of the entire business end to end; from suppliers to COGS to salary. And we want to see it for hardware.

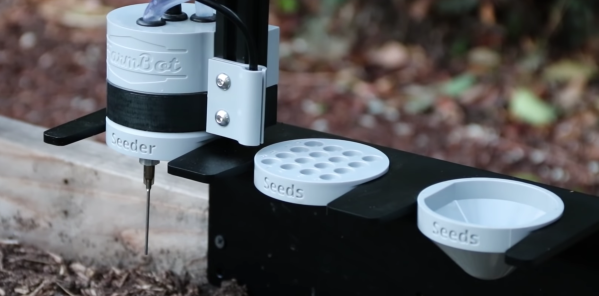
Years ago the first and second Hackaday Prizes captured an entrant named FarmBot whose goal was to build open source robotic farming equipment to make it easier for anyone to grow their own food. A few successful Kickstarters and years later they’ve been shipped multiple versions of the Genesis and Genesis XL robotic farming system and have a sustainable business! And now they’ve decided to open source their business operations too. Suffice to say, this provides quite an uncommon view into the guts of what makes a small open source hardware business tick. Let’s take a closer look!

There is a wealth of information exposed in the company documentation; it’s as though they took their internal wiki and made it public, which we suppose is exactly what happened. The most interesting part for our readers might be the statistics page that tracks costs and quantities for their products. This is where the magic lives. You can use to it see that so far they’ve sold 124 Genesis XL machines at an average selling price of $3,834.34 for $475,458.30 of revenue (it cost $187,200 to build their run of 200 machines). You can also see that each machine has 1,415 parts and takes about 25 hours to assemble. This page is where the true guts of the business live.

Everything else is here too. Here’s where you can learn about what vendors FarmBot uses use logistics, or power, or web infrastructure monitoring. And this is the page with the infamous salary calculation formulas if you want to guess what you’d make as an employee. Then there’s a bunch of boring but important stuff. Fulfillment processes live here, and the consumables they use to support that fulfillment are listed here (with costs!).

One reason we enjoy open source so much is that it affords a wonderful opportunity for people to learn instead of keeping the important parts of a product or process perpetually under wraps. We’re hoping that documentation like this becomes more prevalent and foster an explosion of small hardware companies to follow it.

Bonanza Of Keyswitch Datasheets Fills Our Decks With Clack

Mechanical keyboards use switches of a few different types. But even those types include myriad variations. How’s a hacker to know just exactly what equipment is out there?

For example, if you grab a fellow cube-farmer’s mechanical keyboard (possibly because they clacked on their Cherry Blue’s just one too many times) and angrily rip off a few keycaps to show you’re serious, what do you see? In most cases you expect to see the familiar color and stem shape of a Cherry MX switch or one of its various clones. But you may find a square box around it like a Kailh Box switch. Or the entire stem is a box (with no +) like a Matias switch. Or sometimes it looks like a little pig snout, making it a Kailh Choc.

There is a fairly wide variety of companies which make key switches suitable for use in a keyboard. Many hew to the electrical and mechanical standards implicitly created by the dominant Cherry GmbH’s common switches but not all. So if you’re designing a PCB for such a keyboard and want to use odd switches, you need to check out the Keyboardio keyswitch_documentation repo!

The keyswitch_documentation repo is an absolute treasure trove of hard to find keyswitch datasheets. Finding official information on Cherry MX switches isn’t too hard (keyswitch_documentation has 22 data sheets for MX series switches, and four for ML). But those Kailh Choc’s? Good luck (here it is in keyswitch_documentation). Did you know Tai-Hao made Matias-esque switches as well as weird rubber keycaps? Well they do, and here’s the datasheet.

We’re keeping this one handy until the next time we need data sheets for weird switches. Make sure to send a note if you find something interesting in here that’s worth noting!