Retake On A Wii Remote Controlled Balancing Robot

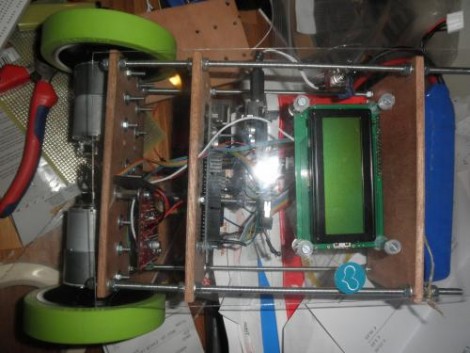
[Tijmen Verhulsdonck] built his own version of a Wii remote-controlled balancing robot. He drew his inspiration from the SegWii, which was built by [Ara Kourchians].

The body is built using one of our preferred fabrication methods; threaded rod makes up a rail system, with three sheets of hard board serving as a mounting structure for the motors, electronics, and battery. This does away with the 9V batteries used on the original SegWii, opting for a very powerful lithium battery perched on the highest part of the assembly. It uses an Arduino as the main microcontroller. That detects roll, pitch, and tilt of the body by reading data from a Sparkfun IMU 5 board (we’re pretty sure it’s this one). Check out the videos after the break. The first demonstrates the robot balancing on its own, then a Wii remote is connected via Bluetooth and [Tijmen] drives it around the room by tilting the controller. The second video covers the components that went into the build.

This is impressive work for a 17-year-old. [Tijmen] lists his material cost at $800 but since he’s Dutch this might not be a USD currency.

Continue reading “Retake On A Wii Remote Controlled Balancing Robot”

Cocktail Cabinet To Be Proud Of

At a glance you might think it’s the real thing, but if you look closer you’ll see that The Distraction Contraption is an extremely well-executed cocktail cabinet recreation that hosts a MAME setup. [Sam Freeman] took pictures of the entire build process and has posted them, along with captions, as a Flickr collection.

The project started after some inspiration from this diminutive cocktail cabinet. He wanted his own version that was closer in scale to the coin-op versions that would have been found in bars a few decades ago. He designed the case to fit a 17″ LCD screen using Google Sketchup. From there, he cut out the parts and routed the edges. The controls feature buttons and joysticks, as you’d expect, but that red cap on the end works as a spinner. He tried out a few different ideas for this auxiliary control. He found that using LEGO gears to map the spinner’s motion to the axle of a mouse worked best. To give the plastic knob a better feel he loaded it with pennies to increase the mass, bringing momentum into play. The final look was achieved using wood-grain contact paper, and custom printed skins.

Gun Turret Built Into A Cake Box

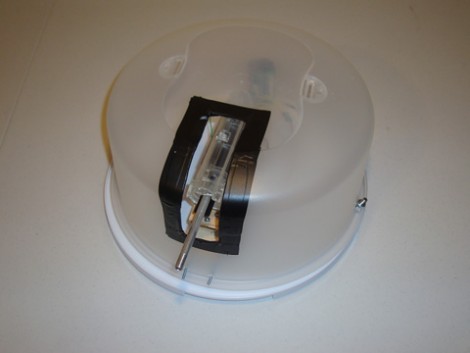
Couch potatoes have a new line of defense thanks to this remote-controlled turret. The gun itself is a hacked down airsoft model. The mount started with a servo motor in the center of a plastic cake box. A thin strip of plywood was added, along with a couple of sliding furniture feet to stabilize the platform as it rotates. A second servo mounts to that platform, which allows the trajectory of the projectile to be adjusted up or down. A PIC 18F4520 controls both of the motors, as well as the firing of the airsoft module, all while listening for commands from an IR receiver. Just adjust the firmware to match an unused device on your universal remote and the power to annoy your roommates will be at the tips of your fingers.

You can see an overview of the build process, as well as a demonstration of the final project in the video after the break. The page linked at the top has a very detailed build log but some of the ‘next’ buttons on that page don’t work for us. Luckily you’ll see a table of contents in the right column which lets you navigate around these bad links.

Continue reading “Gun Turret Built Into A Cake Box”

Kapton Tape Aids In Drag Soldering Surface Mount Parts

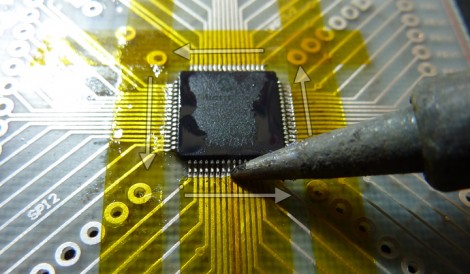
Drag soldering works exactly as its name implies, by dragging a bead of solder across fine-pitch pins you can quickly solder an entire row. The method relies on clean joints, so liquid solder flux is often used to make sure there is good flow. But if you’re drag soldering on boards that you’ve etched yourself the solder can sometimes run down the trace, rather than staying where you want it. Professionally manufactured boards don’t have this problem since they have solder mask covering the copper that doesn’t need soldering. [Ahmad Tabbouch] has a method that uses Kapton tape to act as a temporary solder mask on diy boards.

The process involves several steps. First, three strips are place horizontally across the board, leaving just a portion of the upper and lower pads exposed. Those pads are then tinned with solder, and a light touch with an X-acto knife is then used to score the tape covering the vertical rows of pads. Once the waste as been removed, two more strips are added and those rows are tinned. From there the chip is placed and soldered as we’ve seen before; first tacked in place, then fluxed, and finally drag soldered to complete the connections. This achieves a crisp and clean connection, presumably without the need to clean up your solder mess with solder wick.

Kapton tape resists heat, making it perfect for this process. We’ve also seen it used on hot beds for 3D printers, and as a smoothing surface for sliding mechanisms.

[via Dangerous Prototypes]

Macro Lens And Image Stacking

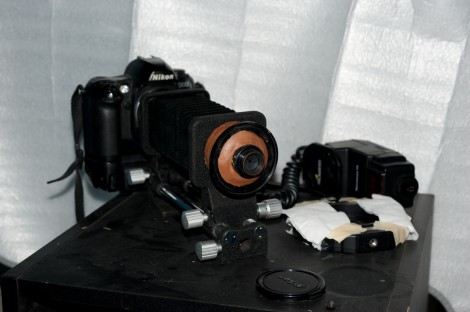
[Samuel Sargent] built his own lens for making stacked macro images.This project, which was completed as part of his senior thesis, utilizes a Zeiss enlarger lens. The aperture ring was broken, making it difficult to tell how much light was being let into the camera. Instead of scrapping the whole thing he turned it around, making it a macro lens when combined with a few other parts. He’s used a Nikon PB-5 belows, a PK-13 extension tube, and a body cap to provide a way to mount the lens to his camera. A hole was added to the body cap using his Dremel, and a liberal dose of epoxy putty seals all of the gaps.

After the break you can see a couple of photos that [Samuel] made of bismuth. He estimates the sharpest focal length by taking a few test shots. Next he captures a series of images, moving the bellows slightly between each shot. Finally, this set is combined using Helicon Focus image stacking software. Maybe for his graduate thesis he can build a mechanized platform to move the subject automatically.

Continue reading “Macro Lens And Image Stacking”

3D Printed Gun Fires Nerf Darts

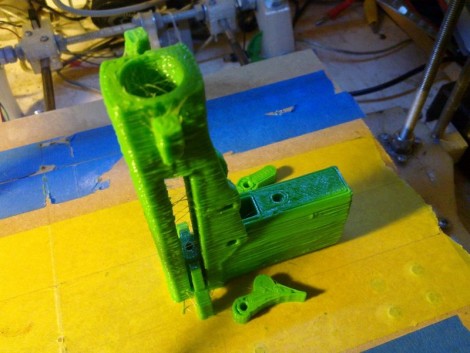
[Vik Olliver] adds a bit more power to what has traditionally been a store-bought toy by designing this printable dart gun. His design prints the follower in the track where it belongs, which means it’s not going to come loose unless the material itself fails. After printing you’ll need to clean up that track just a bit, and ream out the pivot holes for the trigger parts. Two pieces of filament are used as the axles for pivot points and can be melted in place after assembly. A third length of filament acts as a spring, making this a completely plastic gun. Well, not completely; a couple of strong rubber bands deliver the stored energy which sends the Nerf dart on its way. The design is parametric so you can adjust it for the dart dimensions of your choosing before  printing begins.

If you still haven’t managed to boot-strap your own 3D printer don’t fret. You can always give this Nerf dart sniper rifle a try.

3D Printer Gets A Big Resolution Improvement

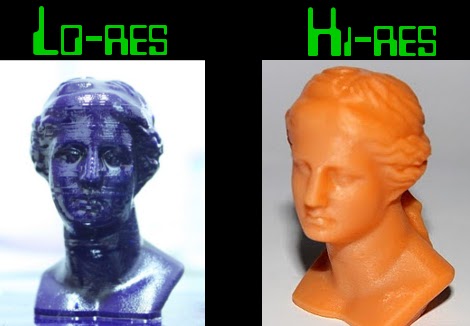
[Jose Carlos Veloso Junior] has been working on his 3D printer to improve the resolution. We looked in on his project back in October when he was printing the blue busts like the one seen above.

We were impressed by the resolution he was able to achieve back then, using liquid resin that is cured with visible light. The resin creates a thin layer on a glass tray, and is cured when a projector shines precisely positioned light from below. The cured resin is then lifted on the Z-axis, and the next layer in the printing process is hardened by the projector’s light.

Well, this newest rendition far outperforms the initial iteration. The bust on the right looks like it’s been hand-buffed to remove the layer lines, but it actually just came off of the printer. [Jose] made a video of the new equipment in action, which you can watch after the break. He’s keeping most of the juicy bits to himself but he did tell us that the improvement he achieved were due to multiple changes in the process. He tweaked the software to use a more precise curing time, the resin formula has been improved, the ability to isolate pixels without hardening resin around them has been stepped up, and he’s made changes to the way the printer is calibrated and how it lifts the hardened model.

This is fantastic. Kudos to you sir!

Continue reading “3D Printer Gets A Big Resolution Improvement”