Printing Your Own Guitar Parts

The white parts that make up the body contours of this guitar have been 3D printed to meet [Bård S D’s] personal specifications. He started designing the pieces last year to add to his Zoybar guitar. Each of the three parts has its own function. The tail piece serves as a floor stand, as well as a hook for hanging the instrument upside down. The wide piece at the top gives the player a place to rest the forearm, and the piece at the bottom serves as a cradle to place on your leg, and contains the jack for the guitar’s pickup. You can see him playing the instrument in the video after the break.

We looked for more information on the Zoybar system but it’s a bit hard to get the facts from that website. We know that the 6-string kit comes standard without frets, and it’ll cost you a pretty penny at around $700. But if it performs as a quality instrument the price isn’t too far out of line.

Continue reading “Printing Your Own Guitar Parts”

Guitar-mounted Camera Documents Your Guitar Hero-ness

[The Longhorn Engineer] wanted to record some of his virtual shredding sessions so he built this camera mount for a Guitar Hero controller. It holds the camera about a foot below the bottom of the controller, pointing up at the guitar and its player. Since the camera is held tightly to the guitar this produces an interesting effect of movement in the background while the foreground is completely stationary. He set out to complete the build using just one piece of acrylic and some fasteners but added an aluminum support piece because the prototype had a bit too much flex to it. The video after the break walks you through the design, the build process, and finishes with a test run.

Continue reading “Guitar-mounted Camera Documents Your Guitar Hero-ness”

Long-range Laser Night-vision

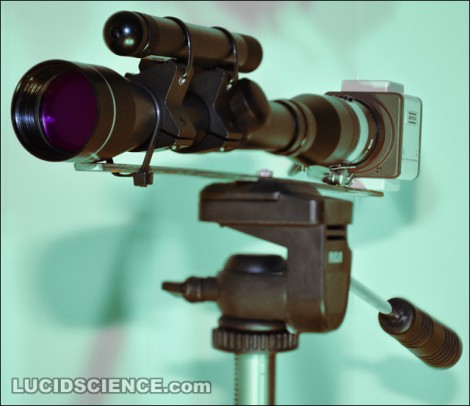
[Oneironaut] is back at it again, churning out yet another great hack in this long-distance night vision build. This isn’t the first time we’ve seen him build a night vision device, you may remember the monocle he put together using the view finder from an old camcorder. This time around he’ll give you look at distant object by using a laser instead of LEDs. He pulled an IR laser diode out of an old CD burner, then used a lens to spread out the dot in order to illuminate a larger area. A standard rifle scope is used as the optics, along with a security camera which can detect the infrared light. As always, he’s done a fantastic job with the images and the write-up. You’ll find his overview video embedded after the break.

Continue reading “Long-range Laser Night-vision”

The Wandering Arduinobot

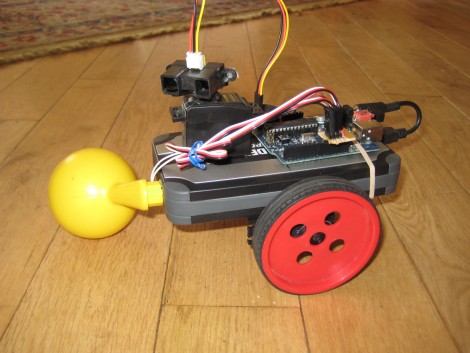
You almost have to love this Arduino based robot just because of the wheels and third leg support. Look closely, do you recognize them? Yep, they’re Capsela parts! That’s a blast from the past and we wonder why we don’t see the strange building toys of yore used in more hacks?

But we digress, this little bugger guy uses continuous rotation servos for locomotion. Perched atop the body is a third servo which scans an IR range finder back and forth to look out for obstacles in its path. The body itself is a Black and Decker rechargeable battery pack called Pocket Power which includes a USB port for a regulated 5V supply. One thing’s for sure, this little guy is fantastic at avoiding pizza and beer… you’ll just have to see for yourself after the break.

Continue reading “The Wandering Arduinobot”

Ski Pole Persistence Of Vision

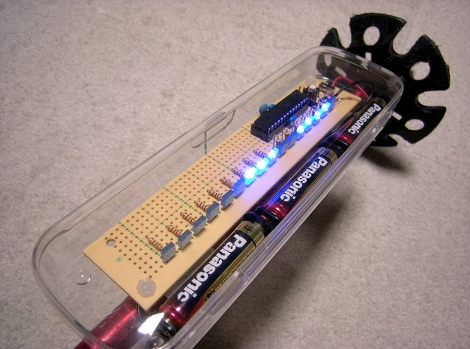
[Powder4u] wanted to make a persistence of vision display for his bicycle but with 50 cm of snow on the ground it’s hard to get out and ride right now. Instead he made this persistence of vision ski-pole accessory. We asked him to share some details and he obliged. It’s made using an Arduino compatible ATmega168, LEDs with resistors, and installed on some protoboard. The enclosure is a clear pencil case, which isn’t water tight but he’s tried to bolster that with some creative scotch tape placement. There’s no sensor to detect which direction the board is moving in so displaying alpha-numeric messages will have some issues, but as you can see he managed to display image data without issue.

We’re used to night skiing with floodlights along the slopes. This would be a fun little thing to have along with you on those dark lift rides.

Learn To Debug Msp430 Chips Using IAR

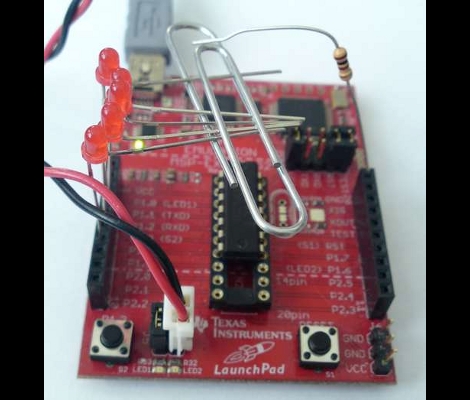
If you haven’t done any debugging with microcontroller programs [Kphlight] posted a follow-along guide for debugging MSP430 chips. You can see above that he’s using the TI Launchpad and has chosen the free (but code limited) IAR Embedded Workbench that is one of the IDE’s that TI provides for the kit. The example builds a Pomodoro timer with just five LEDs and one resistor. You’ll flash the code to the chip, step through each line of the firmware, and learn how to manipulate register data during code execution.

It’s a great primer for the uninitiated, and we’d love to see one using open-source tools like DDD and GDB. If you do write one, don’t forget to send us a tip about it. If you want to give open source a try with this hardware check out our own tutorial.

WWII’s Top Cryptography Comes To A Child’s Toy

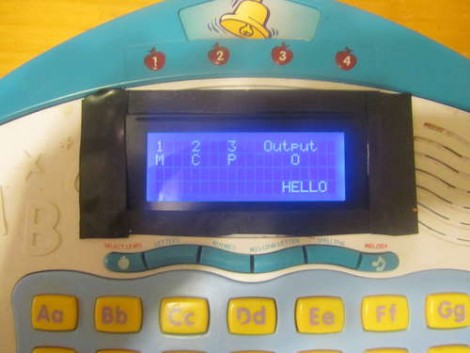
This toy has some upgraded internals that turn it into an Enigma machine. We absolutely love the idea, as it takes a toy that your child may have grown out of, and uses it to provide teachable moments dealing with both history and mathematics. But who are we kidding? We want to make one just because it’s a fun project.

[Sketch] grabbed this toy from a thrift store because it has a full keyboard that he can use to make his own machine. It’s powered by an Arduino, with a four-line character LCD display taking the place of the original. His post covers the methods he used to figure out the keyboard wiring, and also contains a cursory overview of how the Enigma Machine functions. See a video of the finished project after the break.

If this wet your appetite, also check out the paper Enigma Machine we covered during Hackaday’s first year.

Continue reading “WWII’s Top Cryptography Comes To A Child’s Toy”