With the size of electronic parts and batteries these days, very small items are obviously becoming more and more viable. [Yann Guidon] has made some awesome pieces of LED jewelry using a minimal number of surface mount parts and a small lithium-ion battery. To make the jewelry stand out a bit, other than just blinking on and off, these LEDs blink a short message in Morse code.
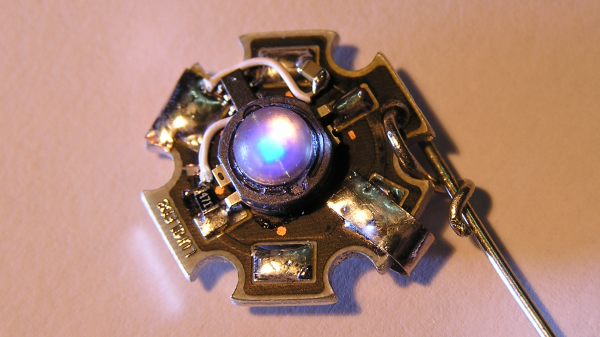
This is an update and open sourcing of some work that [Yann] did a few years ago, and the iterations have resulted in a smaller design. But the main part of the latest version is the addition of the Morse code blinking using a small microcontroller. The microcontroller [Yann] used is the SMD version of the PIC10F200, a small, 8 pin PIC microcontroller. This, a resistor and a metal clip are soldered to pads on a Luxeon Star LED. The LEDs are undervolted so they’re not too bright, so the heat sink isn’t really needed, but it’s a good size for the components. Because the LEDs don’t generation much heat, the back of the aluminum frame that the LED is on is carved out a bit so that the small lithium-ion battery can go there.
The final component is the code itself, and [Yann] has released it as an assembly file. An associated text file contains the text of the message that you want the earrings to blink. The text file can contain up to 190 bytes. A shell script converts the text to a file that can be included in the asm file. After that script is run, assemble the code and flash it to the PIC and you’re done!
We’ve seen a couple of other LED jewelry projects done, including this LED engagement ring, and these tiny light-up earrings. You can see video of [Yann]’s project in the video below:
Continue reading “Morse Code Blinking Jewelry”
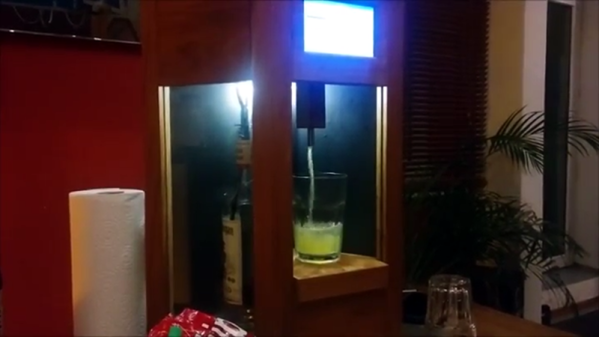
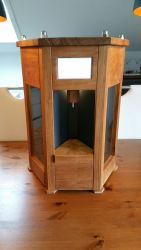 Instead of a sliding wall panel, [HighwingZ] has built a hexagonal container. Five of the six sides contain bottles to fill the drink with, the last panel contains the spigot and a spot for the glass. The machine works by weighing the liquid that gets poured into the glass using a load cell connected to a HX711 load cell amplifier. An aquarium pump is used to push air into whichever bottle has been selected via some magnetic valves which forces the liquid up its tube and into the glass. A simple touch screen UI is used so the user can select which drink and how much of it gets poured. All of this is connected to a Raspberry Pi to control it all.
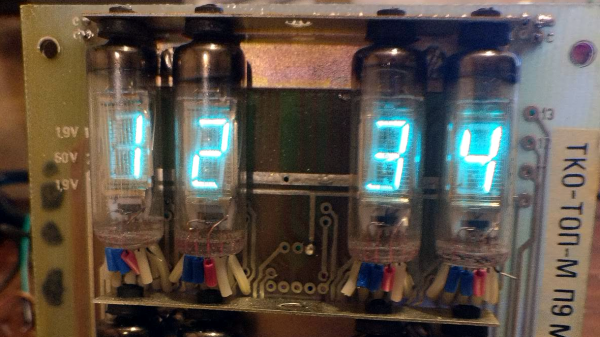
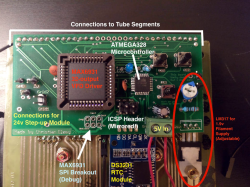 After getting the VFDs lighting up and figuring out the circuitry on the back, [InThePartsBin] decided that a clock was the best thing to build out of it. It was decided that a specialized VFD driver chip was the easiest way to make the thing work, so a MAX6934 was ordered. To give the clock some brains, an ATmega328 was recruited and to keep time, [InThePartsBin] had some DS3231 real-time clock modules left over from a previous project, so they were recruited as well. A daughterboard was designed to sit on the back of the vintage board and hold the ‘328 and the VFD driver chip.