Haunting A Smart Mirror With Hue And Alexa

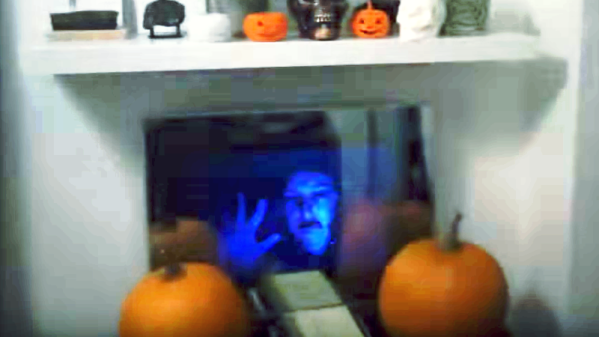
So, your smart mirror has been running for a while, but Halloween is coming up and you want to come up with some cool Halloween stuff to display on the mirror. If you’re looking for ideas, check out [Ben Eagan]’s cool Haunted Smart Mirror which connects the mirror via a Raspberry Pi with Amazon Alexa and Phillips Hue lighting.

[Ben] points to another of his blog pages for those readers interested in the nuances of setting up Alexa with a smart mirror, while concentrating on communication with the Hue bridge and creating the setup for a new Alexa command in this post. Dealing with the Phillips Hue API seems fairly straightforward: Get the IP address of your Hue bridge from your router and the ID of your lights from the Hue app and you’re set to send commands via HTTP. [Ben] includes a Python script to make the lights flicker, which you can modify for your own lights as you wish. Once that’s done, you’ll need to set up the intent that Alexa listens for, and then modify the AWS lambda function that sends commands to the Pi. When the command shows up in the queue on the Pi, any commands [Ben] wants to play are fired off – in this case, a video is played and the Hue lights start to flicker.

There’s no mention of security in the article, so that may be worth a little attention with Alexa and the Hue, but with Halloween coming up fast even if you haven’t built a magic mirror yet, if you’ve got Hue lights, this would be a great, quick, Halloween idea. Especially if you could combine it with your outside lights so that Trick-or-Treaters can join in on the fun. Maybe you’d prefer looking up passing planes using Alexa? Or how about getting your fish to talk?

Continue reading “Haunting A Smart Mirror With Hue And Alexa”

Dual Direction Gaming/Dining Room Beam Lights

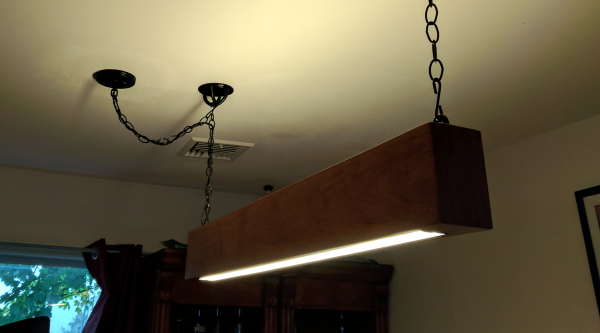
Sometimes, you just can’t find something you want, and that’s when you break out the tools and get dirty with a bit of DIY. Reddit user [JaredBanyard] wanted a nice beam light for the dining room/gaming room. He ended up building one that shone both downward, on the table, and upward, adding some light to the room.

Warm white LED strip lighting was chosen, and two aluminum channels were glued together to hold them. After wiring the four LED strips together a diffuser was placed over them and then they were wired up and turned on to check the amount of light. With two strips per channel, even with the diffuser, there was plenty.

Each pair of channels were set into the main housing, which is made from Sirari hardwood. Two long outside side pieces make for a great looking final product, and the end pieces are sandwiched between the two outside pieces. After a bit of sanding and an application of matte polyacrylic, transformers were screwed inside and then the channels were placed on top. The circuitry was wired to a Z-Wave dimmer to control the lights remotely.

[JaredBanyard]’s put together a bill of materials and there are plenty of pictures. It’s a great, unique, light for the room, which includes a Duchess gaming table from boardgametables.com. For more lighting articles, check out this 2017 Hackaday Prize entry article on modular rail lighting, or this article about adding intelligence to your lighting solution.

[via Reddit]

Quick And Easy NTP Clock

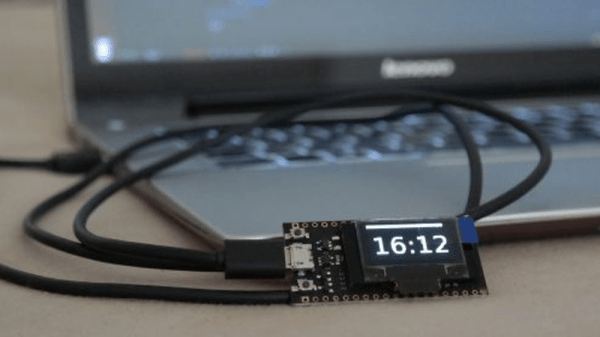
[Danman] got an ESP32 with built-in OLED display, and in the process of getting a clock up and running and trying to get a couple of NodeMCU binaries installed on it, thought he’d try rolling his own.

[Danman] used PlatformIO to write the code to his ESP. PlatformIO allowed [Danman] to browse for a NTP library and load it into his project. After finding the NTP library, [Danman] wrote a bit of code and was able to upload it to the ESP. When that was uploaded [Danman] noticed that nothing was being displayed on the OLED, but that was just a simple matter of tracking down the right address to use when setting up the library for his OLED. Lastly, [Danman] created a large font to display the time with and his mini-clock was done!

It’s always nice to see someone be able to go from buying a board to having a demo put together, and it’s getting easier and easier. Check out this OLED watch, and this pocket watch doesn’t use OLEDs, but it still looks pretty cool.

Teletype Machine Resurrected

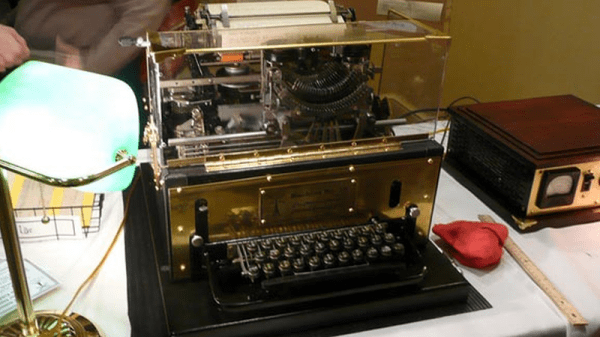
A teleprinter is, at its heart, an automatic typewriter.  It’s electrically controlled and has some smarts to be able to decode an incoming message and has something that will move the keys.   These printers have been in use since the late 1800’s and [AethericLtd] have refurbished an old 1930’s design and given it a bit of steampunk flair.

As is common with older mechanical devices that have been sitting for extended periods of time, the first thing this machine needed was a bath. The machine was separated into its three main parts and soaked in a degreasing solvent. The keyboard was the dirtiest, so it got an overnight soak. Since little of the mechanism was electrical, most of it could be submerged which helped with the cleaning.

The next step in the restoration was lubrication. In order to do a proper job, the manuals (which were available online) were consulted and synthetic motor oil used for lubrication. Once all the hundreds of parts were oiled, [AethericLtd] started working on the wiring. The original wiring in this machine was called Deltabeston – a type of wire by General Electric which uses asbestos insulation. To play it safe, that wire was left alone. The selector magnet required only 4 volts to pull up, but 4 volts wasn’t enough to run the machine. The power supply used was a 120 VDC, 200 mA supply through a 2 KΩ, 10 W resistor.

Once everything was back together and working, [AethericLtd] could take machine out and show it off. The website describes not only the restoration process but also the setup, how to connect to the machine and how to communicate with the machine. Great work! If you are interested in these machines, there have been a few Teleprinter projects on the site before: this one has been modified to connect to a modern modem, and this one prints out tweets.

Continue reading “Teletype Machine Resurrected”

Playing Mario On An Oscilliscope

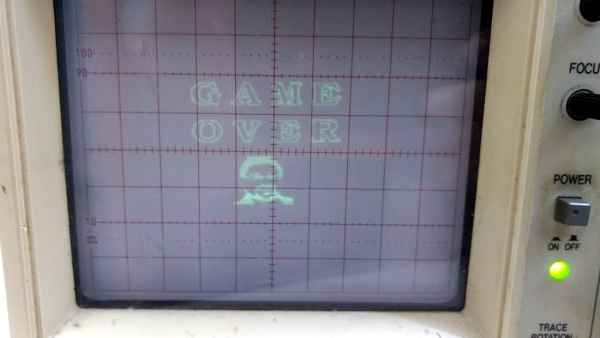
Any display can be connected to a microcontroller and used as a display if you know the protocol to use and have enough power in your micro. Sometimes, an odd display is used just “because it’s there.” This seems to be the case for Reddit user [phckopper], who has used a STM32 and a PS2 joystick to play a version of a Mario game on an oscilloscope.

There’s not many technical details but [phckopper] lets us know that the rendering is done using the SPI on the STM, transferred via DMA, which is synchronized to two saw-tooth waves that are fed in to the X and Y axes of the oscilloscope.  The Z axis, which controls the brightness of the dot, is fed from the MOSI. By making the oscilloscope range all over the screen, similar to the way a CRT’s gun does, [] is able to draw sprites, rather than vector graphics. The display has a resolution of 400×400 and each sprite is 16×16. The input is from a PS2 joystick connected to [phckopper]’s PC, with the information communicated over UART using a simple protocol.

We don’t get to see much of the game in the video after the break, but it’s a pretty impressive job nonetheless, especially when you realize that [phckopper] did this project when he was just sixteen! There are a couple of other oscilloscope projects here at Hackaday, like this one, a great version of pong played on the ‘scope, or this one, showing off some great graphics.

Continue reading “Playing Mario On An Oscilliscope”

Nerf Gun Ammo Counter And Range Finder

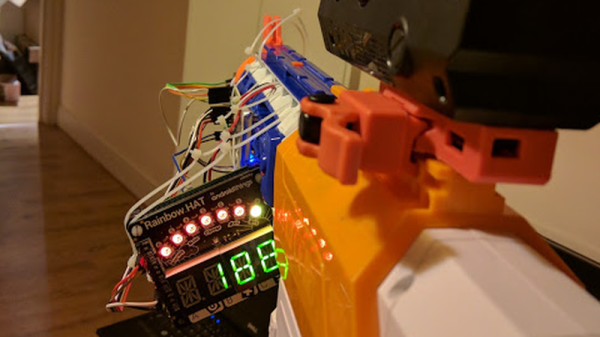
The proliferation of breakout boards that the DIY electronics movement has allowed has been staggering. Buy a few different boards, wire them together to a microcontroller or credit-card computer (both on their own breakout board) and write a bit of code, and you can create some really interesting things. Take Reddit user [Lord_of_Bone]’s Nerf Gun ammo counter and range finder, for example, a great example of having a great idea and looking around for the ways to implement it.

For the range finder, [Lord_of_Bone] looked to an ultrasonic rangefinder. For the ammo counter, [Lord_of_Bone] chose a proximity sensor. To run everything, the Raspberry Pi Zero was used and the visuals were supplied by a Rainbow Hat. The range finder is self-explanatory. The proximity sensor is located at the end of the gun’s muzzle and when it detects a Nerf dart passing by it reduces the ammo count by one. Blu-tack is used to hold everything in place, but [Lord_of_Bone] plans to use Sugru when he’s past the prototype stage.

The one problem [Lord_of_Bone] has with the build is that there’s no way to tell how many Nerf bullets are in the magazine. Currently the wielder must push a button when reloading to reset the count to a preset amount. We’re sure that [Lord_of_Bone] would appreciate any suggestions the Hack-A-Day crowd could offer.

[Lord_of_Bone] gives a full bill of materials, Python code, a lot of pictures and step-by-step instructions so that you, too, can determine how far away your target is, and whether or not you have enough ammo to hit them. We have quite a few Nerf mods on the site, and [Lord_of_Bone] could take a look at this article about how to keep track of your Nerf ammo, and here’s a different method of determining if a Nerf dart has been fired (and measuring its speed.)

[via Reddit] Continue reading “Nerf Gun Ammo Counter And Range Finder”