Non-standard circuit boards

Non-standard Circuits: Jazz For Electrons

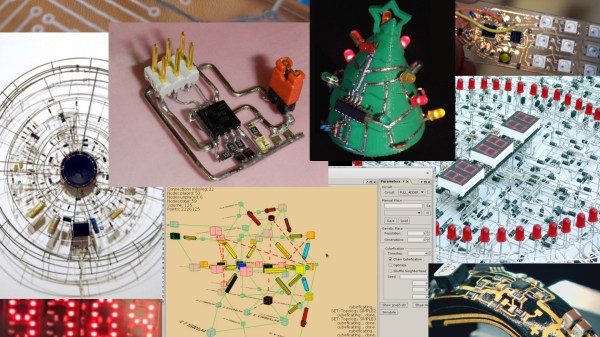
How creative are you when you make your circuit boards? Do you hunt around for different materials to use for the board? As long as it’s an insulator and can handle the heat of a soldering iron, then anything’s fair game. Or do you use a board at all? Let’s explore some options, both old favorites and some you may not have seen before, and see if we can get our creative juices flowing.

Transparent Circuit Boards

Let’s start with the desire to show more circuit and less board. For that we can start with [CNLohr]’s circuits on glass, usually microscope slides. What’s especially nice about his is that he provides detailed videos of the whole process, including all the failed things he tried along the way. Since he didn’t start with copper clad board, he instead glued his copper sheet to the glass using Loctite 3301. That was followed by the usual etching process, though with plenty of gotchas along the way.

In the end, he made a number of circuits, including an LED clock with the LEDs on the glass itself, and even attempted leading the community in making a glass keytar. The latter didn’t work out, but the resulting glass circuits are a work of art anyway.

What about making a transparent circuit board out of acrylic? [Frank Zhao] attempted just that by laser cutting troughs into the acrylic for the traces, and then drawing in nickel ink. But something in the ink ate into the acrylic, and as if that wasn’t bad enough, the voltage drop across the nickel was too high for his circuit. Suggestions were made in the comments for how to solve these problems, but unless we missed it, we haven’t seen another attempt yet.

But we’ve only just begun. What if you wanted even more transparency?

Continue reading “Non-standard Circuits: Jazz For Electrons”

Impressive Drawing Machine For One Made So Simply

Not all of us have CNC machines, laser cutters and 3D printers, and I’ll bet most of us didn’t start out that well equipped. The low-cost drawing machine that [jegatheesan] made for his daughter reminds us that you can prototype, and then make a functioning mechanical Da Vinci with very basic materials and mostly hand tools. He also wrote his own drawing software, with an interface that has its own simplicity.

There really are a lot of things to like about [jegatheesan]’s project. He first works out the math himself by doing something the likes of which we’ve all enjoyed, digging out the old school trigonometry and algebra books for a refresher. Then he got started on his prototype, made using a cardboard tube for the main support and straws and safety pins for the drawing arms. He already had a motor shield for his Arduino but it supported only 2 servos, so he made his own 3-servo shield. In the end, the prototype told him he had to redo some calculations, allowing him to move on to the final machine.

One thing we can say about the final machine is that hot glue must truly be the maker’s connect-all — you won’t find many screws here. Even the servos are held in place with copious quantities of glue. And the mechanism for lifting the pen is also quite clever. The whole thing is mounted on two vertical guide rods, so that it can easily slide up and down. To get it to actually move up and down, he glued a toy car wheel off-center on a servo arm. When the servo turns, the off-center wheel acts like a cam, pushing down on the wooden base to either lift the machine up or lower it down, depending on where the wheel is in its rotation.

See his hackaday.io page for the full step-by-step development process. But first check out the videos below to see how impressive such a simply made machine is in action.

Continue reading “Impressive Drawing Machine For One Made So Simply”

Coca-Cola's 3D sign

Coca-Cola’s New 3D Times Square Sign Invokes Inceptionism

Coca-Cola has updated their sign in Times Square, and this one has a mesmerizing 3D aspect to it, giving the spooky feeling you get from watching buildings curl up into the sky in the movie, Inception. That 3D is created by breaking the sign up into a 68’x42′ matrix of 1760 LED screens that can be independently extended out toward the viewer and retracted again. Of course, we went hunting for implementation details.

Moving Cube Module
Moving Cube Module

On Coca-Cola’s webpage listing the partners involved in putting it together, Radius Displays is listed as responsible for sign design, fabrication, testing and installation support. Combing through their website was the first step. Sadly we found no detailed design documents or behind-the-scenes videos there. We did find one CAD drawing of a Moving Cube Module with a 28×28 matrix of LEDs. Assuming that’s accurate then overall there are 1,379,840 LEDs — try ordering that many off of eBay. EDIT: One behind-the-scenes video of the modules being tested was found and added below.

So the patent hunting came next, and that’s where we hit the jackpot. Read on to see the results and view the videos of the sign in action below.

Continue reading “Coca-Cola’s New 3D Times Square Sign Invokes Inceptionism”

Raspberry Pi automated greenhouse

Raspberry Pi Is The Brains Behind Automated Greenhouse

[Asa Wilson] and his wife picked up a 10’x12′ greenhouse from Harbor Freight that for their location required some serious changes, understandable since they’re in Colorado on the western slope of Pike’s Peak where the winds are strong and the normal growing season is short. After assembling it on a concrete footing and adding some steel bracing, they got to work on adding an environment management system based around a Raspberry Pi. Read on for a look at the modifications they made.

Continue reading “Raspberry Pi Is The Brains Behind Automated Greenhouse”

Pneumatic fighting robot arm concept

From Foot Pump Cylinders To Pneumatic Robot Fighting Arm

Halfords Essentials foot pump

[James Bruton] is well known for making robots using electric motors but he’s decided to try his hand at using pneumatics in order to make a fighting robot. The pneumatic cylinders will be used to give it two powerful punching arms. In true [James Bruton] fashion, he’s started with some experiments first, using the pneumatic cylinders from foot pumps. The cylinders he’s tried so far are taken out of single cylinder foot pumps from Halfords Essentials, costing only £6.29, around $8.11 US. That’s far cheaper than a commercial pneumatic cylinder, and perfectly adequate for this first step.

He did have to hack the cylinder a little though, besides removing it from its mounting and moving it to a DIY frame. Normally when you step down on a foot pump’s lever, you compress the cylinder, forcing air out the hose and into whatever you’re inflating. But he wanted to push air in the other direction, into the hose and into the cylinder. That would make the cylinder expand and thereby extend a robot fighting arm. And preferably that would be done rapidly and forcefully. However, a check valve at the hose outlet prevented air from entering the cylinder from the hose. So he removed the check valve. Now all he needed was a way to forcefully, and rapidly, push air into the hose.

For that he bought a solenoid activated valve on eBay, and a compressor with a 24 liter reservoir and a decent air flow rate of 180 liters per minute. The compressor added £110 ($142) to the cost of his project but that was still cheaper than the batteries he normally buys for his electric motor robots.

After working his usual CAD and 3D printing magic, he came up with an arm for the cylinder and a body that could fit two more valve activated cylinders to act as a working shoulder. A little more 3D printing and electronics, and he had 3 switches, one for each valve and cylinder. He then had the very successful results his experiment. You can see the entire R&D process in the video below, along with demonstrations of the resulting punching robot arm. We think it’s fairly intimidating for a first step.

Continue reading “From Foot Pump Cylinders To Pneumatic Robot Fighting Arm”

The Enigma Enigma: How The Enigma Machine Worked

To many, the Enigma machine is an enigma. But it’s really quite simple. The following is a step-by-step explanation of how it works, from the basics to the full machine.

Possibly the greatest dedicated cipher machine in human history the Enigma machine is a typewriter-sized machine, with keyboard included, that the Germans used to encrypt and decrypt messages during World War II. It’s also one of the machines that the Polish Cipher Bureau and those at Britain’s Bletchley Park figured out how to decipher, or break. Most recently the story of how it was broken was the topic of the movie The Imitation Game.

Let’s start with the basics.

Continue reading “The Enigma Enigma: How The Enigma Machine Worked”

Self playing violin - Phonoliszt Violina

Self-Playing Violin: Eighth Wonder Of The World

[Martin], of the YouTube channel [WinterGatan], recently uploaded a video tour of the Phonoliszt Violina, an orchestrion, or a machine that plays music that sounds as though an orchestra is playing. The interesting thing about this one is that it plays the violin. At the time of its construction, people weren’t even certain such a thing would be possible and so when [Ludwig Hupfeld] first built one around 1910, it was considered the eighth wonder of the world.

The particular one shown in the video is at the Speelklok Museum in Utrecht, the Netherlands. The bow is a rotating cylinder with 1300 horsehairs. To get the sound of a single violin, it actually uses three of them. Rather than the bow being moved to press against the strings, the violins tilt forward to make their strings contact the rotating bow. Only one string is used per violin, hence the reason that three violins are needed. The volume is controlled by making the bow rotate faster for more volume, and slower for less. Mechanical fingers press against the strings with cork to more closely imitate the human fingertip.

The machine consists of both the mechanical violin and piano under the guidance of two paper rolls, with one roll playing at a time. See and hear it in action in the video below.

Continue reading “Self-Playing Violin: Eighth Wonder Of The World”