Harvesting Copper From Microwave Ovens

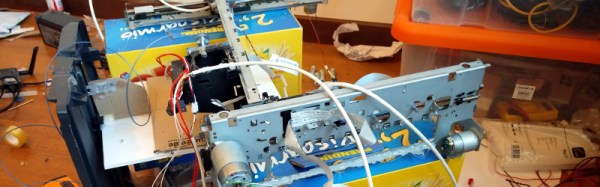
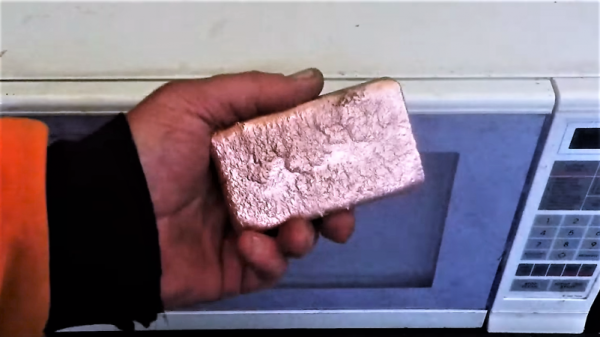
Obsolete appliances were once a gold mine of parts, free for the taking with a few snips of your diagonal cutters. Times have changed, though, and most devices yield only a paltry supply of parts, so much so that only by harvesting raw materials can you get much value out of them. And so we have this example of reclaiming copper from used microwave ovens.

The primary source of copper in most microwaves is the transformer, which we usually see re-tasked for everything from spot welders to material handling electromagnets. But the transformer is not the only source of the red metal; [eWaste Ben] also harvests it from relay coils and the main coil and shading coils of the fan motor.  The bounty is melted down in an electric foundry and cast in a graphite mold into a lovely ingot.

Unless you’re into repeatedly casting copper trinkets, a large bar of reclaimed copper might not be something you have a burning need to possess. But bearing in mind that copper can go for about $2.50 a pound at the scrap yard, there’s some money to be made, especially with dead microwaves essentially free for the taking. As [Ben] points out, taking the extra step to melt and cast the copper harvested from microwaves makes no sense if all you’re going to do is sell the scrap, but it’s nice to know how to do it just the same.

Continue reading “Harvesting Copper From Microwave Ovens”

Determining Kibble Level Via Time-of-Flight

[WTH] is building an IoT kitty food dispenser. There are a few of these projects floating around that measure out portions very sensibly — some use screws to dispense a set amount of food at a time, some measure the weight of the remaining stockpile. This build is definitely not that. This kitty food monitor uses a time of flight sensor to determine the remaining level of food in a hopper. [WTH]’s feeder lets the cat eat all the grub it wants, then alerts the hooman when kibble levels drop below a certain level.

The project starts with one of those pet food dispensers that consist of a hopper that gravity feeds into the food bowl. As the animal eats that food, more dispenses into the bowl. Attached to the lid is an ESP8266 connected to an Adafruit time of flight sensor. This reports the kibble level in centimeters, which is good enough for [WTH]’s purposes. Sensor data is logged to a Google Drive spreadsheet, published as a graph through M2X (AT&T’s IOT service), and texted to [WTH]’s smart watch via IFTTT.

Look for a plethora of Tweeting, Instagramming, and otherwise automated feeding of the cat overlords right here on Hackaday. Check out automatic cat feeder dispenses noms, wants cheezburger, and a cat feeder made with laminator parts.

A Functioning 3D Printer For 10€

There was a time when crowdfunding websites were full of 3D printers at impossibly low prices. You knew that it would turn out to be either blatant vaporware or its delivery date would slip into the 2020s, but still there seemed always to be an eager queue ready to sign up. Even though there were promised models for under $200, $150, and then $100, there had to be a lower limit to the prices they were prepared to claim for their products. A $10 printer on Kickstarter for example would have been just a step too far.

There is a project that’s come close to that mark though, even though the magic figure is 10 euros rather than 10 dollars, so just short of 12 dollars at today’s exchange rate. [Michele Lizzit] has built a functioning 3D printer for himself, and claims that magic 10€ build price. How on earth has he done it? The answer lies in extensive use of scrap components, in this case from broken inkjet printers and an image scanner. These provide all the mechanical parts for the printer, leaving him only having to spend his 10€ on some hot end parts and the printer’s electronics. In an unusual move, the frame of the machine appears to come from a set of cardboard biscuit boxes, a master stroke of junk box construction.

The claimed resolution is 33µm, and using the position encoders from the inkjet printers he is able to make it a closed loop device. We salute his ingenuity in building such an impressive printer from so little, and were we ever locked by the bad guys in a room full of IT junk and lacked a handy escape device, we’d wish to be incarcerated with [Michele] any day over [Angus MacGyver] or [Sgt. Bosco BA Baracus].

You can see the printer in action in the video below the break.

Continue reading “A Functioning 3D Printer For 10€”

Hackaday Prize Entry: Fochica Alerts You

It seems like no one should need to be reminded about the importance of not leaving children in cars, but it still happens. The Fochica project is a Hackaday Prize entry that equips the family minivan with car seat monitors—the name comes from FOrgotten CHild in Car Alert.

It’s an Open Source project consisting of a Bluetooth LE-equipped Arduino that monitors whether the seat is empty or occupied. Paired with a phone app, Fochica monitors pressure sensors and the seat belt’s reed switch to determine whether there’s a kid there. The user’s app checks whether he or she is within Bluetooth range of the car, while also checking whether the kid’s seat is occupied. When the first comes up false and the second true, an alert is sounded.

We could see this technology also being useful for home automation tasks–for instance, reminding you to close the garage door before you go to bed. It’s a great project, and also one of the finalists in the Best Product challenge of the Hackaday Prize this year.

Continue reading “Hackaday Prize Entry: Fochica Alerts You”

Design And 3D Print Robots With Interactive Robogami

Internals of 3D printed “print and fold” robot. [Image source: MIT CSAIL]
Robot design traditionally separates the body geometry from the mechanics of the gait, but they both have a profound effect upon one another. What if you could play with both at once, and crank out useful prototypes cheaply using just about any old 3D printer? That’s where Interactive Robogami comes in. It’s a tool from MIT’s Computer Science and Artificial Intelligence Laboratory (CSAIL) that aims to let people design, simulate, and then build simple robots with a “3D print, then fold” approach. The idea behind the system is partly to take advantage of the rapid prototyping afforded by 3D printers, but mainly it’s to change how the design work is done.

To make a robot, the body geometry and limb design are all done and simulated in the Robogami tool, where different combinations can have a wild effect on locomotion. Once a design is chosen, the end result is a 3D printable flat pack which is then assembled into the final form with a power supply, Arduino, and servo motors.

A white paper is available online and a demonstration video is embedded below. It’s debatable whether these devices on their own qualify as “robots” since they have no sensors, but as a tool to quickly prototype robot body geometries and gaits it’s an excitingly clever idea.

Continue reading “Design And 3D Print Robots With Interactive Robogami”

Superconference Interview: Alan Yates

In 2015, virtual reality was the future, which means we should all have it right now. One of the most technologically impressive VR sets is the HTC Vive, an amazing piece of kit that’s jam-packed with sensors and has some really cool tech going on inside it.

One of the developers of the HTC Vive and the ever-important ‘Lighthouse’ position sensors is [Alan Yates]. He’s of Valve and gave a talk at last year’s Superconference on Why the Lighthouse Can’t Work. Being able to determine the absolute position of the Valve’s headset is hard, but absolutely necessary for VR. Anything else would be an incomplete VR experience at best, and give you nausea at worst.

We sat down with [Alan] after his talk last year, and now that interview is up. You can check that out below.

Continue reading “Superconference Interview: Alan Yates”

Raspberry Pi automated greenhouse

Raspberry Pi Is The Brains Behind Automated Greenhouse

[Asa Wilson] and his wife picked up a 10’x12′ greenhouse from Harbor Freight that for their location required some serious changes, understandable since they’re in Colorado on the western slope of Pike’s Peak where the winds are strong and the normal growing season is short. After assembling it on a concrete footing and adding some steel bracing, they got to work on adding an environment management system based around a Raspberry Pi. Read on for a look at the modifications they made.

Continue reading “Raspberry Pi Is The Brains Behind Automated Greenhouse”