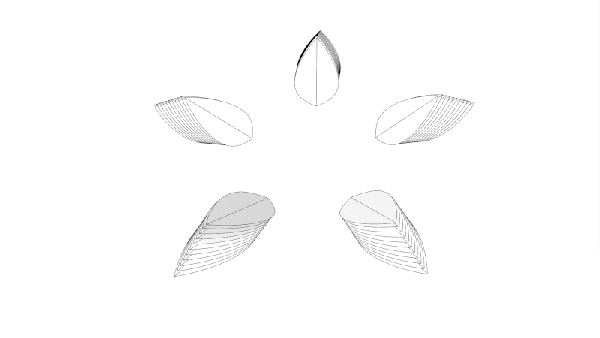
E-Paper Pocket Map Goes Where Your Phone Can’t

It’s easy to take for granted the constantly-connected, GPS-equipped, navigation device most of us now carry in our pockets. Want to know how to get to that new restaurant you heard about? A few quick taps in Google Maps, and the optimal route given your chosen transportation method will be calculated in seconds. But if you ever find yourself lost in the woods, you might be in for a rude awakening. With no cell signal and a rapidly dwindling battery, that fancy smartphone can quickly end up being about as useful as a rock.

Enter the IndiaNavi, a modernization of the classic paper map that’s specifically designed to avoid the pitfalls that keeps your garden variety smartphone from being a reliable bushcraft tool. The color electronic paper display not only keeps the energy consumption low, but has unbeatable daylight readability. No signal? No problem, as the relevant maps are pre-loaded on the device.

Besides the 5.65 inch e-paper display from Waveshare, the India Navi features a L96 M33 GPS receiver and ESP32-WROOM-32 microcontroller. The 3D printed enclosure that holds the electronics and the lithium pouch battery that powers them is still in the early stages, but we like the book-style design. The focus on simplicity and reliability doesn’t end with the hardware, either. The software is about a straightforward as it gets: just boot the IndiaNavi and you’re presented with a map that shows your current position.

With the rise of easily hackable e-paper displays, we’re excited to see more concepts like the IndiaNavi which challenge our ideas on how modern electronics have to function and be used.

Vintage Remote Control Gets Bluetooth Upgrade

This swanky Magnavox remote is old enough to predate the use of infrared, and actually relies on ultrasound to communicate with the television. It’s a neat conversation starter, but not terribly useful today. Which is why [Chad Lawson] decided to gut the original electronics and replace it with a Adafruit Feather 32u4 Bluefruit LE that can actually talk to modern devices.

We know, we know. Some in the audience will  probably take offense to such a cool gadget being unceremoniously torn apart, but to be fair, [Chad] does say he has a second one that will remain in its original state. Plus a quick check on eBay shows these old remotes don’t seem to be particularly rare or valuable. In fact, after some browsing through the recently concluded auctions, we’re fairly sure he paid $27 USD for both of these remotes.

Anyway, [Chad] found that a piece of perfboard in his collection just happened to be nearly the same size as the PCB from the remote, which made the rest of the conversion pretty straightforward. He simply had to mount tactile switches on one side of the perfboard so the remote’s original buttons would hit them when pressed, and then wire those to the Adafruit on the other side. We know there’s a 3.7 V 500 mAh pouch battery in there someplace as well, though it’s not immediately clear where he hid it in the images.

The code [Chad] came up with tells the Adafruit to mimic a Bluetooth Human Interface Device (HID) and send standard key codes to whatever device pairs with it. That makes it easy to use as a media remote on the computer, for example. We’ve seen something similar done with the ESP32, if you’ve already got one in the parts bin and are looking to revamp a remote control of your own.

At the end of the write-up, [Chad] mentions he may try developing an ultrasonic receiver that can pick up the signals from the unmodified remote control. That would be a nice way to bring this whole thing full circle, and should appease even the most hardcore vintage remote control aficionados.

WiFiWart Linux Pentesting Device Gets First PCBs

When we last checked in on the WiFiWart, an ambitious project to scratch-build a Linux powered penetration testing drop box small enough to be disguised as a standard phone charger, it was still in the early planning phases. In fact, the whole thing was little more than an idea. But we had a hunch that [Walker] was tenacious enough see the project through to reality, and now less than two months later, we’re happy to report that not only have the first prototype PCBs been assembled, but a community of like minded individuals is being built up around this exciting open source project.

Now before you get too excited, we should probably say that the prototypes didn’t actually work. Even worse, the precious Magic Smoke was released from the board’s Allwinner A33 ARM SoC when a pin only rated for 2.75 V was inadvertently fed 3.3 V. The culprit? Somehow [Walker] says he mistakenly ordered a 3.3 V regulator even though he had the appropriate 2.5 V model down in the Bill of Materials. A bummer to be sure, but that’s what prototypes are for.

Even though [Walker] wasn’t able to fire the board up, the fact that they even got produced shows just how much progress has been made in a relatively short amount of time. A lot of thought went into how the 1 GB DDR3 RAM would get connected to the A33, which includes a brief overview of how you do automatic trace length matching in KiCad. He’s also locked in component selections, such as the RTL8188CUS WiFi module, that were still being contemplated as of our last update.

Multiple boards make better use of vertical space.

Towards the end of the post, he even discusses the ultimate layout of the board, as the one he’s currently working on is just a functional prototype and would never actually fit inside of a phone charger. It sounds like the plan is to make use of the vertical real estate within the plastic enclosure of the charger, rather than trying to cram everything into a two dimensional design.

Want to get in on the fun, or just stay updated as [Walker] embarks on this epic journey? Perhaps you’d be interested in joining the recently formed Open Source Security Hardware Discord server he’s spun up. Whether you’ve got input on the design, or just want to hang out and watch the WiFiWart get developed, we’re sure he’d be happy to have you stop by.

The first post about this project got quite a response from Hackaday readers, and for good reason. While many in the hacking and making scene only have a passing interest in the security side of things, we all love our little little Linux boards. Especially ones that are being developed in the open.

An OSHW IR Remote Control Powered By The ATtiny13A

The new hotness in consumer electronics might be RF remotes based on protocols like Bluetooth Low Energy, but there’s still plenty of life left in the classic infrared remote. Especially with projects like TinyRemoteXL from [Stefan Wagner], which let you build and program an IR “clicker” of your own. Whether you want to spin up your own custom universal remote or create a beefed up version of the TV-B-Gone, this open source effort is a great place to start.

The original TinyRemote.

As you might have guessed from the name, this project is actually a larger version of the TinyRemote that [Stefan] put together previously. The documentation for that project goes a bit more into the nuts and bolts of talking IR, and is definitely worth a read if you’re into the low level stuff. For the original five button TinyRemote, the hardware consists of little more than a ATtiny13A microcontroller, a pair of IR LEDs, and the transistors to drive them.

But on the XL, things are a bit trickier as there are now twelve buttons for the ATtiny13A to read. Obviously there aren’t enough pins to read so many buttons directly, but with a combination of BAS16TW diode arrays and resistors, [Stefan] is able to detect what button was pressed using the chip’s interrupt pin and ADC. Certainly a handy trick to have in the back of your mind, and the open source nature of this project gives you a great chance to see how it’s implemented.

Between this project and the impressive development board [Djordje Mandic] released recently, it seems we’re looking at something of an infrared hacking revival. Earlier this year we even saw the commercial release of an IR-equipped ESP8266 board.

This Horrifying Robot Is Here To Teach You A Lesson

No, despite what it might look like, this isn’t some early Halloween project. The creepy creation before you is actually a tongue-in-cheek “robot” created by the prolific [Nick Bild], a topical statement about companies asking their remote workers to come back into the office now that COVID-19 restrictions are being lifted. Why commute every day when this ultra realistic avatar can sit in for you?

OK, so maybe it’s not the most impressive humanoid creation to ever grace the pages of Hackaday. But if you’re looking to spin up a simple telepresence system, you could do worse than browsing through the Python source code [Nick] has provided. Using a Raspberry Pi 4, a webcam, and a microphone, his client-server architecture combines everything the bot sees and hears into a simple page that can be remotely accessed with a web browser.

Naturally this work from home (WFH) bot wouldn’t be much good if it was just a one-way street, so [Nick] has also added a loudspeaker that replays whatever he says on the client side. To prevent a feedback loop, his software includes a function that toggles which direction the audio stream goes in by passing the appropriate commands to the bot over SSH; a neat trick to keep in mind for your own, less nightmarish, creations.

If you’re looking for something a bit more capable and have some cardboard laying around, this DIY telepresence mount for your phone might be a good place to start.

Continue reading “This Horrifying Robot Is Here To Teach You A Lesson”

ESP32 Turned Handy SWD Flasher For NRF52 Chips

Got an nRF52 or nRF51 device you need to flash? Got an ESP32 laying around collecting dust? If so, then firmware hacking extraordinaire [Aaron Christophel] has the open source code you need. His new project allows the affordable WiFi-enabled microcontroller to read and write to the internal flash of Nordic nRF52 series chips via their SWD interface. As long as you’ve got some jumper wires and a web browser, you’re good to go.

In the first video below [Aaron] demonstrates the technique with the PineTime smartwatch, but the process will be more or less the same regardless of what your target device is. Just connect the CLK and DIO lines to pins GPIO 21 and GPIO 19 of the ESP32, point your web browser to its address on the local network, and you’ll be presented with a straightforward user interface for reading and writing the chip’s flash.

As demonstrated in the second video, with a few more wires and a MOSFET, the ESP32 firmware is also able to perform a power glitch exploit on the chip that will allow you to read the contents of its flash even if the APPROTECT feature has been enabled. [Aaron] isn’t taking any credit for this technique though, pointing instead to the research performed by [LimitedResults] to explain the nuts and bolts of the attack.

We’re always excited when a message from [Aaron] hits the inbox, since more often that not it means another device has received an open source firmware replacement. From his earlier work with cheap fitness trackers to his wildly successful Bluetooth environmental sensor hacking, we don’t think this guy has ever seen a stock firmware that he didn’t want to immediately send to /dev/null.

Continue reading “ESP32 Turned Handy SWD Flasher For NRF52 Chips”

Pi Pico Game Boy Flash Cart Gets Slim RP2040 Upgrade

The story for this one starts a few months ago, when [John Green] released his PICO-GB project. His code allowed the Raspberry Pi Pico to stand in for a Game Boy cartridge, complete with a simple text menu that let the user select between ROMs that had been baked into the microcontroller’s firmware. The project was particularly notable for the fact that it was entirely a software solution; while a custom breakout cartridge made for a handy temporary solution, you could have permanently wired the Pico’s pins directly to the Game Boy’s cartridge connector if you wanted to.

PICO-GB running on the full-size Pi Pico

Then in early June, the RP2040 chip that powers the Pi Pico went up for sale in single unit quantities. That opened up the possibility of building the PICO-GB functionality into a cartridge small enough to actually fit inside the Game Boy. So [Martin “HDR” Refseth] got to work creating the slick cartridge PCB you’re seeing now.

The RP2040 is joined by a trio of Texas Instruments TXB0108 level shifters, and there’s a spot for adding a SPI flash chip. The RP2040 supports a maximum of 16 MB of external flash, but given the size of Game Boy games were generally measured in kilobytes, that shouldn’t pose much of a problem.

Looking ahead, the original PICO-GB documentation mentions enhancements like loading ROMs from SD card, as well as hardware additions like a real-time-clock for the more advanced games that supported it. We assume those concepts will become part of [Martin]’s PCB eventually, but these are still early days.

We’ve seen Game Boy cartridge emulation with a microcontroller in the past, but we’re exited to see how the unique capabilities of the Raspberry Pi Foundation’s custom silicon can improve the state-of-the-art.

[Thanks to Itay for the tip.]