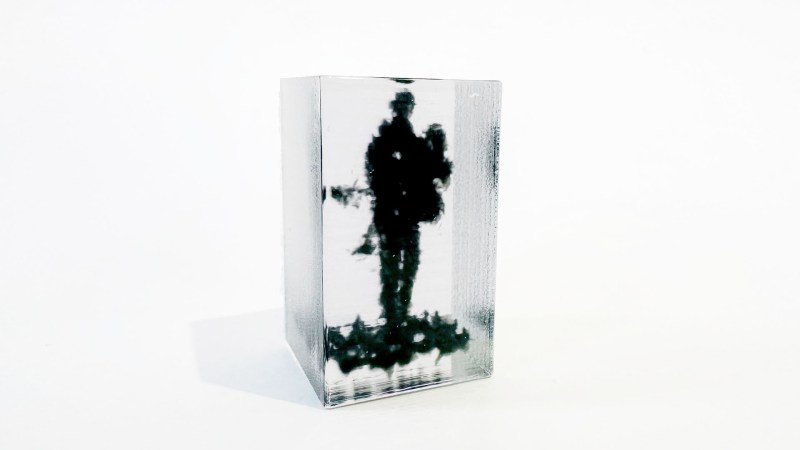
If you had asked us yesterday “How do you 3D Print a Photo”, we would have said “well, that’s easy, do a lithophane”– but artist, hacker and man with a very relaxing voice [Wyatt Roy] has a much more impressive answer: Gaussian splats, rendered in resin.
Gaussian splats are a 3D scanning technique aimed at replicating a visual rather than geometry, like the mesh-based 3D-scanning we usually see on Hackaday. Using photogrammetry, a point cloud is generated with an associated 3D Gaussian function describing the colour at that point. Blend these together, and you can get some very impressive photorealistic 3D environments. Of course, printing a Gaussian smear of colour isn’t trivial, which is where the hacking comes in.
Everyone knows what its like to get a hankering for a specific food. In [Attoparsec]’s case, he wanted waffles. Not any waffles would do, though; he needed waffles in the form of a labyrinth. Those don’t exist, so he had to machine his own waffle maker.
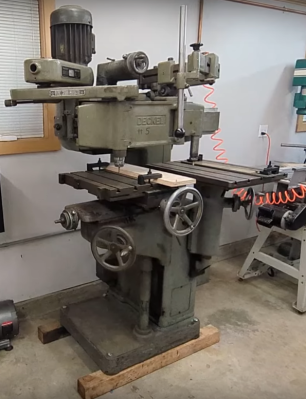
When computers were the size of rooms, these stood in where we’d use CNC today.
Most of us would have run this off on a CNC, but [Attoparsec] isn’t into CNCing–manual machining is his hobby, and he’s not interested in getting into another one, no matter how much more productive he admits it might make him. We can respect that. After a bit of brain sweat thinking of different ways to cut out the labyrinth shape, he has the opportunity to pick up an antique Deckle pantograph mill.
These machines were what shops used to do CNC before the ‘computer numeric’ part was a thing. By tracing out a template (which [Attoparsec] 3D prints, so he’s obviously no Luddite) complex shapes can be milled with ease. Complex shapes like a labyrnthine wafflemaker. Check out the full video below; it’s full of all sorts of interesting details about the machining process and the tools involved.
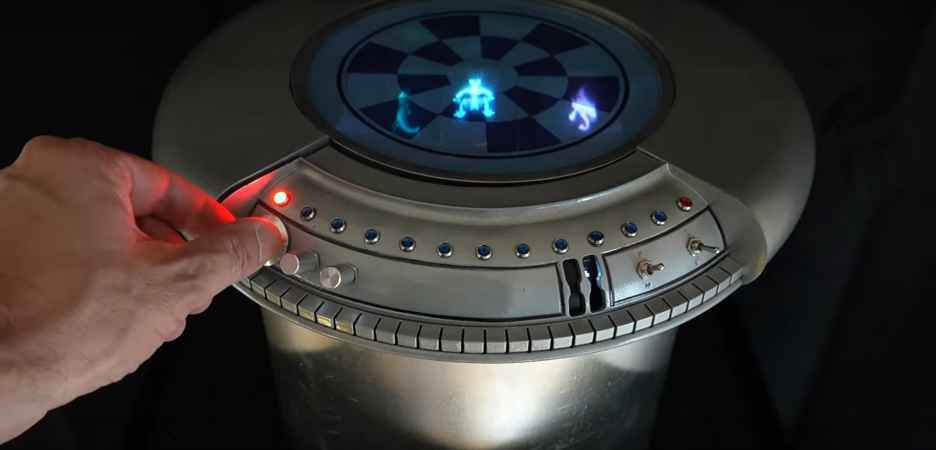
If you have seen Star Wars, you know what is being referenced here. Holochess appeared as a diversion built into the Millennium Falcon in the very first movie, way back in 1977. While not quite as iconic a use of simulated holograms as tiny Princess Leia begging for hope, it evidently struck a chord with [Maker Mac70], given the impressive effort he’s evidently gone through to re-create the game table from the film.
The key component of this unit is a plate from Japanese firm ASKA3D that scatters light from displays inside the table in just such a way that the diverging rays are focused at a point above its surface, creating the illusion of an image hovering in space. Or in this case, hovering at the surface of a acrylic chessboard. Granted, this technique only works from one viewing angle, and so is not a perfect recreation of a sci-fi holoprojector. But from the right angle, it looks really good, as you can see in the video below.
There are actually six SPI displays, driven by an Arduino GIGA, positioned and angled to project each character in the game. Placing two of the displays on 3D printed gantries allows them to move, allowing two creatures to battle in the center of the table. As [Maker Mac70] admits, this is quite a bit simpler than the Holochess game seen in the film, but it’s quite impressive for real world hardware.
The word “Schlieren” is German, and translates roughly to “streaks”. What is streaky photography, and why might you want to use it in a project? And where did this funny term come from?
Think of the heat shimmer you can see on a hot day. From the ideal gas law, we know that hot air is less dense than cold air. Because of that density difference, it has a slightly lower refractive index. A light ray passing through a density gradient faces a gradient of refractive index, so is bent, hence the shimmer. Continue reading “Flow Visualization With Schlieren Photography”→
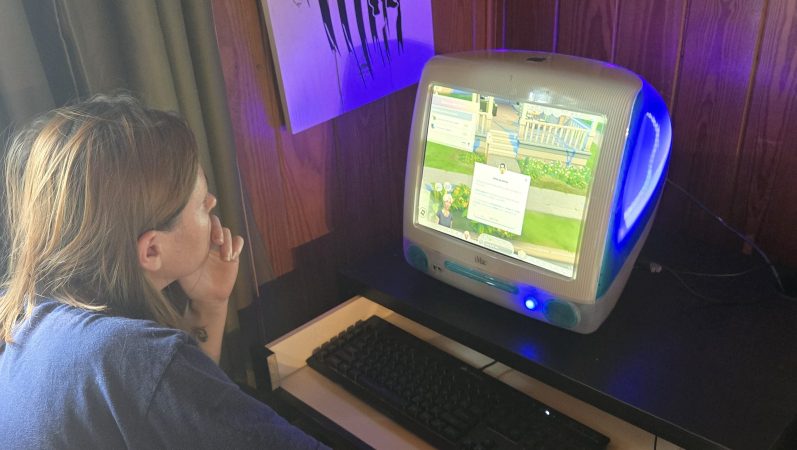
The iMac G3 is an absolute icon of industrial design, as (or perhaps more) era-defining than the Mac Classic before it. In the modern day, if your old iMac even boots, well, you can’t do much with it. [Rick Norcross] got a hold of a dead (hopefully irreparable) specimen, and stuffed a modern PC inside of it.
From the outside, it’s suprizingly hard to tell. Of course the CRT had to go, replaced with a 15″ ELO panel that fits well after being de-bezeled. (If its resolution is only 1024 x 768, well, it’s also only 15″, and that pixel density matches the case.) An M-ATX motherboard squeezes right in, above a modular PSU. Cooling comes from a 140 mm case fan placed under the original handle. Of course you can’t have an old Mac without a startup chime, and [Rick] obliges by including an Adafruit FX board wired to the internal speakers, set to chime on power-up while the PC components are booting.
These sorts of mods have proven controversial in the past– certainly there’s good reason to want to preserve aging hardware–but perhaps with this generation of iMac it won’t raise the same ire as when someone guts a Mac Classic. We’ve seen the same treatment given to a G4 iMac, but somehow the lamp doesn’t quite have the same place in our hearts as the redoubtable jellybean.
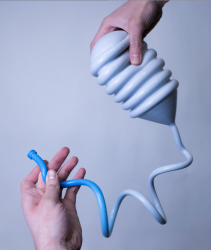
They might call it Levity, but there’s nothing funny about Rapid Liquid Print’s new silicone 3D printer. It has to be seen to be believed, and luckily [3D Printing Nerd] gives us lots of beauty shots in this short video, embedded below.
Smooth, and fast. This bladder took 51 minutes according to the RLP website.
Printing a liquid, even a somewhat-viscous one like platinum-cure silicone, presents certain obvious challenges. The Levity solves them with buoyancy: the prints are deposited not onto a bed, but into a gel, meaning they are fully supported as the silicone cures. The fact that the liquid doesn’t cure instantly has a side benefit: the layers bleed into one another, which means this technique should (in theory) be stronger in all directions than FDM printing. We have no data to back that up, but what you can see for yourself that the layer-blending creates a very smooth appearance in the finished prints.
If you watch the video, it really looks like magic, the way prints appear in the gel. The gel is apparently a commercially-available hydrogel, which is good since the build volume looks to need ̶a̶b̶o̶u̶t̶ ̶5̶0̶0̶ ̶L̶ at least 125 L of the stuff. The two-part silicone is also industry-standard and off-the-shelf, though no doubt the exact ratios and are tweaked for purpose. There’s no magic, just a really neat technology.
If you want one, you can sign up for the waiting list at Rapid Liquid Print’s website, but be prepared to wait; units ship next year, and there’s already a list.
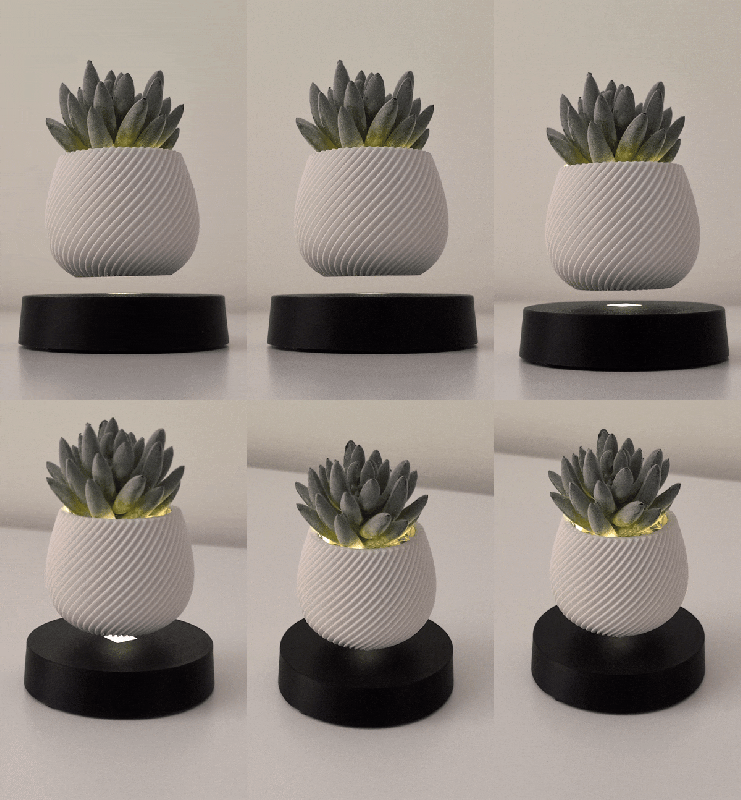
Magnets aren’t magic, but sometimes you can do things with them to fool the uninitiated — like levitating. [Jonathan Lock] does that with his new maglev desk toy, that looks like at least a level 2 enchantment.
This levitator is USB-powered, and typically draws 1 W to 3 W to levitate masses between 10 g and 500 g. The base can provide 3 V to 5 V inductive power to the levitator to the tune of 10 mA to 50 mA, which is enough for some interesting possibilities, starting with the lights and motors [Jonathan] has tried.
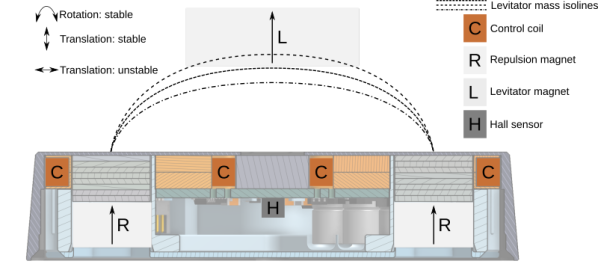
In construction it is much like the commercial units you’ve seen: four permanent magnets that repel another magnet in the levitator. Since such an arrangement is about as stable as balancing a basketball on a piece of spaghetti, the permanent magnets are wrapped in control coils that pull the levitator back to the center on a 1 kHz loop. This is accomplished by way of a hall sensor and an STM32 microcontroller running a PID loop. The custom PCB also has an onboard ESP32, but it’s used as a very overpowered USB/UART converter to talk to the STM32 for tuning in the current firmware.
If you think one of these would be nice to have on your desk, check it out on [Jonathan]’s GitLab. It’s all there, from a detailed build guide (with easy-to-follow animated GIF instructions) to CAD files and firmware. Kudos to [Jonathan] for the quality write-up; sometimes documenting is the hardest part of a project, and it’s worth acknowledging that as well as the technical aspects.




 This levitator is USB-powered, and typically draws 1 W to 3 W to levitate masses between 10 g and 500 g. The base can provide 3 V to 5 V inductive power to the levitator to the tune of 10 mA to 50 mA, which is enough for some interesting possibilities, starting with the lights and motors [Jonathan] has tried.









