Roller-Based Robot Hand Grasps

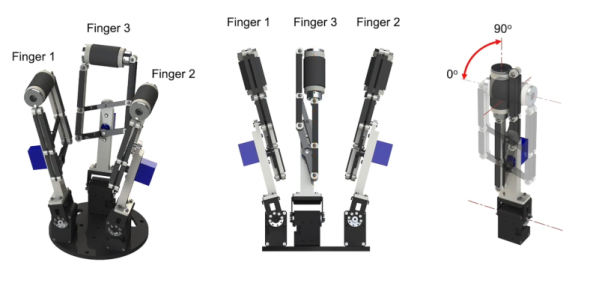
In a recent International Conference on Robotics and Automation paper, [Shenli Yaun] and some others from Stanford discuss the design of a roller-based robot hand that has many features that mimic the human hand. The key feature is that each of the three fingers has a roller with a small geared motor.

The rollers allowed the hand to change an object’s orientation without losing its grasp. Of course, this works well with spherical objects like a ball. But the video shows that it can manipulate other items like a 6-sided die, a water bottle, or even a piece of paper. By spreading the fingers it can even hold large objects you wouldn’t expect at first glance.

Continue reading “Roller-Based Robot Hand Grasps” →

ESP32 Vulnerability Affects Older Chips

There is a scene from the movie RED (Retired, Extremely Dangerous) where Bruce Willis encounters a highly-secure door with a constantly changing lock code deep inside the CIA. Knowing the lock would be impossible to break, he simply destroyed the wall next to the door, reached through, and opened the door from the other side. We thought about that when we saw [raelize’s] hack to bypass the ESP32’s security measures.

Before you throw out all your ESP32 spy gadgets, though, be aware that the V3 silicon can be made to prevent the attack. V1 and V2, however, have a flaw that — if you know how to exploit it — renders secure boot and flash encryption almost meaningless.

Continue reading “ESP32 Vulnerability Affects Older Chips” →

Reforming 3D Prints With Salt And Heat

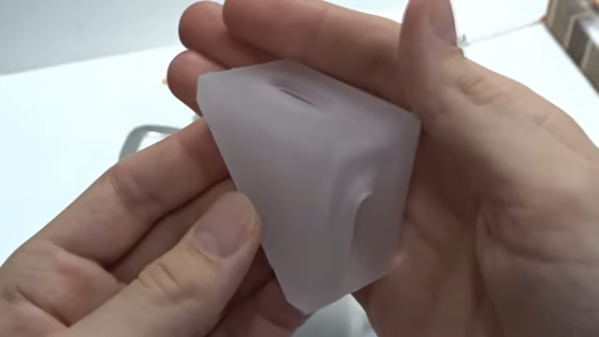
The biggest problem with fused deposition 3D prints is that while the layers should stick together, they aren’t the same as a solid piece of plastic you would get from, say, injection molding. You can anneal plastic using moderate heat, but it is likely to cause the part to deform or change size. [Free Spirit 1] has a solution for this. Using a powdered salt, the part is packed on the inside and out and put in an oven. The results in the video below look really impressive.

In addition to making the part look solid and — we assume — adding strength, the resulting prints are also water- and gas-tight which was the purpose of the effort. That alone would make the technique worthwhile.

The only thing we noticed is that the part has to have access to hold the salt. Anything not supported would be subject to deformation. However, the ground-up salt is so fine that it should be relatively easy to fill in most parts and, of course, print with 100% infill to avoid hollow internal areas.

[Free spirit 1] used a coffee grinder to get the salt powder, but apparently you can buy “flour salt.” We wondered if other powders might work well, too. Apparently, sand didn’t work out, perhaps because the salt dissolves out in water, so whatever you use, it should probably dissolve in something that won’t attack your plastic.

Annealing isn’t a new idea, and we’d love to see some objective tests on this new method.

Continue reading “Reforming 3D Prints With Salt And Heat” →

Upcycled Dryer Motor Makes Budget Disk Sander

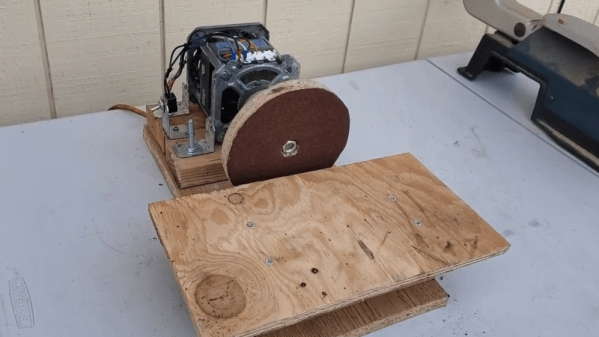
At the most basic level, most shop tools are just a motor with the right attachments. But the details are often far from simple. [DuctTapeMechanic] took a junker clothes dryer, yanked the electric motor from it, and converted it into a disk sander. The price was right at about $10. You can see it all after the break.

As you might imagine, having the motor is only half the battle. You also need a way to mount the thing securely and a way to affix the sanding disk. While this doesn’t pose the same challenges as, say, a drill press, it does take some thought. The motor in the donor dryer didn’t have threads on the shaft, so a bolt and some welding time took care of that. We suspect that’s tricky because you need the shaft and the bolt to be concentric and level.

Once you have a threaded shaft, the rest of the build is anti-climatic. A little carpentry and a little electrical. We would probably cover up the electrical connections a bit more. It seems like you’d want to know which way the motor spins so you could use a reverse thread, if necessary. From the video, we think the motor he has was spinning the right way, but we don’t know if that’s always true.

There’s something satisfying about building your own tools. If you work on smaller things, we’ve seen a miniature sander that might be handy to have around. If you want to go the other way, try finding an old floor polisher instead of a dryer.

Continue reading “Upcycled Dryer Motor Makes Budget Disk Sander” →

Linux Fu: Simple SSH File Sharing

If you have more than one Linux computer, you probably use ssh all the time. It is a great tool, but I’ve always found one thing about it strange. Despite having file transfer capabilities in the form of scp and sftp, there is no way to move a file back or forth between the local and remote hosts without starting a new program on the local machine or logging in from the remote machine back to the local machine.

That last bit is a real problem since you often access a server from behind a firewall or a NAT router with an ephemeral IP address, so it can’t reconnect to you anyway. It would be nice to hit the escape character, select a local or remote file, and teleport it across theĀ  interface, all from inside a single ssh session.

I didn’t quite get to that goal, but I did get pretty close. I’ll show you a script that can automatically mount a remote directory on the local machine. You’ll need sshfs on the local machine, but no changes on the remote machine where you may not be able to install software. With a little more work, and if your client has an ssh server running, you can mount a local directory on the remote machine, too. You won’t need to worry about your IP address or port blocking. If you can log into the remote machine, you are good.

Combined, this got me me very close to my goal. I can be working in a shell on either side and have access to read or write files on the other side. I just have to set it up carefully. Continue reading “Linux Fu: Simple SSH File Sharing” →

TI And Cadence Make PSpice Free

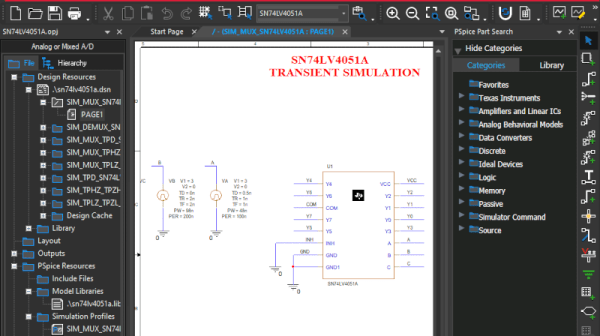
We like simulation software. Texas Instruments long offered TINA, but recently they’ve joined with Cadence to make OrCAD PSpice available for free with some restrictions. You’ve probably heard of PSpice — it’s widely used in academia and industry, but is usually quite costly. You can see a promotional overview video below.

The program requires registration and an approval step to get a license key. The downloaded program has TI models along with other standard models. There seem to be few limits as long as you stick to the supplied library. According to the datasheet, there are no size or simulation complexity limitations in that case. If you want to use other models, you can, but that’s where the limitations hit you:

There is no limitation of how many 3rd party models can be imported into the design. However, if 3rd party models are imported, a user will be able to plot a maximum of 3 signals at a time of their choice when any 3rd party model is imported from web.

We aren’t completely sure what “from web” means there, but presumably they just mean from other sources. In any event, you still get AC, DC, and transient analysis with plenty of options like worst-case timing analysis. Mixed signal designs are supported and there is a wealth of data plotting options, as you would expect.

This is a great opportunity to drive some serious software that is widely used in the industry. The only thing that bummed us out? It runs under Windows. We couldn’t get it to work under Wine, but a Windows 10 VM handled it fine, although we really hate running a VM if we don’t have to.

Still, the price is right and it is a great piece of software. We also liked the recent Micro-Cap 12 release, but we don’t expect any updates for that. Of course, LTSpice is quite capable, too.

Continue reading “TI And Cadence Make PSpice Free” →

A Big Computer Needs A Big Keyboard

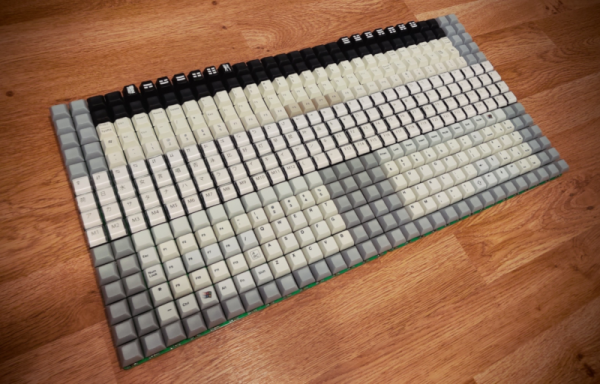
It seems like many keyboard aficionados have been gravitating towards ever smaller boards, but not [Ren]. He’s mostly completed a 433% keyboard with a whopping 450 distinct keys. Using two off the shelf PCBs and Teensy to control it all, this keyboard means you’ll never need to strain to make some awkward chord.

The PCBs have a diode matrix arrangement for 225 keys, which we would have thought was big enough. After all, a Scrabble board has 225 squares, so we assume that’s why the vendor calls them scrabbleboards. Honestly, we’re jealous someone has the desk space for this monster. We were also thinking what other sorts of switch-like sensors you could use with this board. Imagine a home system, for example, with 225 occupancy sensors, each with its own key you could easily read via USB.

There was a time when building your own keyboard of any sort would have been challenging. But now there’s a cottage industry supplying chips, switches, caps, and PCBs to those looking to craft their own custom input devices. The ready availability of 3D printers has also sparked a minor revolution in custom keyboard enclosures and keycaps.

If you’re a fan of the tiny keyboards, we’ve seen some impressive specimens that might catch your fancy. If nothing else, at least they require less soldering. Especially when they only have seven keys.

Thanks [ptkwilliams] for the tip!