Portable CRT TV Becomes Retro Cyberdeck

These days, it’s pretty easy to slap together a single-board computer and a cheap LCD screen to whip up a cool cyberdeck fast. But what if you wanna go more retro? [Manu] found a portable TV straight out of the original Blade Runner film, and decided this would be the perfect base for a cyberdeck rocking a whole-ass CRT screen.

The build started with a Panasonic TR-545 television. Back in the day, it took many large batteries to power this thing up—no surprise given how power hungry CRTs are. This gave [Manu] a neat opportunity to sneak all the new cyberdeck hardware into the original battery tray, including a new lithium-ion battery pack that is much more compact than the original. A Raspberry Pi 5 is running the show, computer-wise, and it’s hooked up to an HDMI RF modulator that allows the video output signal to be hooked up to the TV’s original antenna input. It’s not the cleanest way to go, but it allowed [Manu] to make the mod entirely reversible. All the new hardware slots neatly into the repurposed battery tray, and can be removed quite easily without damage to this vintage specimen. Even the keyboard fits nicely into the setup, as [Manu] was able to find a suitable 60% layout foldable unit right off the shelf.

Check out the slide deck for more details on the build, but be warned—it’s a 241 MB PDF. Bonus points if you calculate what that would cost to store on a hard drive in 1979 when the Panasonic TR-545 was on the market. We’ve seen a similar build before, too, with a classic black & white Magnavox unit. If you like squinting at a tiny blurry screen, a CRT cyberdeck is absolutely the way to go. Just be warned that the other screenwriters at your local coffee shop will be more interested in your hardware than whatever you’re actually working on. Good luck with your next pitch all the same. Video after the break.

Continue reading “Portable CRT TV Becomes Retro Cyberdeck”

Powering USB Devices With A Bench Supply Adapter Board

Sometimes you wanna test a piece of USB hardware, but you don’t just want to plug it into a random old phone charger. [KS-Elektronikdesign] has whipped up a useful tool for just that case, allowing one to easily power USB hardware from a common bench supply.

It would have been simple enough to whip up an adapter board to connect banana jacks to the power pins of a regular USB port. Easing the hookup process was indeed a part of the motivation for this project, in making it easy to power hardware that hooks up via USB-A and USB-C. However, it also goes a little further. It includes TUSB319 chip to handle the all-important power negotiation, without which many USB devices will not feel confident drawing their required amount of current.

There is also polarity protection and over-voltage protection to stop you from blowing stuff up if you hook the board up wrong, which might save you a smartphone or three in the lab. The board will allow negotiated output power up to 10 W via USB-A and 15 W via USB-C, which isn’t heaps, but will be fine for lots of smaller devices. You can up that to 25 W and 35 W respectively if the board is switched to pass-through mode. We particularly like the physical design—the board will plug straight into the banana plugs on any supply with a jack spacing of 19 to 23 mm.

Overall, this is a useful tool to have in the lab if you want to run USB hardware with the flexibility of the voltage and current limits available on your bench supply. There are other ways to power modern USB devices, too, and you can do all kinds of wild stuff if you learn about USB PD and USB PPS. If you’re working up your own nifty lab tools for similar purposes, we’d love to know about it on the tipsline.

Recording HDR Video With A Raspberry Pi

The Raspberry Pi line of single-board computers can be hooked up with a wide range of compatible cameras. There are a number of first party options, but you don’t have to stick with those—there are other sensors out there with interesting capabilities, too. [Collimated Beard] has been exploring the use of the IMX585 camera sensor, exploiting its abilities to capture HDR content on the Raspberry Pi.

The IMX585 sensor from Sony is a neat part, capable of shooting at up to 3840 x 2160 resolution (4K) in high-dynamic range if so desired. Camera boards with this sensor that suit the Raspberry Pi aren’t that easy to find, but there are designs out there that you can look up if you really want one. There are also some tricks you’ll have to do to get this part working on the platform. As [Collimated Beard] explains, in the HDR modes, a lot of the standard white balance and image control algorithms don’t work, and image preview can be unusable at times due to the vagaries of the IMX585’s data format. You’ll also need to jump some hurdles with the Video4Linux2 tools to enable the full functionality of these modes.

Do all that, recompile the kernel with some tweaks and the right drivers, though, and you’ll finally be able to capture in 16-bit HDR modes. Oh, and don’t forget—you’ll need to find a way deal with the weird RAW video files this setup generates. It’s a lot of work, but that’s the price of entry to work with this sensor right now. If it helps convince you, the sample shots shared by [Collimated Beard] are pretty good.

If you’re looking to record some really juicy, colorful imagery with the Raspberry Pi, this is a difficult but viable way to go. We’ve seen some other hardcore Raspberry Pi camera hacks of late, too.

Continue reading “Recording HDR Video With A Raspberry Pi”

Retro Weather Display Acts Like It’s Windows 95

Sometimes you really need to know what the weather is doing, but you don’t want to look at your phone. For times like those, this neat weather display from [Jordan] might come in handy with its throwback retro vibe.

The build is based around the ESP32-2432S028—also known as the CYD, or Cheap Yellow Display, for the integrated 320 x 240 LCD screen. [Jordan] took this all-in-one device and wrapped it in an attractive 3D-printed housing in the shape of an old-school CRT monitor, just… teenier. A special lever mechanism was built in to the enclosure to allow front panel controls to activate the tactile buttons on the CYD board. The ESP32 is programmed to check Open-Meteo feeds for forecasts and current weather data, while also querying a webcam feed and satellite and radar JPEGs from available weather services. These are then displayed on screen in a way that largely resembles the Windows 95 UI design language, with pages for current conditions, future forecasts, wind speeds, and the like.

We’ve seen some fun weather displays over the years, from graphing types to the purely beautiful. If you’ve found a fun way to display the weather (or change it) don’t hesitate to notify the tipsline. Particularly in the latter case.

Sega Genesis Finally Gets Long-Awaited Stock Ticker App 37 Years After Launch

Until now, if you were seated at your Sega Genesis and wanted to check your stock portfolio, you were out of luck. You had to get a smartphone, or a computer, or maybe even a television to look up stock prices and understand your financial position. Thankfully, though, Sega’s neglect of its hero platform has finally been corrected. [Mike Wolak] has given the 16-bit console the real-time stock ticker it so desperately needed. 

The build runs on a MegaWiFi cartridge, which uses an ESP8266 or ESP32 microcontroller to add WiFi communication to the Sega Genesis (or Mega Drive). [Mike] wrote a custom program for the platform that would query the Finnhub HTTPS API and display live stock prices via the Genesis’s Video Display Processor. It does so via a clean console-like interface that would be familiar to users of other 16-bit machines from this era, though seeing so much textual output would have been uncommon.

By default, the stock ticker is set to show prices for major tech stocks, but you can set it up to display any major symbol available in the Finnhub data stream. You can configure up to eight custom stocks and input your holdings, and the software will calculate and display your net worth in real time.

All the files are available for those eager to monitor their portfolios on a Sega, as the financial gods intended. [Mike] notes it took a little work to get this project over the line, particularly as the ESP32-C3 doesn’t support HTTPs with stock firmware. A few other hacks were needed to keep the Genesis updating the screen during HTTP queries, too.

If you have a concentrated portfolio and a spare Sega Genesis, this could be a fun retro way to keep an eye on your holdings. Alternatively, you might prefer to go the classic paper tape route.

Continue reading “Sega Genesis Finally Gets Long-Awaited Stock Ticker App 37 Years After Launch”

Simple MIDI Sample Player Runs On ESP32

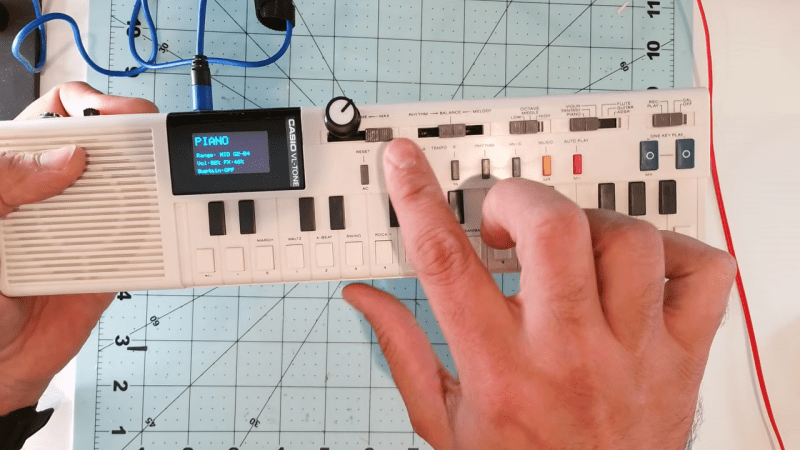
[Jakub] is a musician, and found himself in need of a simple way to trigger samples via MIDI when on stage. So many commercial solutions exist, but most were overkill for the job or too messy and complicated to justify their use in a live environment. Thus, [Jakub] worked up Samplotron to do exactly the job needed with a minimum of fuss.

The project is based around the ESP32. It’s effectively a lightweight hardware sampler that can trigger sounds on command via MIDI. Sample data is loaded from an SD card, which also stores the device configuration. The Samplotron plays back mono 16-bit WAV files at 44,100 Hz, delivering audio via an ES8388 audio codec module connected via I2S. Two encoders are used to control the device, with a menu system presented via an SSD1309 OLED screen. Samples can be loaded and managed via this interface, and it allows tweaks to be made to volume levels and one-shot/loop playback as needed. MIDI input to the device is simply handled via the onboard UART functionality of the ESP32 itself.

It’s a neat little bit of music hardware that does exactly what [Jakub] needs and nothing more. We’ve featured similar builds before, like this neat RP2040 soundboard. If you’re building rad custom hardware for your own musical adventures, we’d love to know all about it. 

DIY Reflow Plate Runs On USB Power Delivery

If you’re working with surface mount components, you’re likely going to want a reflow plate at some point. [Vitaly] was in need of just such a tool, and thus whipped up a compact reflow plate that is conveniently powered via USB-C. 

This reflow rig is designed for smaller work, with a working area of 80 mm x 70 mm. There are two options for the heating element—either a metal core PCB-based heater, or a metal ceramic heater. The former is good for working with Sn42Bi58 solder paste at 138 C, according to [Vitaly], while the latter will happily handle Sn63Pb37 at 183 C if the dirty stuff is more your jam.

Running the show is an ESP32-C3-WROOM, which serves up a web-based control panel over Bluetooth for setting the heating profiles. Using Bluetooth over WiFi might seem like an odd choice at first, but it means you don’t have to add the hot plate to the local wireless network to access it, handy if you’re on the move. It’s also worth noting that you can’t run this off any old USB charger—you’ll need one compatible with USB Power Delivery (PD) that can deliver at least 100 watts.

If you’re needing to whip up small boards with regularity, a hotplate like this one can really come in handy. Files are on GitHub for those eager to build their own.

This isn’t the first time we’ve seen USB-C powering a small reflow plate. Of course, if you make your PCBs self heating, you can sidestep all that entirely.