Keyboard Lights As An Airgap Attack Vector

What do you do when you need to get data into an airgapped machine? Well, you might find yourself limited to basic input devices to interact with the computer in question. As [Nikolay Valentinovich Repnitskiy] demonstrates, though, you can do some fun stuff amidst such limitations.

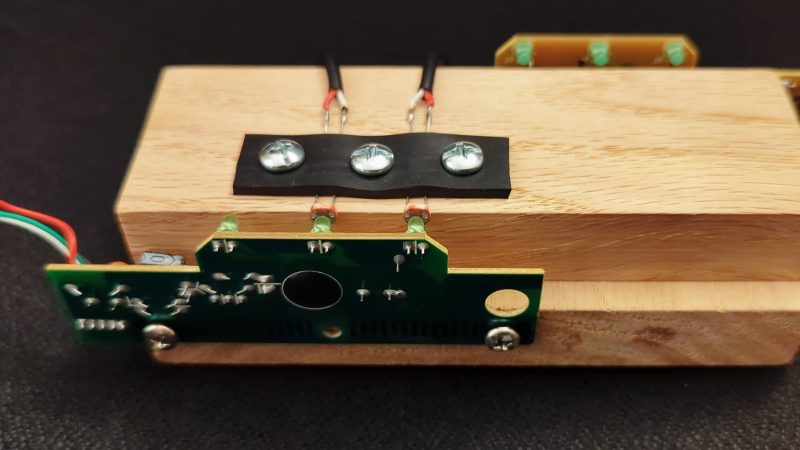
[Nikolay] created what he calls a “unidirectional network” connection via a keyboard. Specifically, he took two Dell SK-8115 keyboards, and stripped them down to their controller PCBs. On one, he soldered photoresistors to a couple of the keyboard matrix pins, such that they’d fire a keypress when lit up. He then placed the other keyboard PCB such that the Num Lock and Caps Lock LEDs are lined up with the photoresistors. This made it possible to have one PC flash the keyboard LEDs in order to “type” on the other machine. This can be used to move data on to it, such as a little program which [Nikolay] prepared which can be made executable and used to further break into the machine and make it easier to pull data across more efficiently in future.

We looked at an earlier version of this hack some time ago. If you’ve been imagining creative ways to talk to airgapped computers, be sure to let us know on the tipsline!
Scrap Pinball Parts Become Beautiful Wall Art

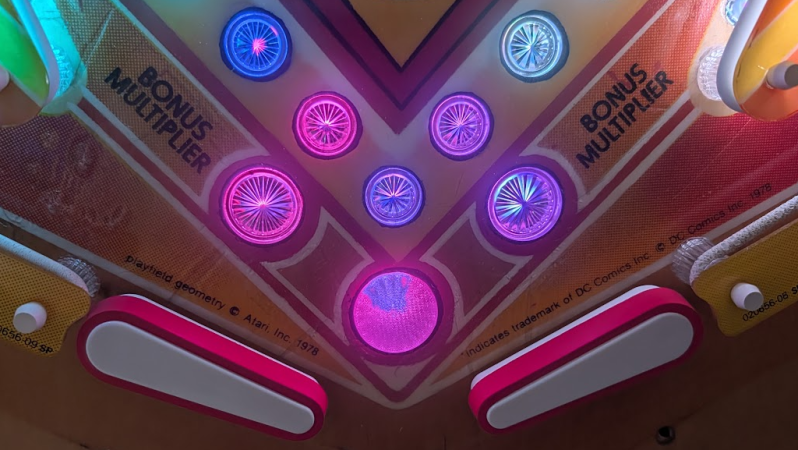
[Hans Scharler] came into a neat find recently—the playfield from a 1970s Atari Superman game. It’s the sort of thing that’s too nice to throw away, but isn’t really enough to reassemble into a viable full machine without a great deal of effort. Thus, [Hans] went a different route—turning it into a beautiful piece of wall art. 

The first step of the build was to collect missing parts; in particular, all the plastic inserts for the playfield that had been lost at some point. Everything was cleaned up and mounted, along with some modified flippers to complete the look. Custom pop bumpers were 3D printed to act as LED-lit light guides rather than as functional pinball components. [Hans] then set about dotting the board with plenty of WS2811 addressable LEDs in a bullet form factor. Everything was placed under the command of a WLED controller, and it’s synced up to [Hans’s] CheerLights MQTT server to boot. More build details are available on the Pinside post for those eager for a deeper dive.

If you come into some old-school pinball hardware that you’d like to turn into decoration, this project is a great one to study. We’ve featured a few other great pinball builds over the years, too.

Continue reading “Scrap Pinball Parts Become Beautiful Wall Art” →

Building A Portable Weather Radar

If you run a large meteorology bureau, then you probably have access to a wonderful weather radar for scrying the heavens. The rest of us aren’t so lucky. If you find yourself bereft of such hardware, though, you could build your own, taking your lead from [Koakno]’s fine example.

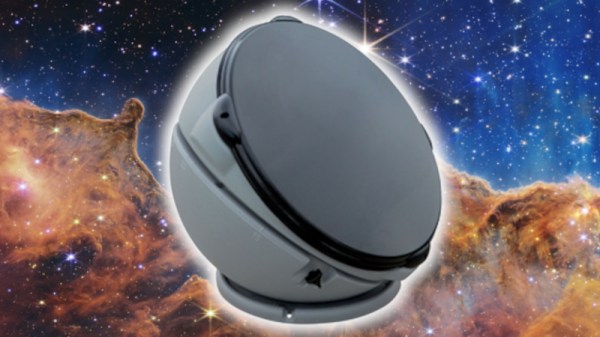
The build uses a satellite dome salvaged from an old RV that [Koakno] scored for just $5. Specifically, a Winegard Carryout Anser GM-5000. The motorized parabolic dish was designed to track TV satellites, but here it’s been repurposed into a scanning radar antenna for X-band signals. It’s paired with a cheap SDR—you can use several on the market—which injects an 850 MHz signal, which is up-converted to 10.4 GHz by the low-noise block (LNB) in the GM-5000 and sprayed out towards the weather.

Echoes come back from rain, hail, and debris, and get down-converted by the LNB back into an 850 MHz signal that the SDR can capture. The echoes are then plotted on a Plan Position Indicator (PPI) display, showing what’s going on in the atmosphere around the dome. [Koakno] reckons detection ranges span out to 40 km for things like heavy rain, while a supercell hail core could be spotted at up to 60 km in the right conditions.

It’s worth noting something important, though. [Koakno] explains that this system is currently in violation of FCC regulations, and shouldn’t be used without the proper licenses to access given spectrum. It’s a useful study of how to build a weather radar, but perhaps not something you can just wire together and fire up without getting in a spot of bother.

If you’re a die-hard tornado chaser or you’ve just always longed to stare meaningfully at a PPI display, this could be the build for you. We’ve featured other DIY radars before, too. We’d also like to see yours, so when it’s done and written up, fire us a note on the tipsline!

Hackaday Europe 2026: High Performance SDR On The Cheap

Radios were once big complicated appliances, full of warm valves and paper-wrapped capacitors, all humming and glowing to capture signals from the aether and spit them out of a speaker. Every component was chosen to build the radio to suit a particular purpose.

These days, we have altogether fancier technology that lets us build radios that can be reconfigured on the fly; software-defined radios, if you will. [Anders Nielsen] has been exploring how to build a high-performance SDR recently, and came to Hackaday Europe 2026 to tell us all about it.

Continue reading “Hackaday Europe 2026: High Performance SDR On The Cheap” →

Duplicating Parts Using Silicone Molds

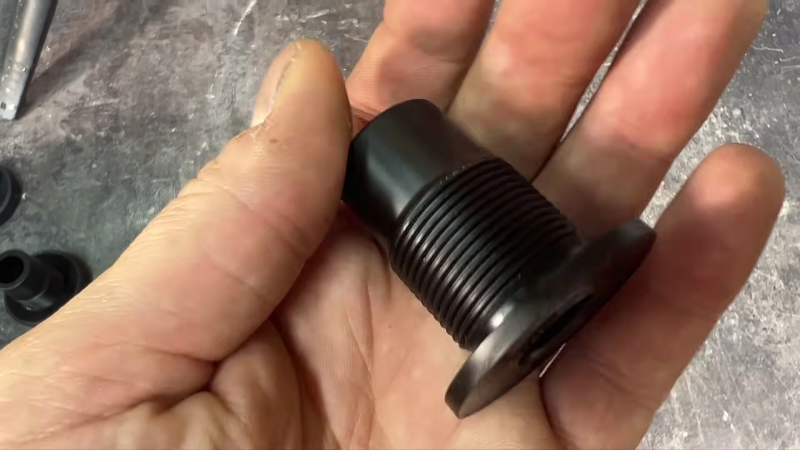
[Do As I Do] had a simple task to complete. A couple of small parts needed to be duplicated in some quantity, with good dimensional accuracy and surface finish. There are a number of ways you might go about this, particularly if you have the original tooling or a machine shop on hand. In this case, however, the plan was to duplicate the parts with silicone molds.

The first step, naturally, was to produce the silicone molds. Doing this involved some craft supplies, with glossy paper and hot glue used to create a vessel for casting silicone around the original parts. The silicone itself was mixed carefully and poured into the vessels, and soon enough [Do As I Do] had a pair of negative molds that could be used to produce duplicates of the original. The original parts were removed, and the silicone molds were filled with resin over and over again to make as many duplicates as were needed.

This was a simple enough project with straightforward geometry that suited the process. More challenging parts would require more care in mold prep and more advanced techniques. Depending on material choice for the duplicate parts and other factors like intended final application, extra steps like degassing may be necessary, too. Still, for a quick guide on duplicating a simple plastic part, it’s hard to beat.

We’ve featured other silicone mold jobs before, like these impressive recreated tail light lenses. Video after the break.

Continue reading “Duplicating Parts Using Silicone Molds” →

Delta Pen Plotter Draws In Multiple Colors

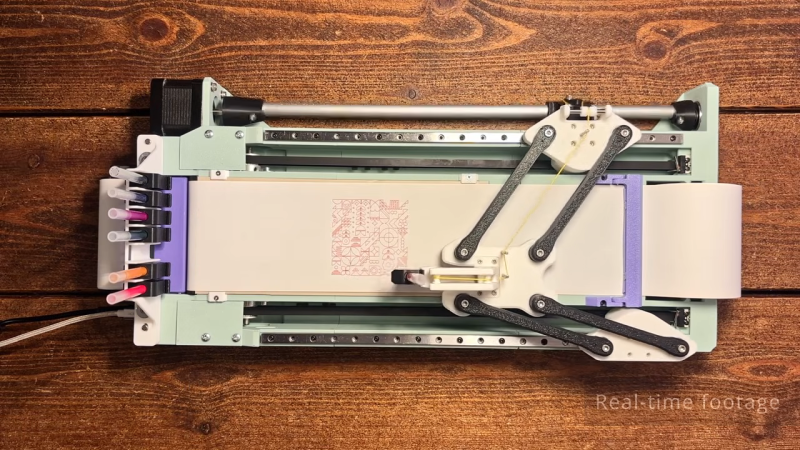
If you’re building your first plotter, or you just like thinking in right angles, you’d probably consider a Cartesian design for your build. [András Vujovits] went another route with his project, building an impressive delta pen plotter with a useful tool changer, to boot.

The build relies on a unique motion system, wherein two NEMA 17 stepper motors drive either side of the linkage to control the position of the end effector—in this case, a pen carriage. By controlling the position of each side of the mechanism, it’s possible to move the pen through XY space. Running the show is an Arduino Nano, fitted with a GRBL shield and appropriate stepper motor drivers.

The magnetic tool changer is particularly nifty, too. It allows the plotter to grab a different ink at will to add more color to the drawing. It’s well-designed, with the plotter able to change inks without losing accuracy or otherwise fumbling the switchover. The plotter uses Muji ball point pens, which are available in a range of colors and draw with slick, clean lines. It’s also quite a fast plotter, thanks in part to [András]’s efforts to keep the pen carriage light by using a smart mechanism to offload the pen lifting actuator to the main body.

[András] has plans available, but you’re going to have to pay for them. Still, it’s always nice to see a new machine in the wild. Video after the break.

Continue reading “Delta Pen Plotter Draws In Multiple Colors” →

Building A Fencing Scoring Box

The sport of fencing requires keeping score, just like so many other similar pastimes. When their club’s existing scoring rig broke, [jc0025] stepped up to build a scoring box of their own, using the typical tools of the maker trade.

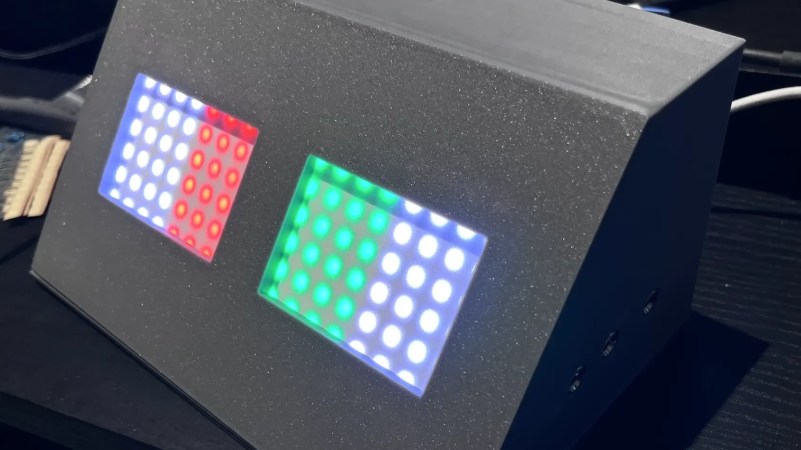
The brains of the operation is an Arduino Nano, running the venerable ATmega328P. It’s set up to drive a pair of 8×8 WS2812B addressable LED panels. It’s also hooked up to a pair of fencing socket blocks, which hook up to the lamé (jacket), weapon, and guard of each player for electronically scoring hits. The Arduino is thus programmed to respond to various conditions, lighting the LEDs in turn. For example, the tip of one player’s weapon hitting the other player’s lamé will fire a colored light, allowing the hit to be scored. Meanwhile, a tip hitting the floor will fire a white light, indicating off-target. There’s also a buzzer for sonic indication, as well. Everything is wrapped up in a tidy 3D-printed housing, while power is courtesy of a USB-C charger hooked up to the unit.

If you’re looking to replace some old broken fencing scoring gear on the cheap, this project is probably a good place to start. We’ve featured some other great scoreboard projects over the years, too. Meanwhile, if you’re whipping up your custom own gear for your local sporting club, we might like to hear about it on the tipsline.