Adding USB-C To The TS100, But Not How You Think

USB-C has its special Power Delivery standard, and is capable of delivering plenty of juice to attached hardware. This has led many to modify their TS-100 soldering irons to accept the connector. [Jana Marie] is the latest, though she’s taken rather a different tack than you might expect.

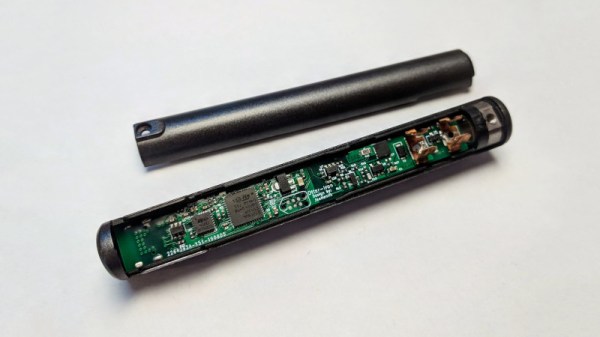
[Jana] didn’t want to modify the original hardware or hack in an adapter. Instead, she struck out on her own, developing an entire replacement PCB for the TS-100 iron. The firmware is rough and ready, and minimal work has been done on the GUI and temperature regulation. However, reports are that functionality is good, and [Jana]’s demonstration shows it handling a proper desoldering task with ease.

Files are on Github for those that wish to spin their own. The PCB is designed to snap neatly inside the original case for a nice fit and finish. Power is plentiful too, as the hardware supports USB Power Delivery 2.0, which is capable of running at up to 100 W. On the other hand, the stock TS-80 iron, which natively supports USB-C, only works with Quick Charge 3.0, and thus is limited to a comparatively meager 36 W.

We’ve seen plenty of TS-100 hacks over 2019. Some have removed the standard barrel jack and replaced it with a USB-PD board. Meanwhile, others have created adapters that plug in to the back of the iron. However, [Jana] is dictating her own terms by recreating the entire PCB. Sometimes it pays to go your own way!

[Thanks to elad for the tip!]
Laser Welding With A Tattoo Removal Gun

Dating as far back as the early 1960’s, researchers were zapping tattoo inks with laser light was an effective way to remove the markings from human skin. At the time it was prohibitively expensive. But the desire to have an undo-button for badge choices is strong, and thus the tattoo removal gun was born.

These days you can pick up one of these zappy, burn-y wonders for far less than a flagship cellphone put their high-power-output to alternative use. [Andrew] recently discovered that these devices can be readily repurposed into a laser welding tool with just a bit of work under the hood.

He first came across the technology via videos from [styropyro], whose work we’ve featured before. The tattoo removal gun features a YAG laser, which is pulsed to create a high power density. In initial testing, the pulses were too short and of too high intensity to effectively weld with; instead, the pulses simply cratered the metal.

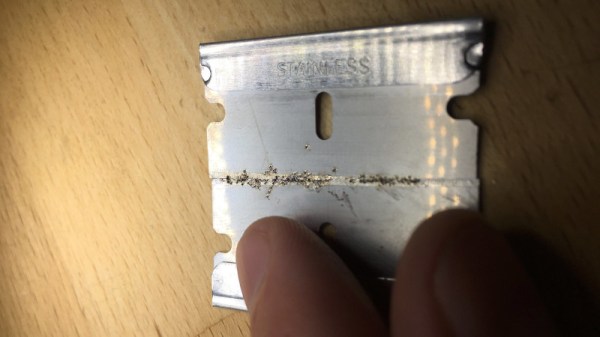
After delving in further, [Andrew] discovered that by removing the Q-switch optical component, the pulses from the laser could be lengthened. This reduces the power density, and allows the tool to weld various materials even on its lower power settings. Success was found welding steel, titanium, and other materials, though attempts to weld copper and silver faced little success. Test pieces included razor blades and small screws, which could easily be welded with the tool. Results of the razor blade welding is spectacular, with a high-quality welding bead achieved by taping the laser to a CNC mill for precise movement.

It could prove to be a useful tool for those experimenting with complex projects involving bonding metals at very fine scales. If you’re pursuing something exotic yourself, we want to hear about it!

Color Coded Clock Runs On Roman Numerals

Roman numerals are, by modern standards, a bit unusual. By virtue of using designations for both 5 and 10, and not scaling well to higher numbers, they’ve fallen out of favor outside of some specific uses. One of those is in time keeping, in which many clocks use the classical numerals instead of the more popular Arabic replacements. [Nicola]’s clock does too, albeit in a rather unusual way.

A diagram of the clock displaying the times 18:40 and 23:04.

The build begins with a faux-neon palm tree LED decoration, which is gutted and refitted with a WS2812B LED strip, run by an Arduino Nano. An RTC is used to keep accurate time, and the time is set by running a one-off program to initialise the clock.

To tell the time, the LEDs are color coded. However, instead of using a binary representation that many can find unfamiliar, colors are chosen instead to correspond to Roman numerals. Blue, green, red and yellow are chosen to represent 1, 5, 10, and 50, or I, V, X, and L respectively. The Github has more details for the curious. The clock uses 24 hour time, and we think we’ve figured out how the display works – with hours on the left and minutes on the right.

It’s fun to see an LED clock that takes a different bent on the usual themes. We’ve seen plenty over the years, from the byte clock to this stunning blinkenlights build. If you’ve cooked up your own special timepiece, be sure to let us know.

Addressable LED Strings In Your USB

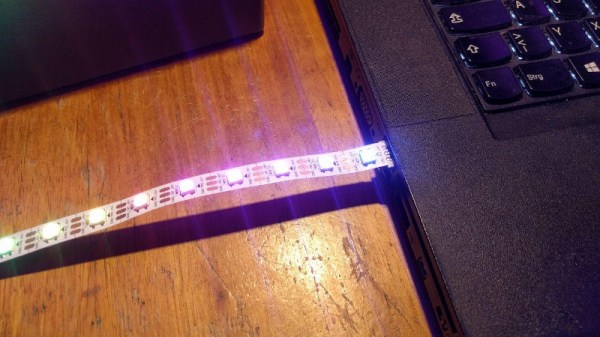
WS2812Bs, or NeoPixels, or whatever else you call them brought full-color LEDs to maker projects a meter at a time in recent years. Hooked up to a microcontroller, they make creating vibrant, full-color glowables a cinch. They won’t work on their own though, and a some point you want to ditch the dev board and let the blinking stand on its own two feet. Enter the USB LED Otter.

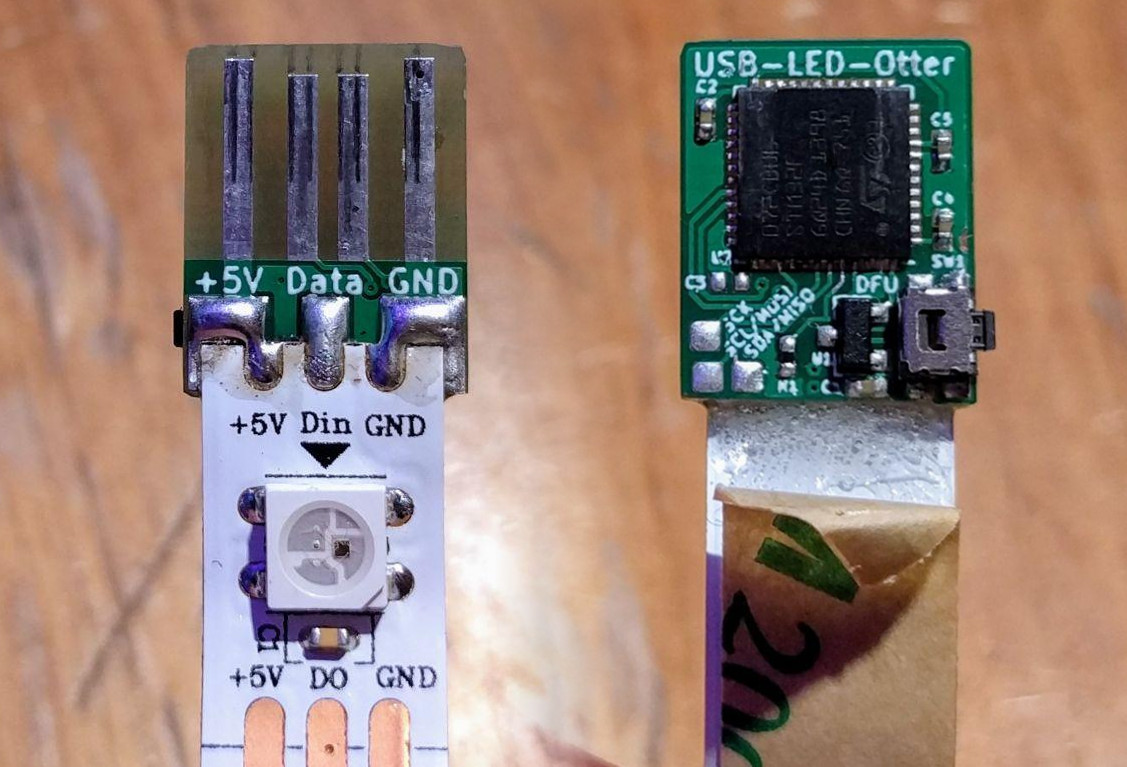
This small square of PCB lets you plug an LED strip directly into a USB port. The PCB itself has four traces on the back that mate with any USB port, and three pads for soldering the strip’s ground, 5 V line, and data. An STM32F072 microcontroller serves as the brains of the operation, packing plenty of horsepower and full compatibility with USB 2.0.

Code is flashed to the chip over USB using Device Firmware Upgrade (DFU) and once written the strip can then be driven by jamming the string into a suitably powerful USB wall charger. The woman behind the build, [Jana Marie], has mentioned that Open Pixel Control could be implemented but that may be an exercise left to the reader.

It’s a useful little tool, and one that promises to do even more with a little more development. Whipping up a few boards should be an easy task for anyone with a reflow oven and a free weekend. Oh, and if you’re tired of the WS2812? There’s other addressable LEDs out there, too!

Hard Drive Data Recovery – Why Not DIY?

Hard drive failures can be tough to bear, particularly for the average person who doesn’t back up. When it comes to data recovery, there’s always those bleating from the sidelines that it’s a job that must be left to the professionals. However, this is Hackaday, not HireSomeoneADay, so [Matt]’s video on do-it-yourself hard drive repair is just what we like to see.

The video begins with plugging the non-functional drive into an external caddy, and using a microphone to listen to the sounds it makes. Upon analysis, [Matt] concludes that the drive is not spinning up, and suspects the heads may be stuck, causing the problem. When tapping the drive fails to unstick the heads, the next step is disassembly.

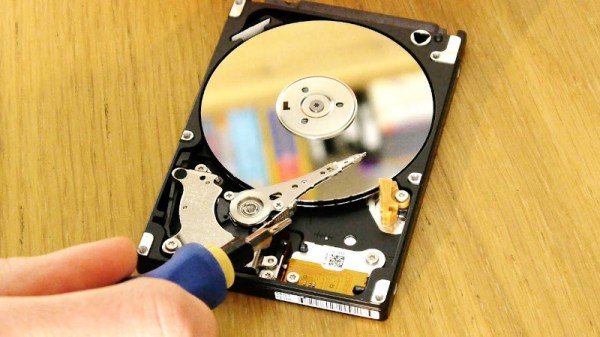
Despite the best advice from armchair commentators, this can be achieved at home without a clean room. [Matt] opens the drive carefully, and notes that the head is indeed stuck to the platter, instead of sitting in its home position. Using a screwdriver, the platters are rotated in their usual direction while gentle pressure is applied to pull the head away, being sure to use a light touch to avoid ripping the heads off entirely. With this done, the drive is reassembled and powered up. Amazingly, the repair is successful, and data is able to be recovered!

It’s important to note that this is a highly risky procedure, and not guaranteed to succeed. Truly valuable data should be left to the professionals, but if you’re skint or simply unbothered, it doesn’t hurt to have a go yourself. Be sure to avoid dust entering the drive, and take care not to touch the platters themselves. Of course, if you brick the device, you can always scavenge it for parts. Video after the break.

Continue reading “Hard Drive Data Recovery – Why Not DIY?” →

Replacing A Non-Replacable Laptop Keyboard

Spilling a drink on a laptop is a terrifying experience. If you’re lucky you’ll ruin just a keyboard, and if not, your entire machine could go up in smoke. Assuming you’ve just suffered the latter, you can still be out of luck, as many laptops come with fancy integrated keyboards that are not designed to be removable. It’s not always the case however, as this ingenious hack from [InsideMyLaptop] bears out.

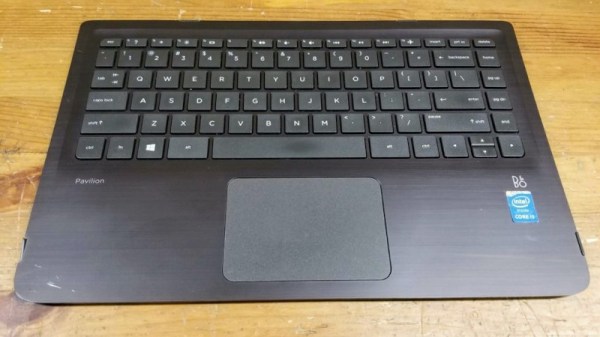
The hack begins with removing the top case assembly from a HP Pavilion laptop. The keyboard is riveted into the top plate assembly, along with the trackpad, which would normally necessitate their replacement as a total unit. However, if properly armed with a soldering iron, these plastic rivets can be melted to allow the backing plate and keyboard to be removed. A replacement part can then be sourced, and the remaining rivet stubs can be remelted to hold the new part in place.

It’s a simple hack, but one that goes to show one shouldn’t always take “No User Servicable Parts Inside” as an answer. We’ve seen other useful work from [InsideMyLaptop] before – like this power jack repair way back in 2011.

Slack, Now On Windows 3.1

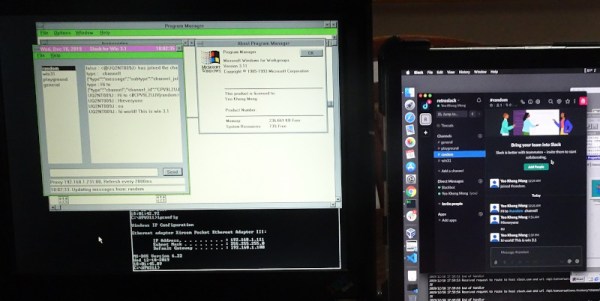
Slack is either an online collaboration tool, or a religion, depending on who you talk to. Naturally, it’s accessible across all manner of modern platforms, from Windows and MacOS to smartphones. However, some prefer to go further back. At a recent company hackathon, [Yeo Kheng Meng] decided to create a Slack client for Windows 3.1.

This is how you learned to program before the Internet.

Programming for an older OS, in this case, Windows For Workgroups 3.11, requires setting up a viable development environment. Visual C++ 1.52 was pressed into service in this case, being the last version capable of targeting Windows 3.11. The development environment is run on a Windows 2000 virtual machine running on a Mac laptop. This was chosen for its ability to run 16-bit apps, and its Samba compatibility with both Windows 3.11 and Windows 10 and modern Macs.

There were several challenges to face along the way. Old school Windows simply isn’t capable of dealing with HTTPS, necessitating a proxy to handle the exchange of packets with Slack servers. Additionally, memory management was a hassle due to the limits of the 16-bit architecture. Thankfully, an old programming manual from the era was of great help in this regard.

At the end of the hackathon, a usable Slack client was up and running, complete with garish colors from the early Windows era. There’s a few key features missing, such as the ability to resolve user IDs, but overall, the concept works. We’ve seen [Yeo]’s work with this vintage OS before too. Video after the break.

Continue reading “Slack, Now On Windows 3.1” →