Make Your Own Flexible Panel Lights

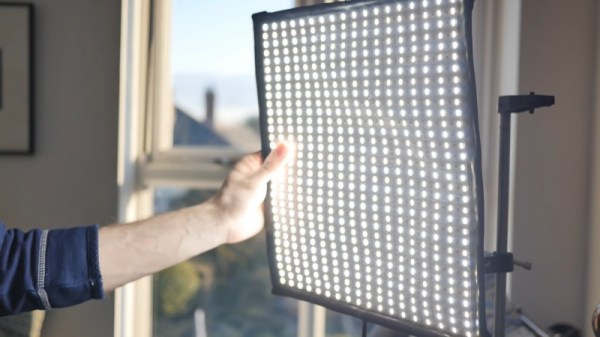
In this day and age, production values are everything. Even bottom-rung content creators are packing 4K smartphones and DSLRs these days, so if you want to compete, you’re gonna need the hardware. Lighting is the key to creating good video, so you might find a set of flexible panel lights handy. Thankfully, [DIY Perks] is here to show you how to build your own. (Video embedded below.)

The key to building a good video light rig is getting the right CRI, or Color Rendering Index. With low CRI lights, colors will come out looking unnatural or with odd casts in your videos. [DIY Perks] has gone to the effort of hunting down a supplier of high-quality LED strips in a range of different color temperatures that have a high CRI value, making them great for serious video work.

To build the flexible panel, the LED strips are glued onto a fake leather backing pad, which is then given a steel wire skeleton to enable it to be bent into various shapes. Leather loops are built into each corner of the panel as well, allowing the light to be fitted to a stand using a flexible aluminium bracket. The LEDs are slightly under-volted to help them last longer and enable them to run from a laptop power supply.

The build is one that focuses on light quality and usability, rather than just throwing a bunch of bright LEDs at the problem and calling it good. The results are great, with the panel showing a significant improvement on [DIY Perks]’s earlier builds.
Continue reading “Make Your Own Flexible Panel Lights” →
Fake Graphics Cards And How To Fix Them

When shopping online, there’s plenty of great deals out there on modern graphics hardware. Of course, if you’re like [Dawid] and bought a GTX1050 Ti for $48 from Wish, you probably suspect it’s too good to be true. Of course, you’d be correct.

[Dawid] notes from the outset that the packaging the card ships in is unusual. While it’s covered in NVIDIA and GeForce branding, there’s no note of the model number or even the overarching series. The card is loosely packed in bubblewrap, free to bounce around in transit. Upon installation, the card reports itself as a GTX1050 Ti, but refuses to properly work with NVIDIA drivers and routinely causes a Blue Screen of Death.

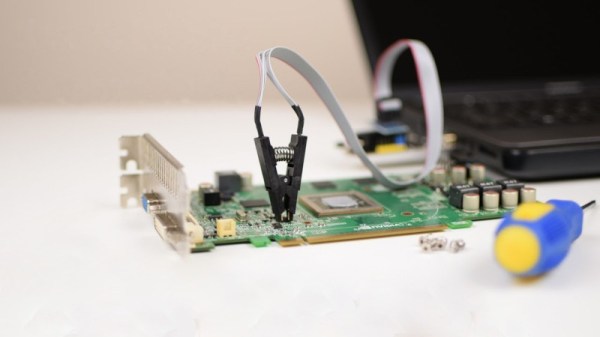
Upon disassembly, it becomes apparent that the card is merely a poorly manufactured GTS450 Revision 2, over five generations older than the card it was advertised as. Thanks to the mismatch between the actual hardware and what the card reports as, the drivers are unable to properly work with the card.

For those that have been scammed, there is some hope. [Phil] has had experience with several of these cards, which similarly misreport their actual hardware. To correct this, the cards need to have their BIOS flashed to reflect reality, but the fake cards don’t work with NVIDIA’s NVFlash tool. Instead, they must be flashed manually using an EEPROM programmer. Once the cards are flashed with an appropriate BIOS, they can be used with the proper drivers and will function properly, albeit with much less performance than was advertised.

It’s an interesting insight into the state of online shopping platforms, and the old adage remains true – if it’s too good to be true, it probably is. Plus, hacking GPUs can often have great results. Video after the break.

Continue reading “Fake Graphics Cards And How To Fix Them” →

Boost Your WiFi Range With Cookware

WiFi was the killer technology that made home networking easy. No more messing around with hubs and cables and drilling holes in walls, simply turn the devices on and hit connect. Over time the speed and range has increased, but those with larger houses or granny flats out back have suffered. There are tricks to boost range however, and some of them involve cookware.

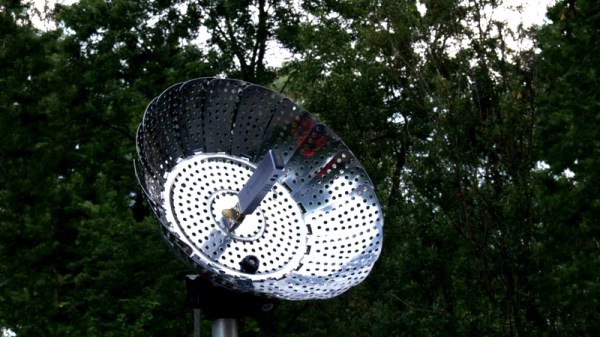
The clever hack here is to use a metal strainer as a parabolic reflector, to capture signals and focus them onto the PCB antenna in a USB WiFi dongle. The strainer is drilled out, and a USB extension cable has its female end glued into the base. This allows the dongle to be positioned inside the strainer. For best results, the dongle should be positioned so that its antenna elements are sitting at the focal point of the parabola; this can be determined through mathematics or simply by experimenting with positions to see what gives the best signal strength.

It’s a design that is quite directional, and should help boost signals as well as block out those from unwanted stations. The build is simple, and can even be tripod mounted which helps with aiming and looks cool to boot.

For many, WiFi antenna hacks are old school, but it’s always good to keep the techniques in mind as you never know when it will come in handy to solve a new problem. Some crazy things are possible with the right gear, too.

CPAP Monitor Alerts Wearer To Malfunctions

Continuous Positive Airway Pressure machines are a common treatment tool for sleep apnea and other respiratory issues. A common problem with their use is that the mask becomes dislodged during sleep, and thus fails to provide airway pressure to the patient. [Bin Sun] decided to take a stab at solving this problem.

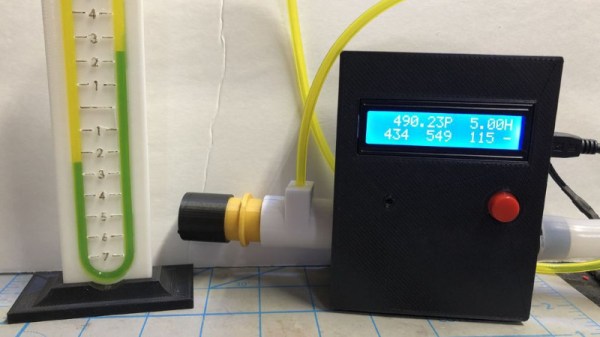
The project consists of an Arduino fitted with a MPXV7002DP pressure sensor. The sensor is used to monitor the pressure in the CPAP pipes. If the pressure varies regularly, it is likely the system is working. If however, the pressure remains at a roughly constant level, that suggests the mask is no longer properly fitted to the wearer, or that there is another problem. In this event, the device sounds a buzzer to wake the wearer, alerting them to check the equipment.

It’s a simple solution to the problem, and something we’re surprised isn’t built into most CPAP machines from the factory. It’s important to be careful before modifying any medical equipment, though we see plenty of hackers taking the plunge to innovate in this area.

A Look At The Basics Of Building An Arduino Watch

Miniaturization has made smart watches possible, even for the DIY maker to tinker with. For those just getting to grips with basic digital electronics, it can be daunting, however. For those just starting out, [陳亮] put together a handy guide to building the core of an Arduino-based watch.

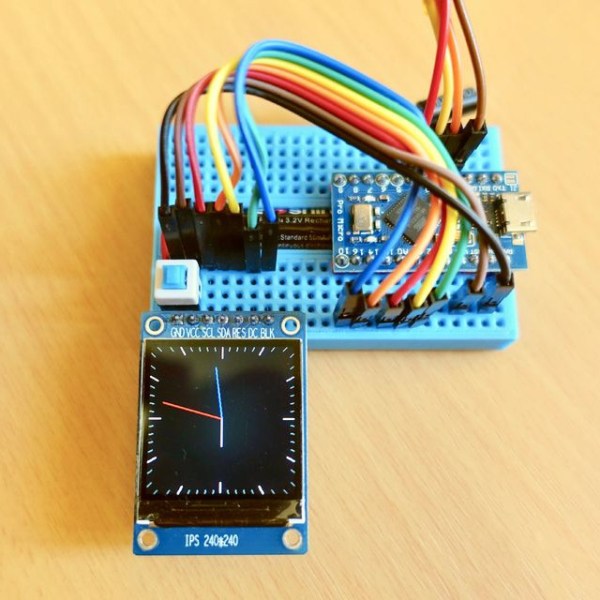
The writeup starts at the beginning, going over the basic hardware requirements for a smart watch. This involves considering size, packaging and power draw, as well as the user interface. The build settles on an Arduino Pro Micro, as it uses the ATmega32U4 which eliminates secondary USB-to-serial chips, helping cut down on power consumption. A square IPS LCD display is used to display an analog-style watch face, and time is kept by a DS3231 real-time clock. A pair of small vibration sensors are used to wake the watch when the user moves their wrist to check the time.

While it doesn’t cover the final assembly into a watch-like form factor, it’s a handy guide on what it takes to build a working watch for those who are still getting their feet wet with hardware. Once you’ve got that down, it’s time to contemplate how you’ll build the sleek exterior. Naturally, a good maker has that covered, too.

Driving P5 Panels With A Raspberry Pi

Building displays out of LEDs can be fun, but quickly becomes tedious as the pixel count increases. At this point, it’s worthwhile investing in off-the-shelf panels that have everything pre-soldered and ready to go. [Tom Hammond] wanted to run a P5 panel, and put a Raspberry Pi to work to get it going.

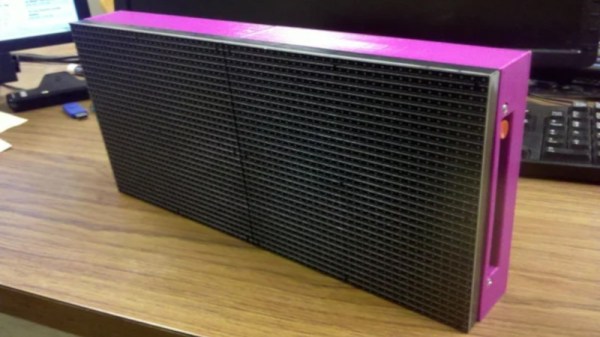
P5 panels are so-called for their 5 mm spacing between LEDs. The panels in question are built with RGB LEDs, allowing full-color graphics to be displayed. In this build, a 64 x 32 panel is used for a total of 2048 pixels. A Raspberry Pi Zero runs the display, using its GPIO to clock out pixel data. Software designed for Christmas light displays is used to program the light show, with xLights being the choice in this case. It’s all wrapped up in a tidy 3D printed frame, and the final product looks remarkably well put together.

It’s a great way to get familiar with P5 panels, and an excellent starting point if you’re contemplating a larger build down the track. If you’re going all out, consider how to make the most of your install from an architectural perspective. Video after the break.

Continue reading “Driving P5 Panels With A Raspberry Pi” →

Big Ol’ LED Wall Looks Cool, Can Draw Over 170 Amps

Building giant LED walls comes with a serious set of challenges. Whether they lie in power, cable routing, or just finding a way to clock out data fast enough for all the pixels, it takes some doing to build a decent sized display. [Phill] wanted a statement piece for the office, so rolled up his sleeves and got to work.

The build uses P5 panels, which we’ve seen used before on a smaller scale. Initial testing was done with a Raspberry Pi 3, which started to run out of grunt when the build reached 28 panels. The refresh rate was slow, and anything with motion looked messy. At that point, a dedicated driver was sourced in order to handle the full 48-panel display. Other challenges involved dealing with the huge power requirements – over 170 amps at 5 volts – and building a frame to hold all the panels securely.

The final product is impressive, standing 2 meters wide and 1.2 meters high. Resolution is 384 x 256. With a Mac Mini running video into the display through the off-the-shelf driver, all manner of content is possible. [Phill] even whipped up a Slack channel for users to send GIFs and text messages to the display. Naturally, we’re sure nobody will take advantage of this functionality.

If you’ve got your own giant LED wall, and you’re dying to tell us about it, make sure you get in touch. Video after the break.

Continue reading “Big Ol’ LED Wall Looks Cool, Can Draw Over 170 Amps” →