Reflow Solder Your Micro SD To Ensure It Doesnt Go Anywhere

SD cards are great inexpensive storage for your embedded project. Using SPI,  they only take a few wires to hook up, and every micro-controller has a FAT file system interface to drop in your project. Problem with SD cards are the connectors.

Usually connectors cost more than the brains of your project,  and the friction fit, spring loaded contacts are not ideal for temperature swings, humidity and high vibration applications. Wouldn’t it be nice if you could just solder the thing down, especially if you know you are never going to remove it?

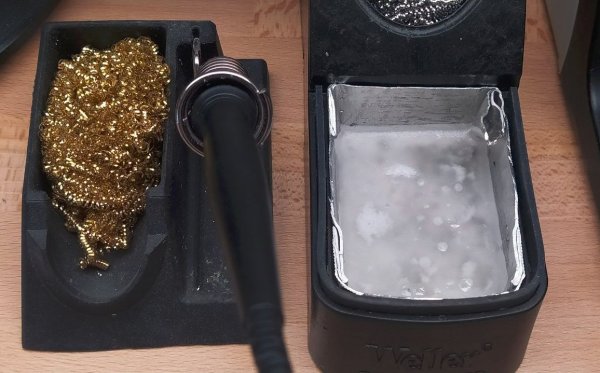
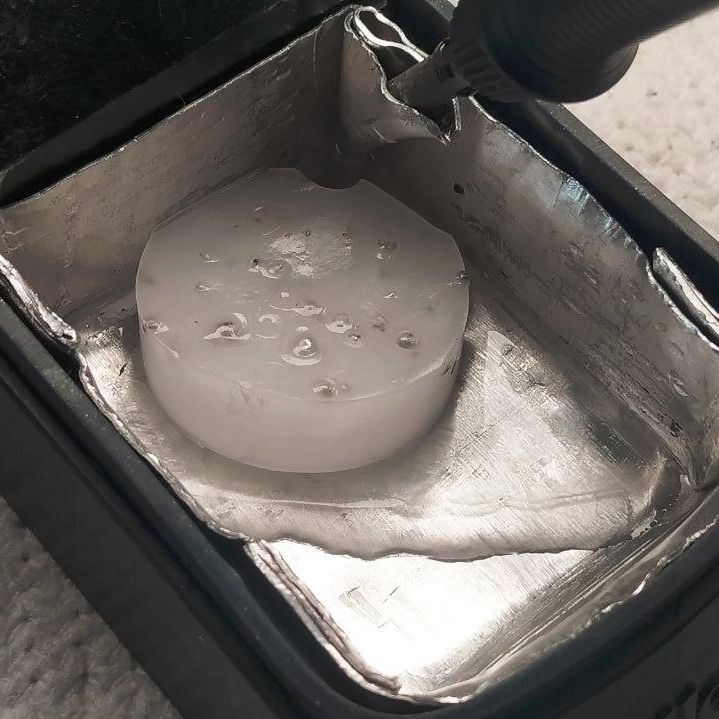
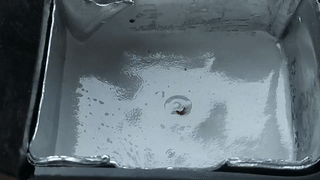
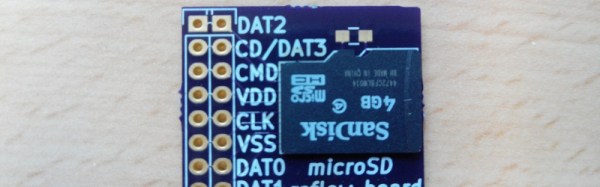
[Timothée] decided to try and succeeded in reflow soldering a Micro SD card direct to a breakout board. While starting as a what if experiment, the PCB was laid out in Ki-Cad and sent off to a fab. Once returned the Micro SD was fluxed, tinned and fluxed again, then reflowed using an IR setup.

The end result is a handy breakout board where you never have to worry about someone swiping the card to jam in their camera, and is ready for any breadboard project.

Using an SMD capacitor as a clip for flash media on a circuit board.

SMD Capacitor Doubles As Cheap SD Card Latch

Here’s a clever hack. Simple, elegant, and eminently cost-effective: using an SMD capacitor to hold your flash media in place!

This is a hack that can pretty much be summed up with just the image at the top of the page — a carefully placed SMD capacitor soldered to a routed tab makes for an extremely cost effective locking mechanism for the nearby SD card slot. There’s just enough flexibility to easily move the capacitor when its time to insert or eject your media.

It’s worth noting that the capacitor in this example doesn’t even appear to be electrically connected to anything. But there’s also no reason you couldn’t position one of the capacitors in your existing bill of materials (BOM). This form of mechanical support will be much cheaper than special purpose clips or mounts. Not a big deal for low-volume projects, but if you’re going high-volume this is definitely something to keep in mind.

If you’re just getting started with SMD capacitors then one of the first things to learn is how to solder them. Also, if you’re hoping to salvage them then try to look for newer equipment which is more likely to have SMD components than through-hole. If you’re planning to use your capacitors for… “capacitance” (how quaint), you can start by learning the basics. And if you want to know everything you can learn about the history of capacitors, too.

Thanks to [JohnU] for writing in to let us know about this one. Have your own natty hacks? Let us know on the tipsline!

Hacker Tactic: ESD Diodes

A hacker’s view on ESD protection can tell you a lot about them. I’ve seen a good few categories of hackers neglecting ESD protection – there’s the yet-inexperienced ones, ones with a devil-may-care attitude, or simply those of us lucky to live in a reasonably humid climate. But until we’re able to control the global weather, your best bet is to befriend some ESD diodes before you get stuck having to replace a microcontroller board firmly soldered into your PCB with help of 40 through-hole pin headers.

Humans are pretty good at generating electric shocks, and oftentimes, you’ll shock your hardware without even feeling the shock yourself. Your GPIOs will feel it, though, and it can propagate beyond just the input/output pins inside your chip. ESD events can be a cause of “weird malfunctions”, sudden hardware latchups, chips dying out of nowhere mid-work – nothing to wish for.

Worry not, though. Want to build hardware that survives? Take a look at ESD diodes, where and how to add them, where to avoid them, and the parameters you want to keep in mind. Oh and, I’ll also talk about all the fancy ways you can mis-use ESD diodes, for good and bad alike!

Continue reading “Hacker Tactic: ESD Diodes”

DIY laser microphone on cutting mat

Spy Tech: Build Your Own Laser Eavesdropper

Laser microphones have been around since the Cold War. Back in those days, they were a favorite tool of the KGB – allowing spies to listen in on what was being said in a room from a safe distance. This project by [SomethingAbtScience] resurrects that concept with a DIY build that any hacker worth their soldering iron can whip up on a modest budget. And let’s face it, few things are cooler than turning a distant window into a microphone.

At its core this hack shines a laser on a window, detects the reflected light, and picks up subtle vibrations caused by conversations inside the room. [SomethingAbtScience] uses an ordinary red laser (visible, because YouTube rules) and repurposes an amplifier circuit ripped from an old mic, swapping the capsule for a photodiode. The build is elegant in its simplicity, but what really makes it shine is the attention to detail: adding a polarizing filter to cut ambient noise and 3D printing a stabilized sensor mount. The output is still a bit noisy, but with some fine tuning – and perhaps a second sensor for differential analysis – there’s potential for crystal-clear audio reconstruction. Just don’t expect it to pass MI6 quality control.

While you probably won’t be spying on diplomats anytime soon, this project is a fascinating glimpse into a bygone era of physical surveillance. It’s also a reminder of how much can be accomplished with a laser pointer, some ingenuity, and the curiosity to see how far a signal can travel.

Continue reading “Spy Tech: Build Your Own Laser Eavesdropper”

the PTC fuse to blame for the fault described, on the ROG Ally board, with a wire soldered across the fuse

ROG Ally SD Card Slot Fix Shines Light On PTC Fuse Failure Modes

The Asus ROG Ally is a handheld that, to our pleasant surprise, has attracted a decently sized modding community. Recently, we’ve stumbled upon a Reddit post investigating a somewhat common failure mode of this handheld — the microSD card slot going out of order, where an inserted card fails to be recognized, pretty irritating to encounter. Now, it turns out, this is down to a certain model of PTC fuses being failure-prone.

It makes sense to fuse the SD card slot. The cards are dense pieces of technology that are subject to some wear and tear in daily use. As such, it’s not unheard of that a microSD card can short-circuit internally — heating up to the point of melting plastic and giving people severe burns. Given that such a card is typically connected to a beefy 3.3 V rail, any mass-manufactured device designer could want to put a fuse between the 3.3 V rail and the card. However, on some ROG Ally batches, a certain make of the fuse is used, that appears to be likely to develop faults: the fuse’s resistance increasing dramatically during the card’s normal operation, with the SD card being supplied subpar power as a result.

There’s a fair bit of investigating happening in the comment section, with people posting oscilloscope captures, using breakouts to tap the SD card, and figuring out the fuse part numbers for the affected models. As for Reddit’s solution, it’s short-circuiting the fuse with a piece of thin wire — we would probably source a suitable fuse and solder it on top of the faulty one.

This isn’t the first ROG Ally modification we’ve covered so far, and given the activity we’re seeing, it’s unlikely to be our last.

Old Ham Wisdom Leads To Better Aluminum Painting

When [bdk6] tried painting aluminum for electronic projects, he found it didn’t tend to stay painted. It would easily scratch off or, eventually, even flake off. The problem is the paint doesn’t want to adhere to the aluminum oxide coating around the metal. Research ensued, and he found an article in an old ham radio magazine about a technique that he could adapt to get good results painting aluminum.

Actually, paint apparently adheres poorly, even to non-oxidized aluminum. So the plan is to clean and remove as much aluminum oxide as possible. Then the process will convert the aluminum surface to something the paint sticks to better. Of course, you also need the right kind of paint.

The key ingredients are phosphoric acid and zinc phosphate. Phosphoric acid is found in soft drinks, but is also sold as a concrete and metal prep for painting. The zinc phosphate is part of a special paint known as a self-etching primer.

Cleaning takes soap, elbow grease, and sandpaper. The next step is a long soak in the phosphoric acid. Then you apply a few coats of self-etching primer and sand. Once it is all set, you can paint with your normal paint. That’s usually epoxy-based paint for [bdk6].

Of course, you can also dye aluminum while anodizing it. Soldering aluminum also has its challenges.

The SSD described, a green board with a ZIP connector, a controller chip and two out of four NAND chips populated. There's traces of flux on the chip, as it hasn't been washed after soldering yet.

ZIF HDDs Dying Out? Here’s An Open-Source 1.8″ SSD

A lot of old technology runs on parts no longer produced – HDDs happen to be one such part, with IDE drives specifically being long out of vogue, and going extinct to natural causes. There’s substitutes, but quite a few of them are either wonky or require expensive storage medium. Now, [dosdude1] has turned his attention to 1.8 ZIF IDE SSDs – FFC-connected hard drives that are particularly rare and therefore expensive to replace, found in laptops like the Macbook Air 1,1 2008 model. Unsatisfied with substitutes, he’s designed an entire SSD from the ground up around an IDE SSD controller and NAND chips. Then, he made the design open-source and filmed an assembly video so that we can build our own. Take a look, we’ve put it below the break!

For an open-source design, there’s a respectable amount of work shared with us. He’s reverse-engineered some IDE SSDs based on the SM2236 controller to design the schematic, and put the full KiCad files on GitHub. In the video, he shows us how to assemble this SSD using only a hot air station and a soldering iron, talks about NAND matching and programming software intricacies, and shows the SSD working in the aforementioned Macbook Air. Certainly, assembly would have been faster and easier with a stencil, but the tools used work great for what’s a self-assembly tutorial!

Continue reading “ZIF HDDs Dying Out? Here’s An Open-Source 1.8″ SSD”