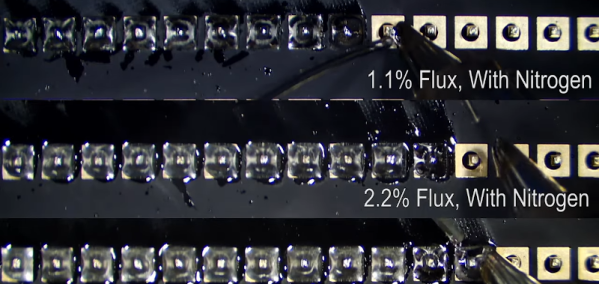
If you’ve ever welded, you know that some welders blow a shield gas over the work for different reasons. For example, you often use a gas to displace oxygen from the area and avoid oxidation. You can also solder using a nitrogen shield. This allows higher temperatures and a reduction of flux required in the solder. Wave soldering often uses nitrogen, and JBC offers a soldering iron that can employ nitrogen shield gas. [SDG Electronics] puts that iron through its paces in the video below.
As you might expect, this isn’t a $50 soldering iron. The price for the iron is just under $1,000 and that doesn’t include the power supply or the nitrogen source. The nitrogen generator that converts compressed air into nitrogen is particularly expensive so [SDG] just used a cylinder of gas.
Tales of Raspberry Pi SD card corruption are available online by the fistful, and are definitely a constant in Pi-adjacent communities. It’s apparent that some kind of problems tend to arise when a Raspberry Pi meets an SD card – which sounds quite ironic, since an SD card is the official and recommended way of booting a Pi. What is up with all of that?
I can start with a history lesson. Back when Raspberry Pi launched in 2012 – which is now 10 years ago – there were SD card controller driver problems, which makes sense given the wide variety of SD cards available out there. They were verifiably fixed one by one at some point in time, as debugging goes, their impact decreased and bugs with individual cards got smoothed over. This is how the “Pi SD card corruption” meme was originally born; however, if the problems were to end there, so would the meme. Yet, tales of broken SD cards plague us to this day – way less severe than they were in the beginning, but pronounced enough that you’ll see people encounter them every now and then.
Over the years, a devoted base of Pi SD card haters has grown. Their demand has been simple – Raspberry Pi has to get an ability to boot from something else, in large part because of corruption reasons, but also undeniably because of speed and capacity/cost limitations of SD cards. Thanks to their demands and work, we’ve seen a series of projects grow from unofficial efforts and hacks into officially supported Raspberry Pi abilities – USB boot being initially more of a workaround but now something you can enable out of the box, SSD-equipped Pi enclosures becoming more of a norm, and now, NVMe boot appearing on the horizon. Every few years, we get a new way to boot a Pi. Continue reading “Raspberry Pi And The Story Of SD Card Corruption”→
We might be amidst a chip shortage, but if you enjoy reverse-engineering, there’s never a shortage of intriguing old chips to dig into – and the 2513N 5×7 character ROM is one such chip. Amidst a long thread probing a few of these (Twitter, ThreadReader link), [TubeTime] has realized that two address lines were shorted inside of the package. A Twitter dopamine-fueled quest for truth has led him to try his hand at making the chip work anyway. Trying to clear the short with an external PSU led to a bond wire popping instead, as evidenced by the ESD diode connection disappearing.
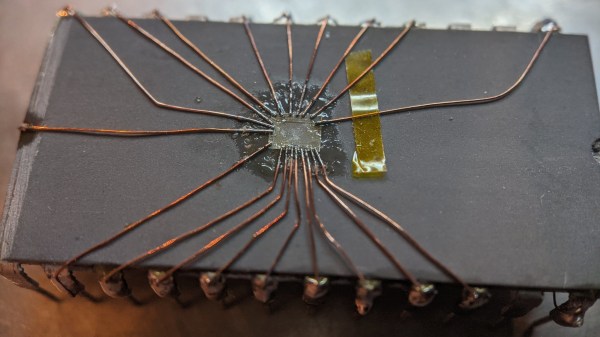
A dozen minutes of sandpaper work resulted in the bare die exposed, making quick work of the bond wires as a side effect. Apparently, having the bond pads a bit too close has resulted in a factory defect where two of the pads merged together. No wonder the PSU wouldn’t take that on! Some X-acto work later, the short was cleared. But without the bond wires, how would [TubeTime] connect to it? This is where the work pictured comes in. Soldering to the remains of the bond wires has proven to be fruitful, reviving the chip enough to continue investigating, even if, it appears, it was never functional to begin with. The thread continued on with comparing ROMs from a few different chips [TubeTime] had on hand and inferences on what could’ve happened that led to this IC going out in the wild.
Such soldering experiments are always fun to try and pull off! We rarely see soldering on such a small scale, as thankfully, it’s not always needed, but it’s a joy to witness when someone does IC or PCB microsurgery to fix factory defects that render our devices inoperable before they were even shipped. Each time that a fellow hacker dares to grind the IC epoxy layers down and save a game console or an unidentified complex board, the world gets a little brighter. And if you aren’t forced to do it for repair reasons, you can always try it in an attempt to build the smallest NES in existence!
As the pandemic edges further into its second year, the tedium of life under lockdown is taking its toll. We may be fighting the spread of infection by staying home and having our meetings over video conferencing software, but it’s hellishly boring! What we wouldn’t do for our hackerspaces to be open, and for the chance to hang out and chew the fat about our lockdown projects!
Here at Hackaday we can bring some needed relief in the form of the Hackaday Remote: Bring-A-Hack held via Zoom on Thursday, April 8th, at 1pm Pacific time. We know you’ve been working hard over the last year, and since you’ve been denied the chance to share those projects in person, we know you just can’t wait to sign up. Last year’s Remoticon showed us the value of community get-togethers online, with both the team soldering challenge rounds and the bring-a-hack being particular event highlights, so it’s time for a fresh dose to keep up our spirits.
It doesn’t matter how large or small your project is, if it interests you other readers will also want to see it. Be prepared to tell the world how you made it, what problems you solved, and a bit about yourself, and then step back, take a bow, and be showered with virtual roses from the adoring masses. There’s a sign-up link if you have a project to show off Looks like we’re full up for planned presenations, but still come and bring your hacks for showing in conversation groups. Don’t hold back if you’re worried it’s not impressive enough, a certain Hackaday scribe has submitted an OpenSCAD library she’s working on.
SD cards have long been a favorite with microcontroller hobbyists. Cheap, readily available, and easily interfaced, they remain a staple for small projects that need to store a lot of data. Now, they’re available in chip form! These are known as SD NAND parts that emulate the SD card interface itself.
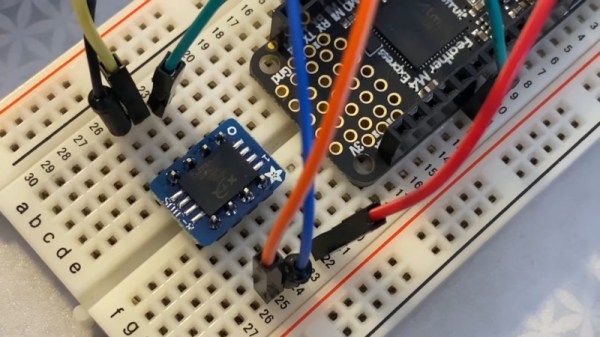
These chips come in standard LGA8 surface mount package and can be easily soldered to a board, offering mechanical and manufacturing benefits versus using a normal SD or microSD card in a slot-type connector. Also, unlike other SMD flash memory parts, they handle all the file system details and wear levelling for you! With the inflation of SD card sizes, it’s also difficult to find these on the shelf in normal cards these days.
[Adafruit] plan to have a breakout for these parts out soon with a level shifter included for ease of use. We can imagine these chips finding their way into all manner of datalogger projects, since they can be ordered with other parts and permanently soldered into a design. If you’ve got a particularly good idea where these chips would prove useful, sound off in the comments. Video after the break.
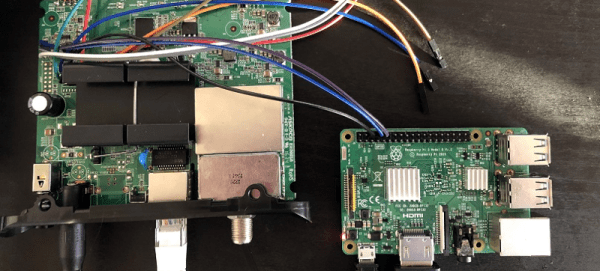
What do you do with an old cable modem in a closet? If you are [stdw] you reverse engineer it and turn it into a software-defined radio. The modem in question was a Motorola MB7220. After looking at a similar project using a different modem, it seemed like it should be doable.
Cracking open the case revealed two likely UART ports, one of which was active. The output from that UART provided a lot of info. The chip was a Broadcom BCM3383 which is a MIPS processor. It had eCos as an operating system. However, the bootloader eventually disables the UART, so there wasn’t much more investigation possible via the serial terminal.
The next step was to dump the flash memory. That required a little solder surgery to prevent the board from starting while the flash chip had power. It appeared that some key credentials and configuration data were present, but they were really backups. After doing a factory reset to remove the backups, the right data was apparent.
After some lengthy exploration, the diagnostic that builds a spectrum display gave up its data. At first, the data was just a small sample of what was really required, but it did show a local FM station as a spectrum. Eventually, the data loss rate was down to about 12% when streaming which is not great, but good enough. You can hear an audio clip of the reception. Not exactly crystal-clear quality, but not bad.
Of course, no one will use this for an FM radio. But it is a fascinating view into how far you can hack into a device like this if you have some skills and patience. There must be something about quarantine that is making people hack old gear, as we just recently saw a similar Netgear hack. Even cheap games aren’t safe.
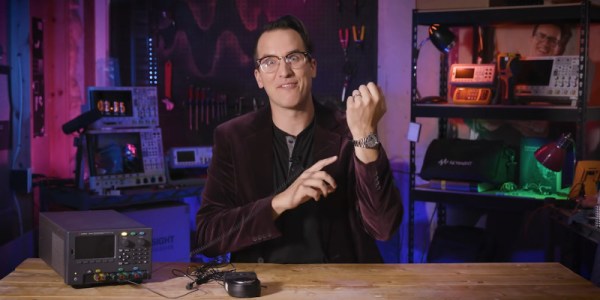
Anti-static ESD straps are de rigueur in lab settings for those working with sensitive electronics. They’re a simple protective device, and one that generally doesn’t warrant a second thought. However, [Daniel Bogdanoff] figured they could stand to be a little more fashionable, and set to work on a fancier design.
The first step was to take a look at a regular ESD strap. Typically, they consist of a band that fastens around the wearer’s wrist, with a metal stud for connecting to the earthing lead. The earthing lead contains a high resistance to limit the discharge current to avoid ugly high-energy shorts when wearing the strap.
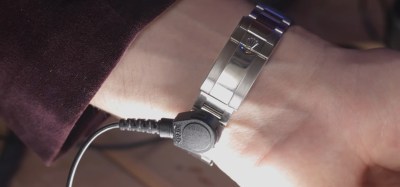
The metal stud is attached to a replacement link on the ROLEX’s strap, making the modification neat, tidy, and reversible.
With a good understanding of the basics, [Daniel] set about modifying a CASIO calculator watch for practice. After soldering a metal stud to the watch case failed, a second attempt with conductive epoxy worked great. The watch could be connected to the earthing strap, and an ESD tester confirmed the device was doing its job.
But unfortunately, permanently modifying the borrowed ROLEX wasn’t an option. Instead, [Daniel] limited his work to a single replacement link which could be inserted into the watch band. Hooked up to an earthing strap, the luxury watch also passed a basic ESD test successfully.
[Daniel] notes that while this is a fun experiment, using properly rated safety equipment is best. Additionally, he points out that the ROLEX is likely to do worse than the CASIO for the simple fact that a metal-banded watch is more likely to cause shorts when working on electronics. Of course, if a watch isn’t your thing, consider a ring instead. Video after the break.