The Smallest Wave Blaster Card

In the early 90s, the Creative Sound Blaster was the soundcard. It wasn’t the absolute best sounding card on the market, but it quickly became the defacto standard and delivered good sound at the right price. It relied primarily on the Yamaha OPL-3 FM synthesis chip, but if you were feeling spendy, you could pimp it out with a Wave Blaster add-on card, which essentially bolted a sample synthesis engine onto the card. This gave the card a broad palette of sampled instruments with which to play MIDI tunes all the sweeter, so you could impress your grade school chums who came over to play DOOM.

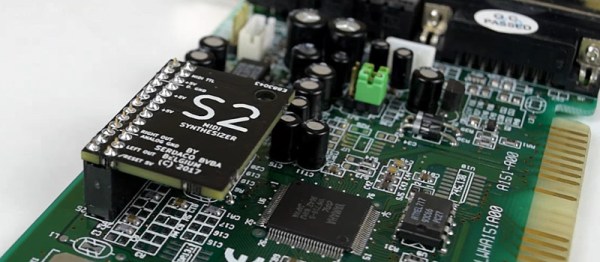
It’s now 2017, if you hadn’t checked the calendar, and Sound Blasters from yesteryear are only going to go further upward in price. It goes without saying that add-on daughterboards and accessories are even rarer and are going to be priced accordingly. So, if you’re building a vintage gaming rig and are desperate for that sample-synth goodness, [Serdashop] are here to help with their latest offering, the Dreamblaster S2.

It’s reportedly the smallest Wave Blaster add-on board available, which is awesome. If you’re sticking it on top of your Sound Blaster 16, yes, it’s pointless – you’re not exactly short on room. But if you want to integrate this with a compact microcontroller project? Size matters. Yes, you can feed this thing MIDI signals and it’ll sing for you. A hot tip for the uninitiated: MIDI speaks serial, just like everything and everyone else. Your grandma learned to speak it in the war, you know.

Your options for hooking this up are either slotting it into a Wave Blaster compatible card, or buying the carrier board that allows you to use it with a Game Port, in addition to custom-wiring it to your own hardware. We’d love to see this as a HAT for the Raspberry Pi Zero. Do it, send it in and we’ll write it up.

We’ve seen [Serdashop]’s hardware here before – namely, the earlier Dreamblaster X2. Video below the break.

Continue reading “The Smallest Wave Blaster Card”

The Cardboard Computer

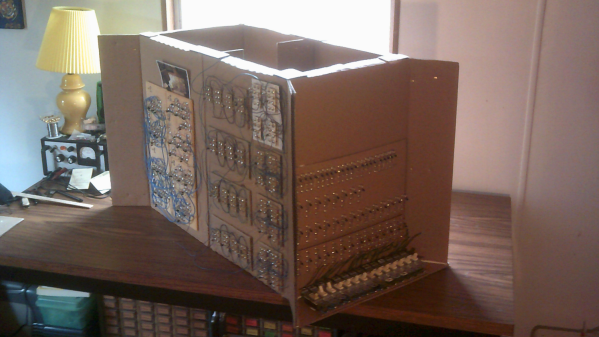
Every time we say “We’ve seen it all”, along comes a project that knocks us off. 60 year old [Mark Nesselhaus] likes to learn new things and he’s never worked with hardware at the gate level. So he’s building himself a 4-bit Computer, using only Diode-Transistor Logic. He’s assembling the whole thing on “card board” perf-board, with brass tacks for pads. Why — because he’s a thrifty guy who wants to use what he has lying around. Obviously, he’s got an endless supply of cardboard, tacks and Patience. The story sounds familiar. It started out as a simple 4-bit full adder project and then things got out of hand. You know he’s old school when he calls his multimeter an “analog VOM”!

It’s still work in progress, but he’s made a lot of it in the past year. [Mark] started off by emulating the 4-bit full adder featured on Simon Inns’ Waiting for Friday blog. This is the ALU around which the rest of his project is built. With the ALU done, he decided to keep going and next built a 4-to-16 line decoder — check out the thumbnail image to see the rats nest of jumbled wires. Next on his list were several flip flops — R-S, J-K and D types, which would be useful as program counters. This is when he bumped into problems with signal levels, timing and triggering. He decided to allow himself the luxury of adding one IC to his build — a 555 based clock generator. But he still needed some pulse shaping circuitry to make it work consistently.

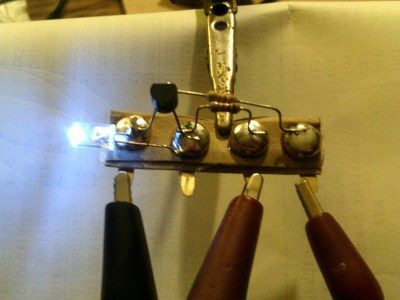
from right, Input, +5V, nc, gnd
LED Driver : from left, Gnd, NC, +5V, Input

[Mark] also built a finite-state-machine sequencer based on the work done by Rory Mangles TinyTim project. He finished building some multiplexers and demultiplexers, and it appears he may be using a whole bank of 14 wall switches for address, input and control functions. For the output display, he assembled a panel using LED’s recovered from a $1 Christmas light string. Something seems amiss with his LED driver, though — 2mA with LED on and >2.5mA with LED off. The LED appears to be connected across the collector and emitter of the PNP transistor. Chime in with your comments.

This build seems to be shaping along the lines of the Megaprocessor that we’ve swooned over a couple of times in the past. Keep at it, [Mark]!

Continue reading “The Cardboard Computer”

Raspberry Pi Chiptune Player Rocks A Sound Chip From The 80’s

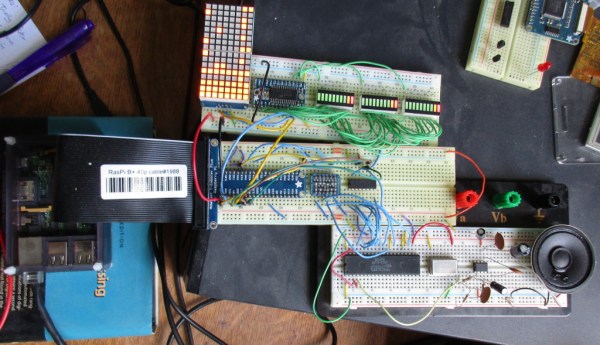
Sometimes it’s worth doing something in an inefficient way. For example, it might be worth it in order to learn something new, or just to use a particular part. [Deater] did just that with the Raspberry Pi AY-3-8910 Chiptune Player (with LED visualizers!)

The venerable General Instrument AY-3-8910 series sound chips were common in older hardware like home computers and game consoles as well as sound cards for the Apple II family. They were capable of generating three channels of square waves with various effects. Developers eventually squeezed every little bit of performance out with clever hacks. The Raspberry Pi has more than enough power to do all this in software, but as [Deater] puts it, it’s far more interesting to use an actual AY-3-8910 from the 80’s. Some LED bar graphs and matrices round out the whole system.

All the code for the Raspberry Pi AY-3-8910 chiptune player can be found on [deater]’s github repository for the project. A video of the player banging out some sounds is embedded after the break.

Continue reading “Raspberry Pi Chiptune Player Rocks A Sound Chip From The 80’s”

Beautiful Cardboard Robot Build

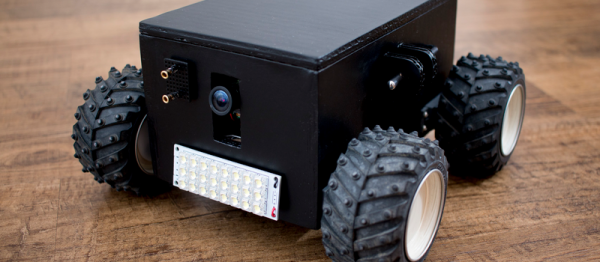
[Miloslav Stibor] may have built Mimobot 2.1 out of cardboard so that it’s not very heavy, but the robot is absolutely no lightweight. Read through his logs (in Czech, or in translation) and you’ll see what we mean.

Our favorite feature is the recharging dock and docking connectors, made respectively out of spring-loaded rivet ferrules and copper-tape-covered cardboard. The video found on that page is also absolutely brilliant: watch in awe as it climbs over children’s books, pulls a wooden train, or scales a mountain of pillows.

We wrote [Miloslav] and asked about the continuous-rotation servos, because they ran so smoothly at low speeds. He replaced the potentiometer with a pair of “carefully matched” 2.2 k resistors, and drives them with a PWM signal. Sounds easy, and obviously works very well. We were always under the impression that it was a little bit more complicated to get proportional control of hobby servos. We’ll have to experiment.

The wheels and lightweight frame (made of “military grade” cardboard — saturated with a wood/paper glue) make it entirely capable in living-room environments covered in cables or rugs, which is something we can’t say about our purchased vacuum-cleaner-bot. And the cell-phone remote interface that lets him control the onboard camera and its elevation and lighting. Driving the thing around with the phone control looks fun.

In short, if you build small robots, give this one a look. Something very much like this is now on our short must-build list. And we can’t wait to see Mimobot v3!

Retrotechtacular: Hand-Synthesized Sound

When you think of early sound synthesis, what technologies come to mind? The Hammond Organ?  Or perhaps its predecessor, Thaddeus Cahill’s Telharmonium? In the early 1920s and 30s, many Bauhaus artists were using paper and film to synthesize musical instruments.

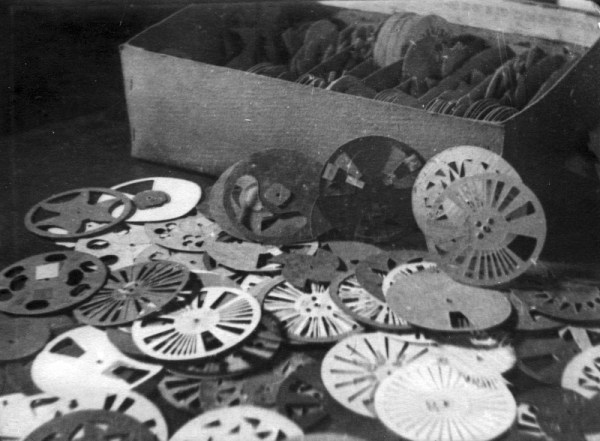
A few of them experimented with the optical film soundtrack itself, drawing waveforms directly upon it. [Evgeny Sholpo] created an optical synthesizer he called the Variophone. It used cardboard disks with intricate cutout patterns that resembled spinning, sonic snowflakes.

During the early 1930s, an artist named [Nikolai Voinov] created short animated films that incorporated the cut paper sound technique. [Voinov]’s soundtrack looked like combs of varying fineness. For his animated figures, [Voinov] cut and pieced together characters from paper and made them move in time to his handmade paper soundtrack.

In [Voinov]’s “Dance of the Crow”, an animated crow struts his stuff from right to left and back again while working his beak in sync with the music. The overall effect is like a chiptunes concertina issuing forth from a crow-shaped pair of bellows. It’s really not to be missed.

Thanks for the tip, [Leo]!

Retrotechtacular is a weekly column featuring hacks, technology, and kitsch from ages of yore. Help keep it fresh by sending in your ideas for future installments.

Logic Noise: Sweet, Sweet Oscillator Sounds

Welcome to part one of a series taking you down the rabbit hole of DIY electronic synthesizers based on (largely) CMOS logic chips. Instead of synths being commodity gear made by large corporate enterprises, we’ll be building with the cheapest available parts, using and misusing digital logic. In short, don’t expect pre-packaged smooth tones, because we’ll be making creative noise machines.

If you’re the chiptunes type, you’ll probably find something you like here. If you’re the circuit bender or electro-noise-punk type, this is gonna be right up your alley. If you just like to see CMOS chips wriggle and squirm in unintended ways, feel free to look over my shoulder. If you’re the type who insists that a screwdriver can’t be used to pry open a paint can, then maybe you’d better move along. There’s a thin line between the glitch as bug and the glitch as interesting discovery, and we’ll be dancing all over it.

Continue reading “Logic Noise: Sweet, Sweet Oscillator Sounds”

Reverse Engineering Super Animal Cards

If you don’t have a niece or nephew we encourage you to get one because they provide a great excuse to take apart kids’ toys.

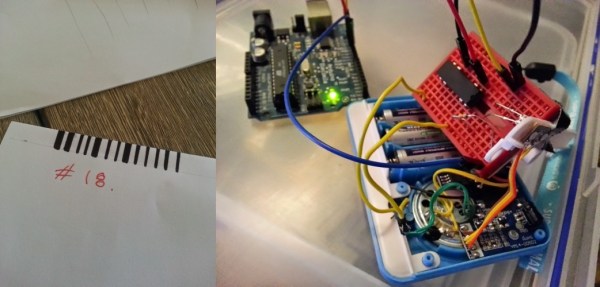
[Sam] had just bought some animal-themed trading cards. These particular cards accompany a card-reader that uses barcodes to play some audio specific to each animal when swiped. So [Sam] convinces her niece that they should draw their own bar codes. Of course it’s not that easy: the barcodes end up having even and odd parity bits tacked on to verify a valid read. But after some solid reasoning plus trial-and-error, [Sam] convinces her niece that the world runs on science rather than magic.

But it can’t end there; [Sam] wants to hear all the animals. Printing out a bunch of cards is tedious, so [Sam] opens up the card reader and programs and Arduino to press a button and blink an IR LED to simulate a card swipe. (Kudos!) Now she can easily go through all 1023 possible values for the animal cards and play all the audio tracks, and her niece gets to hear more animal sounds than any child could desire.

Along the way, [Sam] found some interesting non-animal sounds that she thinks are Easter eggs but we would wager are for future use in a contest or promotional drawing or something similar. Either way, its great fun to get to listen in on more than you’re supposed to. And what better way to educate the next generation of little hackers than by spending some quality time together spoofing bar codes with pen and paper?