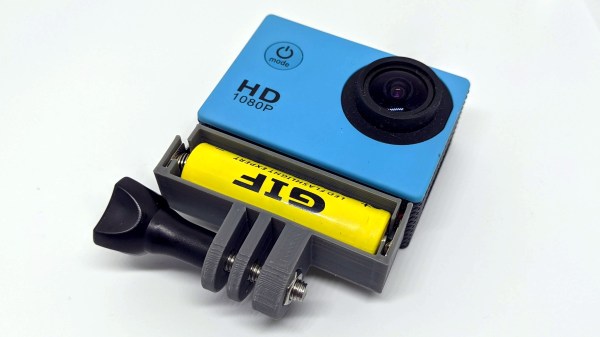
[Facelesstech] owns an SJCAM SJ4000 action camera, but the internal battery was no longer functional. Not wishing to buy a replacement and unwilling to hook up an ungainly USB cable to feed power, the solution was to design and 3D print an adapter to power the camera from a single rechargeable 14500 sized battery (which is the same size as an AA cell, and a good match for the width of the camera.)
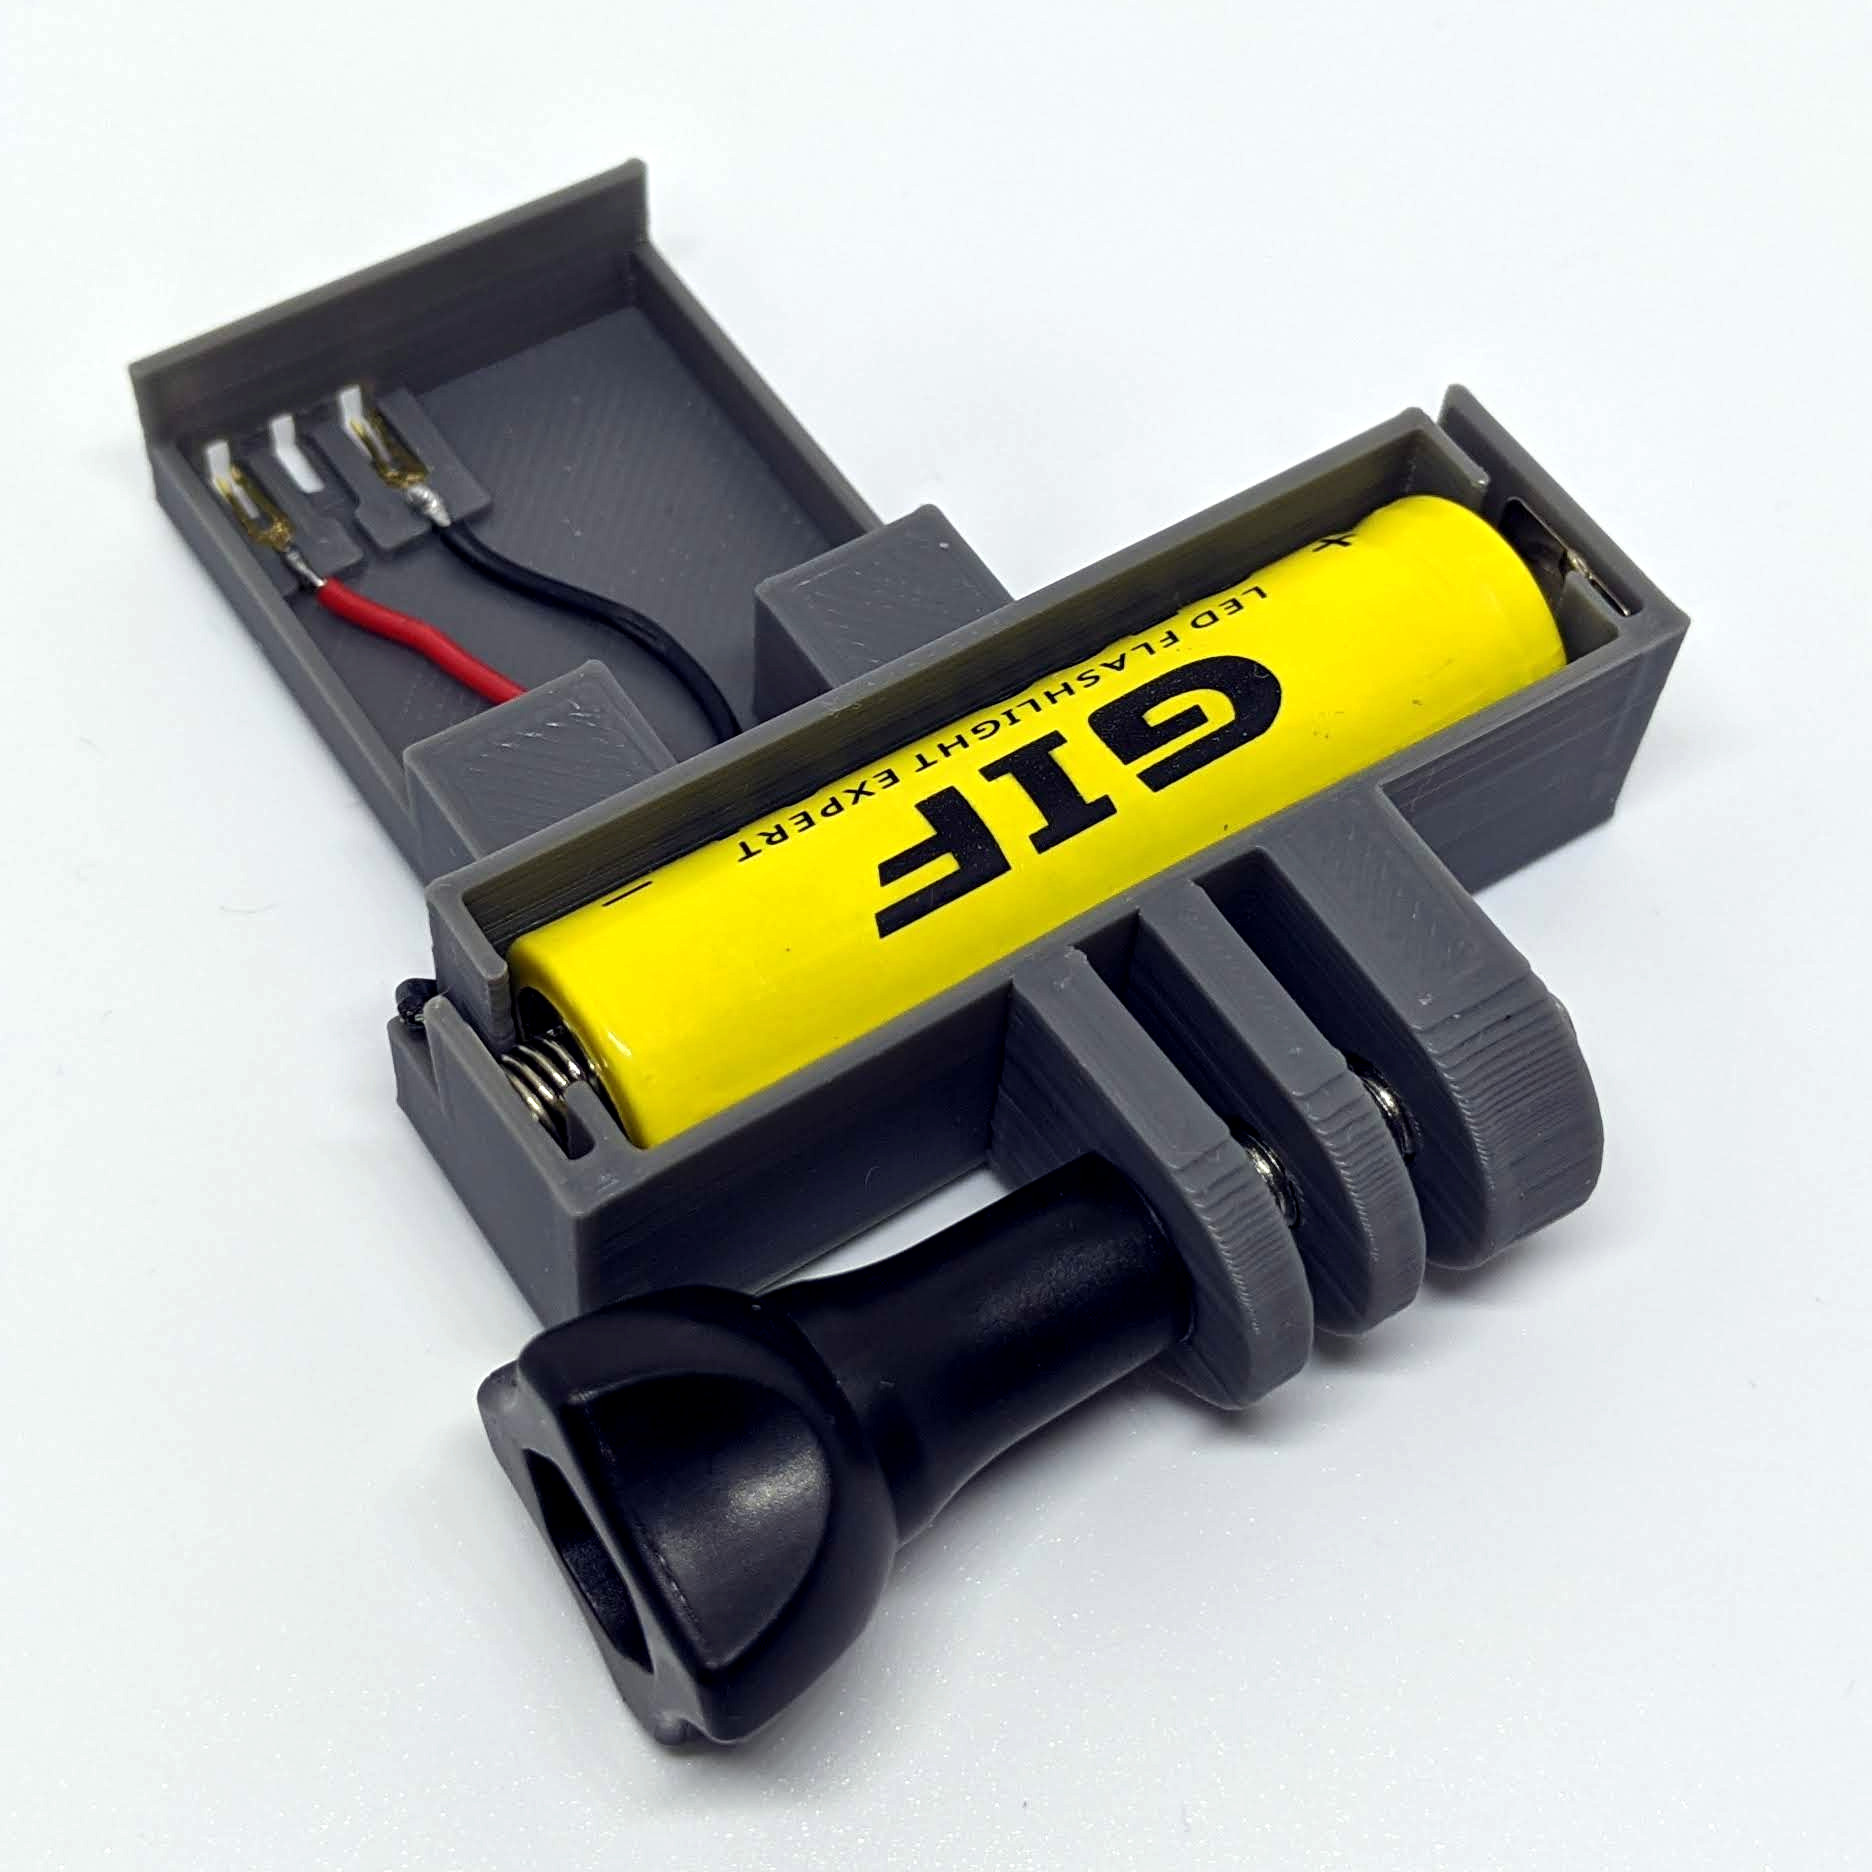
The adapter works by mimicking the original battery, so the camera never knows the difference. A 3D-printed holder for the 14500 battery (which doubles as a GoPro compatible mount) has an extension the same size and shape of the camera’s original internal battery. The tricky part was interfacing to the power connectors buried inside the camera’s battery bay. For a solution, [Facelesstech] eventually settled on the small connectors harvested from inside a female header, using them to connect to the small blades inside the camera. We broke open a spare female 0.1″ header, shown here, to make it clear where these little pieces come from. The only other battery hardware needed are the contacts for an AA cell, but those are also easy to harvest and reuse.
The GitHub repository for the project includes STL files as well as the FreeCAD files for the parts. A video overview is embedded below.
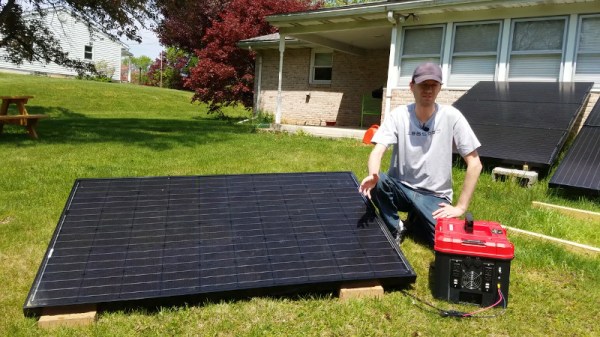
The build starts with 18650 lithium-ion cells sourced from a recycler, packed inside obsolete modem battery packs. After harvesting 390 cells, the best 364 are chosen and assembled into plastic holders to create a 14S26P configuration. A spot welder is employed to weld the pack together, with XT60 connectors used as the main bus connectors, albeit in a very non-standard configuration. Balance leads are hooked up to a 14S battery management system, to keep things in check. The huge pack is then installed inside a stout Craftsman toolbox, along with a MPPT solar charger module, and a 1500W inverter for output.
The build video is a great resource for anyone interested in building custom 18650 packs or battery solar power systems. [LithiumSolar] does a great job of clearly explaining each step and the reasons for part selections along the way. Of course, in a neat dovetail to this project, we’ve even seen solar-powered spot welders before – which would be useful if you need to replicate this build out in the field somewhere. Video after the break.
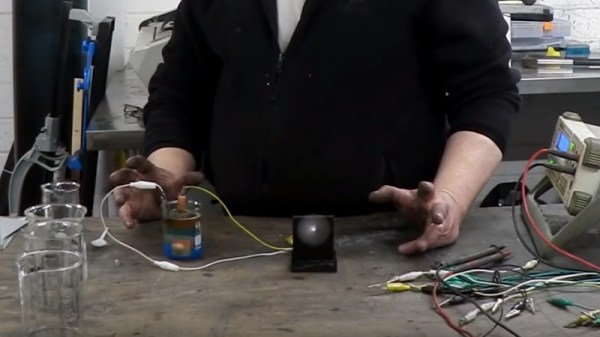
The internet is full of dubious content promoting “free energy” devices and other ideas that stretch credibility, so [Robert Murray-Smith] prefaces his demonstration of a gravity battery with a warning to look elsewhere if you are in search of such things. Instead he’s showing us a pair of cells from The Model Engineer and Amateur Electrician, a printed periodical that sounds to us something like an equivalent of Hackaday from the 1890s. (Video embedded below.)
The cells are termed gravity batteries because their constituents settle out into layers not unlike a tequila sunrise under the influence of gravity, something that made them especially suitable for the home constructor in the late 19th century when there were no handy wall outlets from which to snag a bit of power.
The chemistry of each is not unexpected if you spent any time in your high school’s lab, a zinc-copper primary cell with a zinc sulphate/copper sulphate electrolyte and a secondary zinc-carbon cell with a zinc bromide electrolyte and a layer of bromine forming on charging. The construction in large glass vessels is archaic though, and it’s this that’s prompted his video. He poses the question whether this type of cell might be revived using 21st century techniques to produce something of use today. The video is below the break, and even if you are not about to try your hand at electrochemistry it’s an interesting watch.
As electric utilization, adoption of electric cars, and the use of renewable power continues to rise, engineers all over are searching for the perfect utility scale battery. We have all heard about Tesla’s 100MW lithium battery pack in South Australia. The system is a massive success and has already paid itself back. However, engineers all over were quick to point out that, until we have a breakthrough, Lithium cells are just not the right choice for a utility system in the long run. There has to be a better solution. Continue reading “A Redox Flow Battery Made From Iron Industry Waste”→
[Dirk] shared a fascinating project of his that consists of several different parts coming together in a satisfying whole. It’s all about wanting to do target practice, indoors, using a simple red laser dot instead of any sort of projectile. While it’s possible to practice by flashing a red laser pointer and watching where it lands on a paper target, it’s much more rewarding (and objective) to record the hits in some way. This is what led [Dirk] to create human-powered, battery-free laser guns with software to track and display hits. In the image above, red laser hits on the target are detected and displayed on the screen by the shooter.
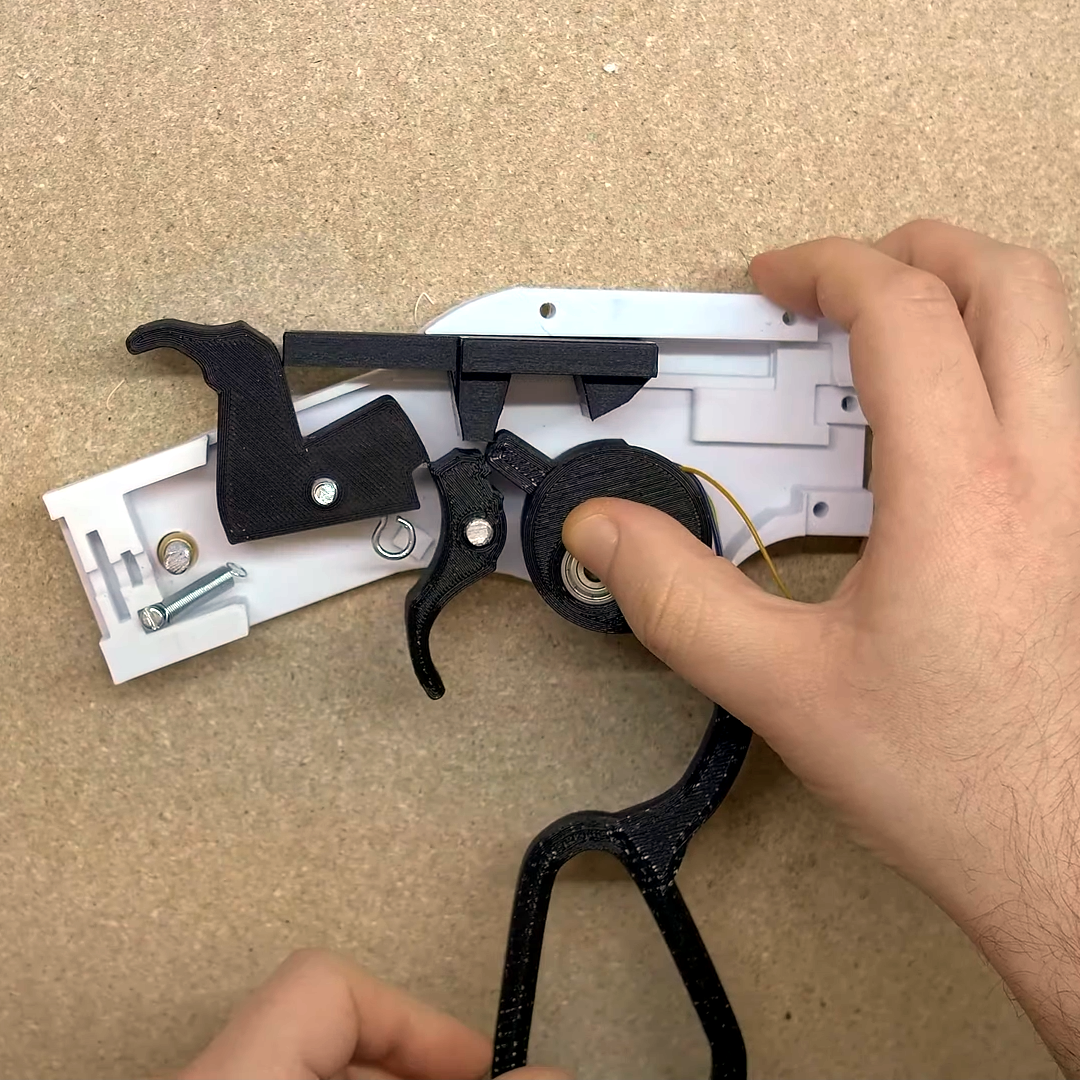
Right under the thumb is the pivot point for the lever, and that’s also where a geared stepper motor (used as a generator) is housed. Operating the action cranks the motor.
There are several parts to this project and, sadly, the details are a bit incomplete and somewhat scattered around, so we’ll go through the elements one at a time. The first is the guns themselves, and the star of the show is his 3D printed cowboy rifle design. The rifle paints the target with a momentary red laser dot when the trigger is pressed, but that’s not all. [Dirk] appears to have embedded a stepper motor into the lever action, so that working the lever cranks the motor as a generator and stores the small amount of power in a capacitor. Upon pulling the trigger, the capacitor is dumped into the laser (and into a piezo buzzer for a bit of an audio cue, apparently) with just enough juice to create a momentary flash. We wish [Dirk] had provided more details about this part of his build. There are a few more images here, but if you’d like to replicate [Dirk]’s work it looks like you’ll be on your own to some extent.
As for the target end of things, blipping a red dot onto a paper target and using one’s own eyeballs can do the job in a bare minimum sort of way, but [Dirk] went one further. He used Python and OpenCV with a camera to watch for the red dot, capture it, then push an image of the target (with a mark where the impact was detected) to a Chromecast-enabled screen near the shooter. This offers much better feedback and allows for easier scoring. The GitHub repository for the shot detector and target caster is here, and while it could be used on its own to detect any old laser pointer, it really sings when combined with the 3D printed cowboy rifle that doesn’t need batteries.
Not using projectiles in target practice does have some benefits: it’s silent, it’s easy to do safely, there is no need for a backstop, there are no consumables or cleaning, and there is no need to change or patch targets once they get too many holes. Watch it all in action in the video embedded below.
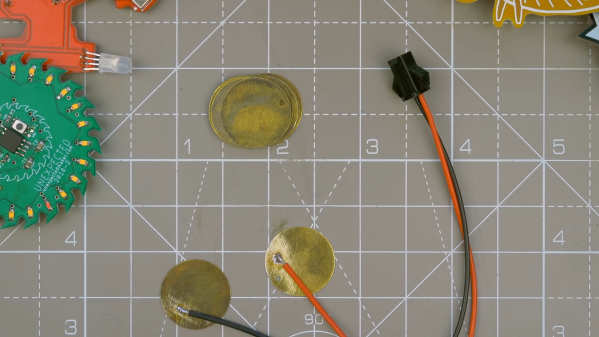
Back when batteries were expensive and low-capacity, it was common to buy a “battery eliminator” that could substitute for common battery configurations. [David Watts] must remember those, because he decided to make an eliminator for all the CR2032 battery-driven gear he has. He got some brass blanks about the size of the battery, and you can see the results on the video below.
His first attempt seemed to work fairly well, a sandwich of two brass disks, each with a Velcro spacer and wires soldered on to connect to a power supply. The fake battery looks as though it might be a little thick, but it did work once the battery holder was persuaded to accept it.
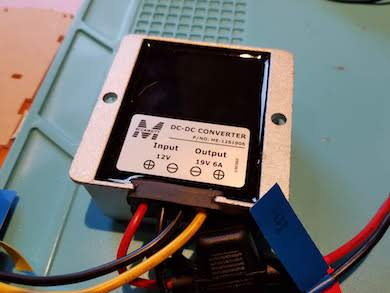
[Steve Chamberlin] has a spiffy solar-charged 12 V battery that he was eager to use to power his laptop, but ran into a glitch. His MacBook Pro uses Apple’s MagSafe 2 connector for power, but plugging the AC adapter into the battery via a 110 VAC inverter seemed awfully inefficient. It would be much better to plug it into the battery directly, but that also was a problem. While Apple has a number of DC power adapters intended for automotive use, none exist for the MagSafe 2 connector [Steve]’s mid-2014 MacBook Pro uses. His solution was to roll his own MagSafe charger with 12 VDC input.
Since MagSafe connectors are proprietary, his first duty was to salvage one from a broken wall charger. After cleaning up the wires and repairing any frayed bits, it was time to choose a DC-DC converter to go between the MagSafe connector and the battery. The battery is nominally 12 volts, so the input of the DC-DC converter was easy to choose, but the output was a bit uncertain. Figuring out what the MagSafe connector expects took a little educated guesswork.
The original AC adapter attached to the charger claimed an output of 20 volts, another Apple adapter claimed a 14.85 V output, and a third-party adapter said 16.5 volts. [Steve] figured that the MagSafe connectors seemed fine with anything in the 15 to 20 V range, so it would be acceptable to use a 12 V to 19 V DC-DC boost converter which he had available. The result worked just fine, and [Steve] took measurements to verify that it is in fact much more efficient than had he took the easy way out with the inverter.
 [Facelesstech] owns an SJCAM SJ4000 action camera, but the internal battery was no longer functional. Not wishing to buy a replacement and unwilling to hook up an ungainly USB cable to feed power, the solution was to design and 3D print an adapter to power the camera from a single rechargeable 14500 sized battery (which is the same size as an AA cell, and a good match for the width of the camera.)
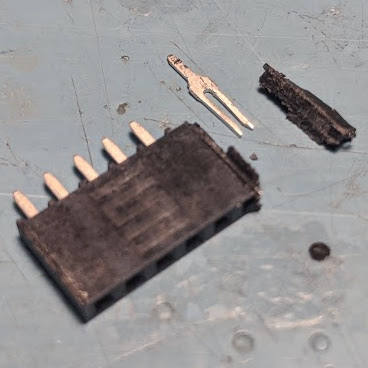 The adapter works by mimicking the original battery, so the camera never knows the difference. A 3D-printed holder for the 14500 battery (which doubles as a GoPro compatible mount) has an extension the same size and shape of the camera’s original internal battery. The tricky part was interfacing to the power connectors buried inside the camera’s battery bay. For a solution, [Facelesstech] eventually settled on the small connectors harvested from inside a female header, using them to connect to the small blades inside the camera. We broke open a spare female 0.1″ header, shown here, to make it clear where these little pieces come from. The only other battery hardware needed are the contacts for an AA cell, but those are also easy to harvest and reuse.