Impatience Is A Virtue When Testing This Old Maritime Teleprinter

[Larry Wall], inventor of Perl, once famously said that programmers have three key virtues: sloth, hubris, and impatience. It’s safe to say that these personality quirks are also present in some measure in most hardware hackers, too, with impatience being perhaps the prime driver of great hacks. Life’s too short to wait for someone else to build it, whatever it may be.

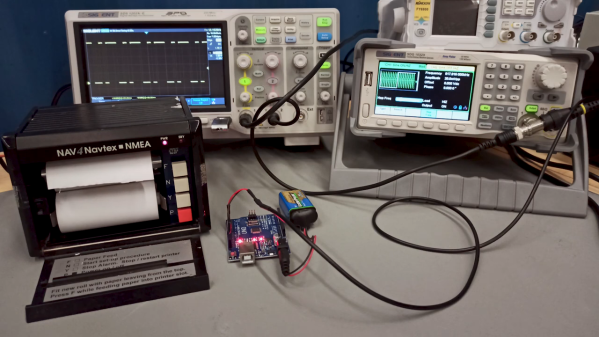
Impatience certainly came into play for [Sebastian (AI5GW)] while hacking a NAVTEX receiver (in German). The NAVTEX system allows ships at sea to receive text broadcast alerts for things like changes in the weather or hazards to navigation. The trouble is, each NAVTEX station only transmits once every four hours, making tests of the teleprinter impractical. So [Sebastian]’s solution was to essentially create his own NAVTEX transmitter.

Job one was to understand the NAVTEX protocol, which is a 100-baud, FSK-modulated signal with characters encoded in CCIR 476. Since this encoding is also used in amateur radio teletype operations, [Sebastian] figured there would surely be an Arduino library for encoding and decoding it. Surprisingly, there wasn’t, but there is now, allowing an Arduino to produce the correct sequence of pulses for a CCIR 476-encoded message. Fed into a function generator, the mini-NAVTEX station’s signal was easily received and recorded by the painfully slow teleprinter. There’s that impatience again.

We thought this was a neat hack, and we especially appreciate that [Sebastian]’s efforts resulted in a library that could be useful to hams and other radio enthusiasts in the future. We’ve talked about some more modern amateur radio digital modes, like WSPR and FT8, but maybe it’s time to look at some other modes, too.

Continue reading “Impatience Is A Virtue When Testing This Old Maritime Teleprinter”

Looking At Fortran In 100 Seconds

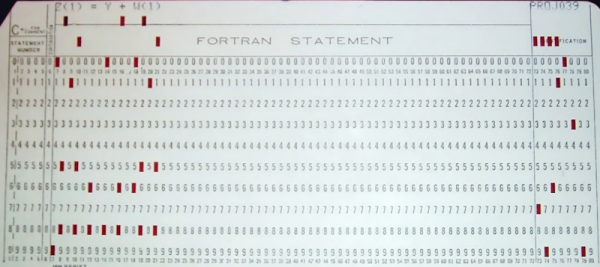
Usually, when we are talking about old computers, we are thinking of BASIC interpreters. But [Fireship] reminds us that it was originally Fortran and promises to give you the essentials in 100 seconds. We didn’t think you could do much in that short amount of time, but we have to admit that they did a pretty good job.

Of course, it doesn’t hurt that we know Fortran — you probably aren’t going to be able to put it on your resume after watching this video. On the other hand, we were impressed with how much they did squeeze in. If you haven’t touched Fortran since the 1960s and 1970s, you should know that it has changed. Pointers, dynamic memory allocation, and even objects are all possible. It is still a very capable language and very adept at crunching large sets of numbers. Besides, there are many sophisticated algorithms you can borrow from decades of Fortran development.

If you decide you want to have a go, there is, of course, GNU Fortran. Honestly, as much time as we spent writing Fortran in years past, we don’t recommend it for new job prospects. But if you have some period hardware and want an authentic experience, it might just be the way to go. Or, just fire up a browser if you want to play.

Not everyone agrees, though, that Fortran is on the wane. There are efforts to bring it even more up to date. You can even use it for web development.

Continue reading “Looking At Fortran In 100 Seconds”

Got A Cardboard Box? Get Into Food Smoking!

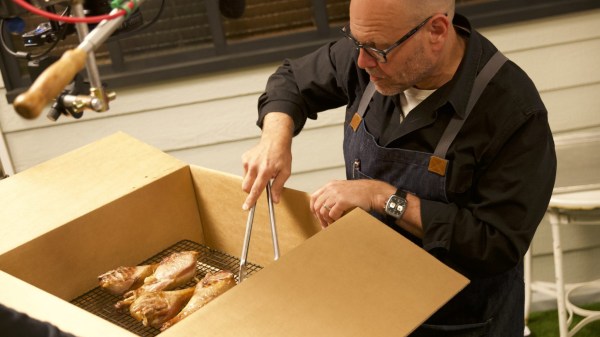
We appreciate a good kitchen hack, and we have always liked TV personality and chef [Alton Brown]’s McGuyver-ish approach to these things. So for anyone who hasn’t seen it, let’s take a moment to highlight how to make (and use) Alton Brown’s Cardboard Box Smoker.

[Alton] himself confesses that over the years it has remained his favorite smoker for a few good reasons. The price is certainly right, but there are a few other things that really stand out in the design. It’s easy to assemble and take down, needing very little storage space compared to a purpose-built smoker. It’s also trivial to monitor the temperature inside: just poke a thermometer probe through the side of the box. Finally, it’s a great way to get some additional use out of an old hot plate and cast iron pan. It’s the kind of thing one could put together from a garage sale and a visit to the dollar store.

The cardboard box is perfectly serviceable, but one may be tempted to kick it up a notch with some upgrades. In that case, check out this tech-upgraded flower pot smoker (also based on an Alton Brown design.)

Reusing and repurposing is a great way to experiment in the kitchen without needing to buy specialized equipment. Here’s another example: Kyoto-style cold brew coffee. It’s thick and rich and brings out different flavor profiles. Curious? Well, normally it requires a special kind of filter setup, but it can also be accomplished with cheesecloth, coffee filters, and a couple of cut-up soft drink bottles. Oh, and some rubber bands and chopsticks if things are too wobbly. Just do yourself a favor and use good quality coffee beans, or better yet, roast them yourself. Just trust us on this one.

Liquid Piston Engine Finally Works

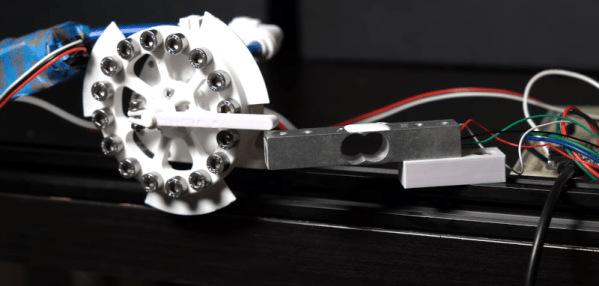
The first video from [3DPrintedLife] attempting to make a liquid piston engine was… well… the operative word is attempting. The latest video, though, which you can see below gets it right, at least eventually.. He has a good explanation of the changes that made the design better. Turns out, one change that made a difference was to turn a key part of the engine inside out. You can see the video below.

The first version would quickly break during operation and while the first new version didn’t work very well, it did stay in one piece which is a definite improvement.

Continue reading “Liquid Piston Engine Finally Works”

Stratum 1 Grandmaster Time Server On A Budget

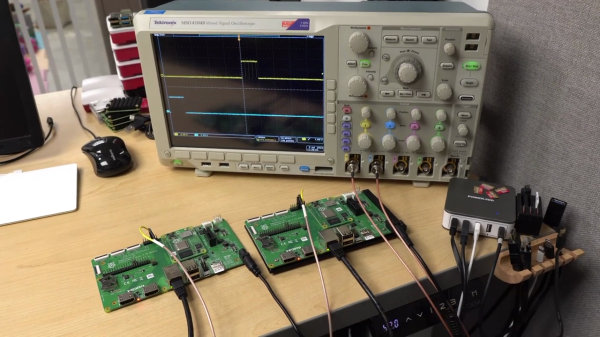
[Jeff Geerling] has been following the various open source time projects for some time now, and is finally able to demonstrate a working and affordable solution for nanoseconds-accurate timekeeping in your local lab. The possibility of a low-cost time server came about with the introduction of the Raspberry Pi CM4 compute module back in Oct 2020, whose Broadcom network chip (BCM54210PE) supports PTP (Precision Time Protocol, IEEE-1588) 1PPS output and hardware-based time stamping. Despite the CM4 data sheet specifying PTP support, it wasn’t available in the kernel. An issue was raised in Feb last year, and Raspberry Pi kernel support was finally released this month.

[Jeff] demonstrates how easy it is to get two CM4 modules to synchronize to within a few tens of nanoseconds in the video below the break. That alone can be very useful on many projects. But if you want really stable and absolute time, you need a stratum 1 external source. These time servers, called grandmasters in PTP nomenclature, have traditionally been specialized pieces of kit costing tens of thousands of dollars, using precision oscillators for stability and RF signals from stratum 0 devices like navigation satellites or terrestrial broadcast stations to get absolute time. But as Lasse Johnsen, who worked on the kernel updates remarks in the video:

In 2022 these purpose-built grandmaster clocks from the traditional vendors are about as relevant as the appliance web servers like the Raq and Qube were back in 1998.

It is now possible to build your own low-cost stratum 1 time server in your lab from open source projects. Two examples shown in the video. The Open Time Server project’s Timecard uses a GNSS satellite receiver and a Microchip MAC-SA5X Rubidium oscillator. If that’s overkill for your projects or budget, the Time4Pi CM4 hat is about to be release for under $200. If accurate time keeping is your thing, the technology is now within reach of the average home lab. You can also add PTP to a non-CM4 Raspberry Pi — check out the Real-Time HAT that we covered last year.

Continue reading “Stratum 1 Grandmaster Time Server On A Budget”

Collaborative Effort Gets Laser Galvos Talking G-Code

Everyone should know by now that we love to follow up on projects when they make progress. It’s great to be able to celebrate accomplishments and see how a project has changed over time. But it’s especially great to highlight a project that not only progresses, but also gives back a little to the community.

That’s what we’re seeing with [Les Wright]’s continuing work with a second-hand laser engraver. It was only a few weeks ago that we featured his initial experiments with the eBay find, a powerful CO2 laser originally used for industrial marking applications. It originally looked like [Les] was going to have to settle for a nice teardown and harvesting a few parts, but the eleven-year-old tube and the marking head’s galvanometers actually turned out to be working just fine.

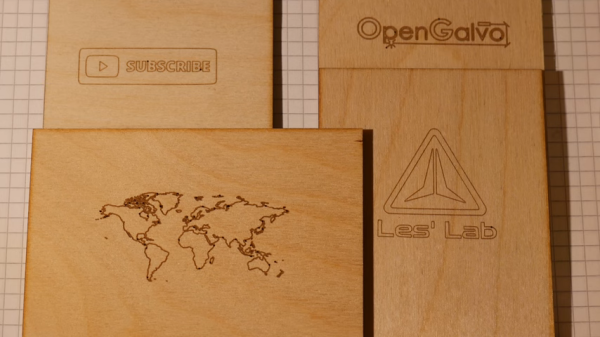
The current work, which is also featured in the video below, mainly concerns those galvos, specifically getting them working with G-code to turn the unit into a bit of an ad hoc laser engraver. Luckily, he stumbled upon the OPAL Open Galvo project on GitHub, which can turn G-code into the XY2-100 protocol used by his laser. While [Les] has nothing but praise for the software side of OPAL, he saw a hardware hole he could fill, and contributed his design for a PCB that hosts the Teensy the code runs on as well as the buffer and line driver needed to run the galvos and laser. The video shows the whole thing in use with simple designs on wood and acrylic, as well as interesting results on glass.

Of course, these were only tests — we’re sure [Les] would address the obvious safety concerns in a more complete engraver. But for now, we’ll just applaud the collaboration shown here and wait for more updates.

Continue reading “Collaborative Effort Gets Laser Galvos Talking G-Code”

A Simple Web-Based Wiring Harness Tool

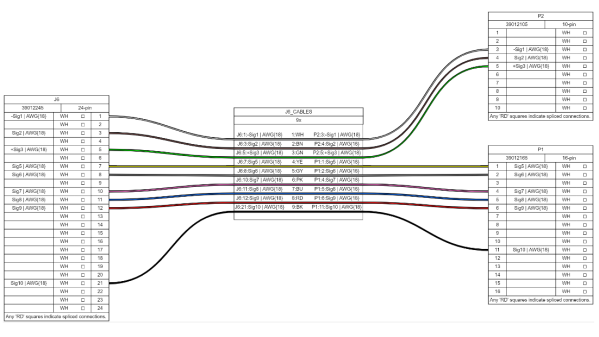
When building electronic assemblies there is quite often the need to construct custom cables to hook things up. It’s all very well if you’re prototyping by hand, or just building one or two of a thing, but if you’re cranking them out using outside help, then you’re going to want to ensure that cable is described very accurately. [Christian Nimako-Boateng Jr.] presents for us the first version of wirely, a wiring harness tool. This is a web-based tool that allows one to describe the cable ends and connectivity between them, producing a handy graphic and exports to excel in a format that should be easy to follow.

Based around the wireviz Python library running on a flask-based backend, image data are sent to the web assembly front-end and rendered with OpenGL. Configuration files can be imported and exported as JSON, making it easily linkable to other tools if required. Helpfully, the tool also seems to support some kind of revision control, although we didn’t try that yet. The process is straightforward enough, one simply defines a few groups (these relate to individual PCBs or other floating items in the assembly) which each contain one or more connectors. First, the connectors are described with part numbers, and wire gauge data, before defining the list of connections (wires) showing which signal and physical pins are connected together. Nothing more complex than that yet. We think there is still some more functionality that the tool could manage, such as shielding and guarding details, twisted pair definitions and a few others, but for a first pass, wirely looks pretty handy.

If you want a more heavyweight option using IEC 60617 symbols for describing wiring harnesses, then look no farther than QElectroTech, and yes, we have covered wireviz before, just for those that want to cut out the middleman and describe their cables in Python directly.