[Bits und Bolts] has been restoring an old PC motherboard with the infamous bad electrolytic capacitors. The video of his exploits was interesting enough, but pretty standard stuff. What we found interesting though, was an odd feature of the ASUS Bios called “Post Reporter” that let the motherboard speak error codes and status through the external speaker. (Video, embedded below.) We aren’t sure who wanted that, and since we haven’t seen it around lately, we are guessing the answer was nobody wanted it.
We enjoyed watching the PCB rework. Those large internal ground plane layers do make it hard to unsolder and then solder the caps. That makes the job seem deceptively easy. However, if you want to skip to the exotic BIOS, jump to the 8:20 mark.
Halloween is many things to many people. For some, it’s a chance to dress up and let loose. For others, it’s a chance to give everyone in the neighborhood a jump scare. For [Aaron], it’s the perfect time to put on a show in the yard with some musical, light-up jack-o-lanterns.
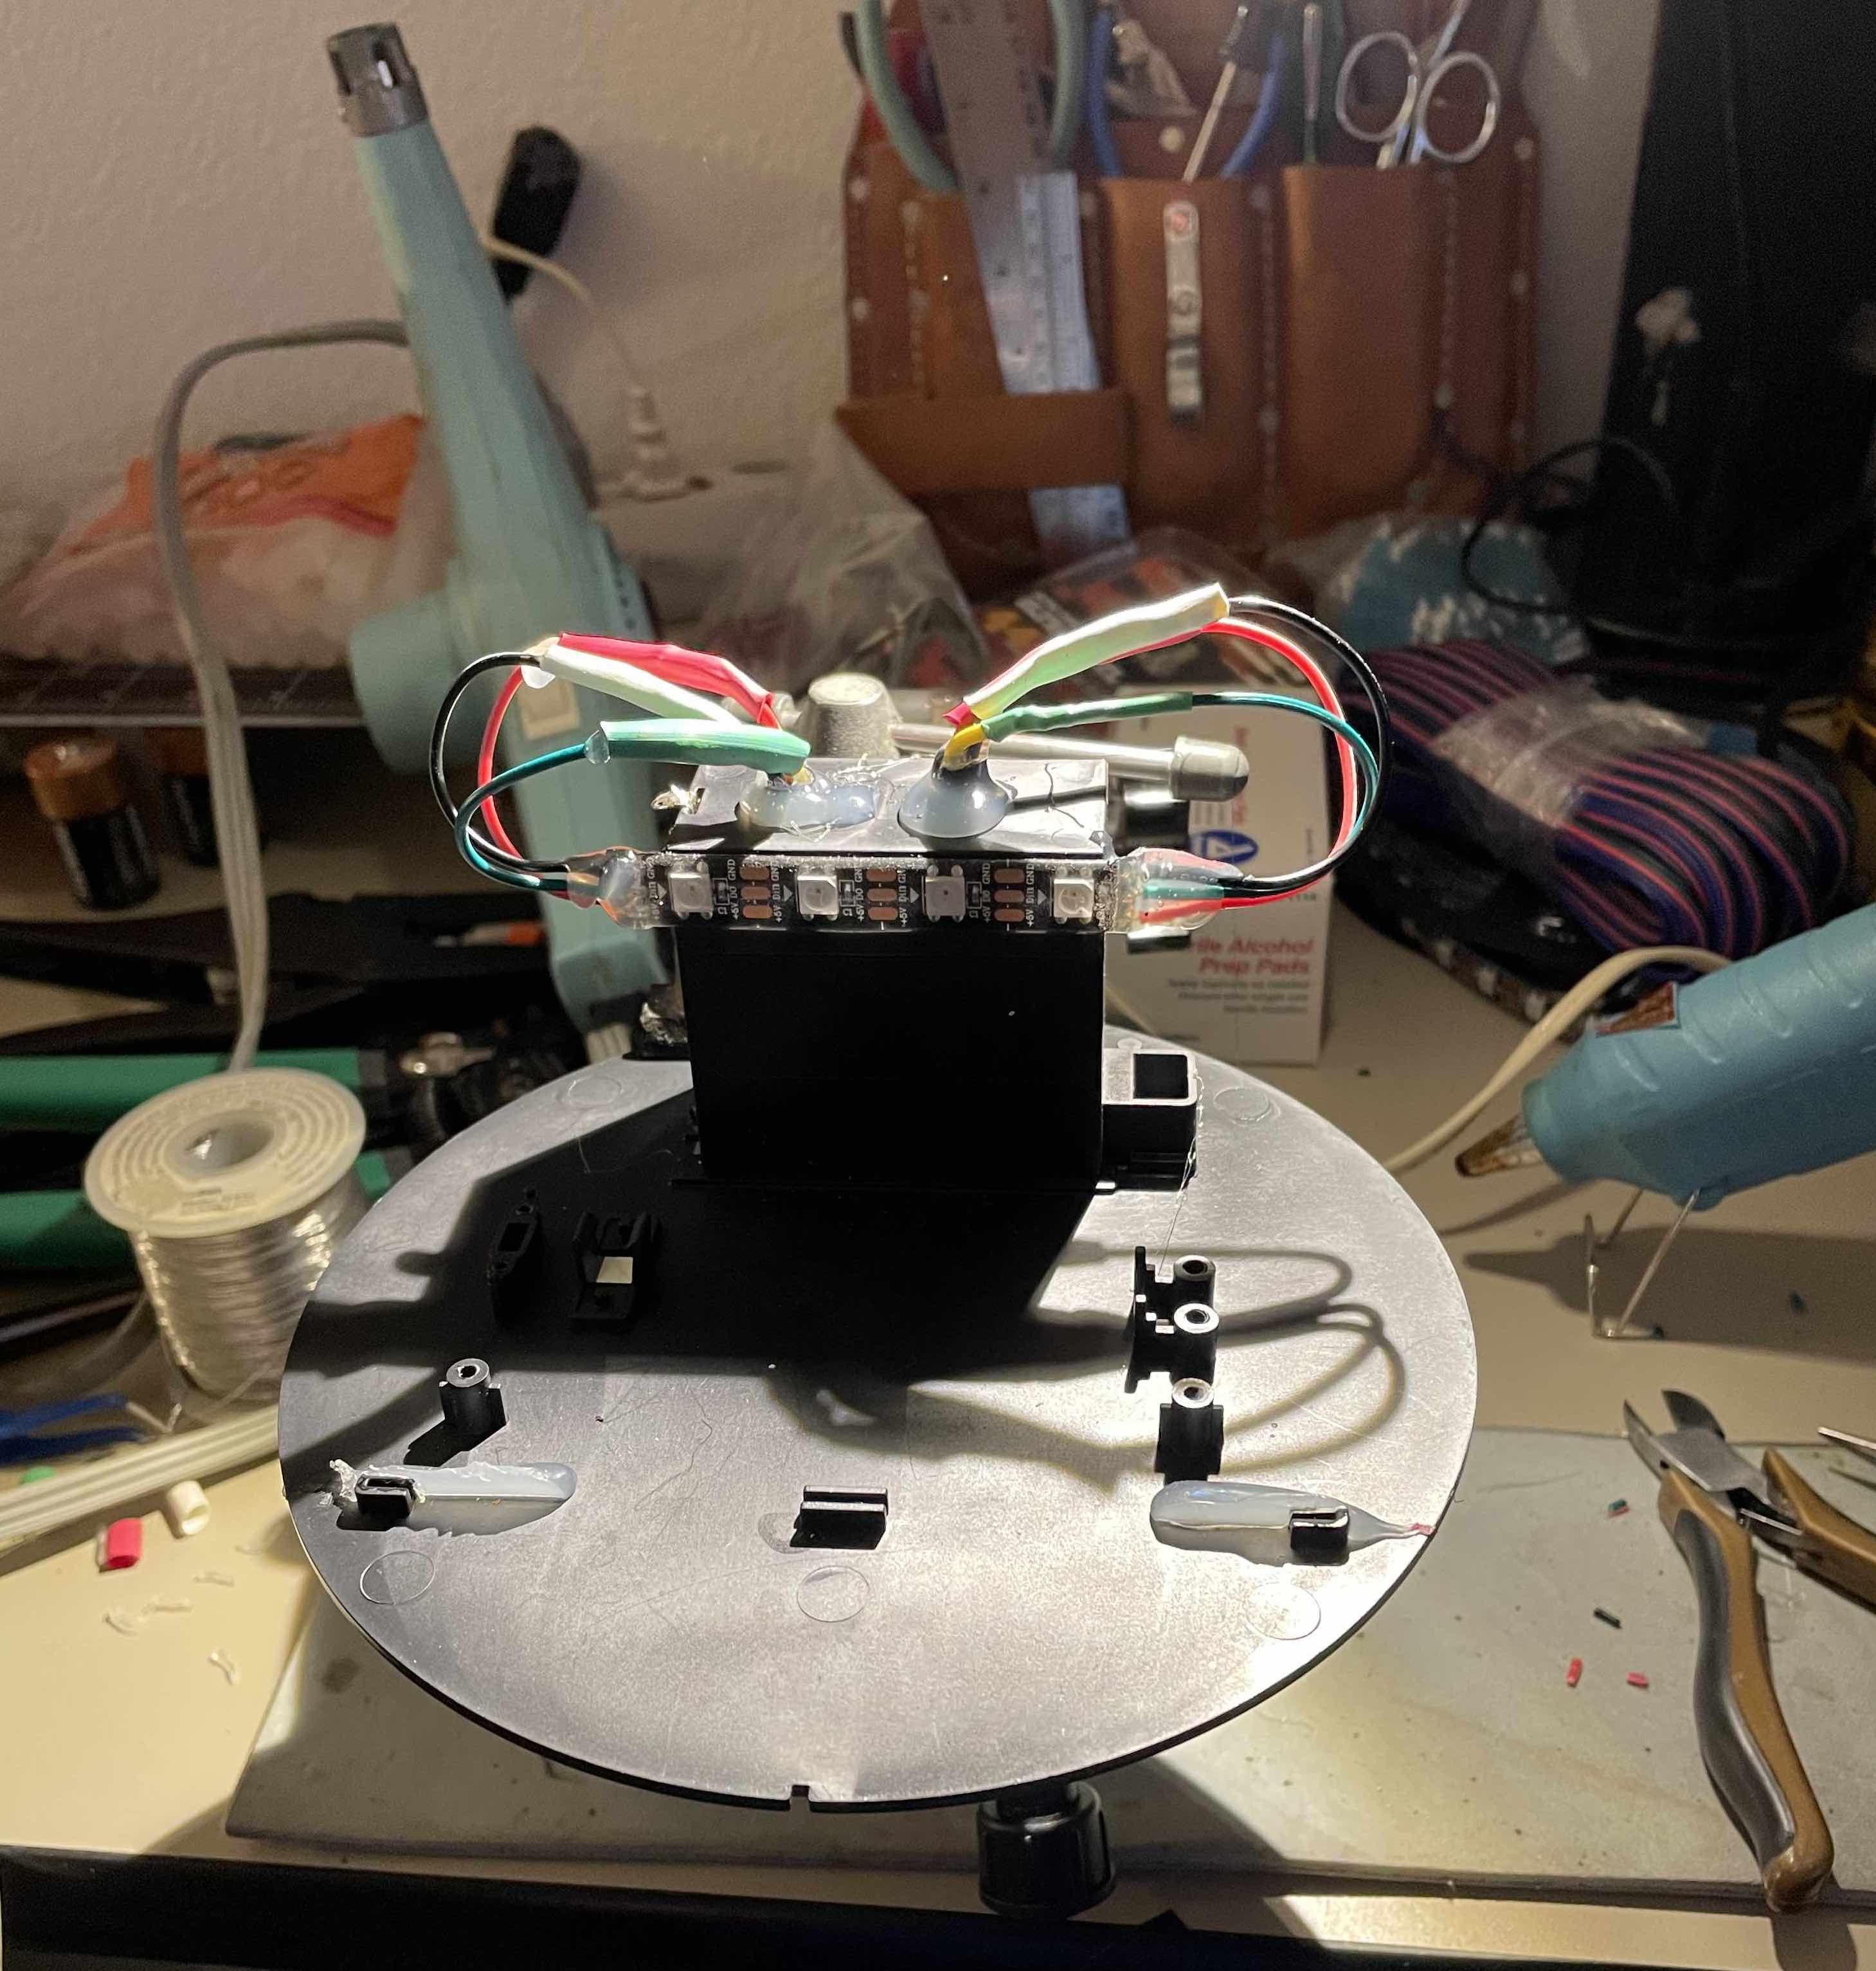
[Aaron] came across some deeply-discounted light-up jack-o-lanterns a few years ago. They all had one of those Try Me buttons that’s powered by a couple of coin cells and uses a temporary two-wire connection to the PCB, and [Aaron] figured he could remotely control them using this port of sorts.
Now the guts are made of addressable RGB LEDs that are connected through the battery compartment via weatherproofed pigtails.
On the control side, he has a Raspberry Pi 3, an amplifier, and a couple of power supplies all housed in a weatherproof box. Since it’s not possible to multiplex both the lights and the audio on a Pi 3, he added a USB sound card into the mix.
Be sure to check out the awesome demo video after the break, followed by a pumpkin conversion video.
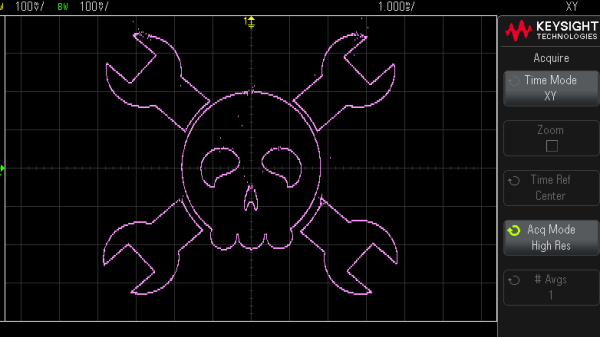
We all love our cheap digital oscilloscopes, and with good reason. But if there’s one place where analog scopes still shine, it’s anywhere you need X-Y mode. Digitally sampling the inputs and mapping them on the screen as discrete points just isn’t the same as steering an electron beam around a CRT, making X-Y mode work on digital scopes — at least the affordable ones — somewhat lacking.
Thankfully, nobody told [Mark Hughes] that his digital scope would make a lousy X-Y display, so he just plunged ahead and figured out how to make it work anyway. The results are actually pretty good, but it took some doing. His setup begins with OsciStudio, an application built to take 3D shapes and animations and turn them into oscilloscope music. The output from that is piped to a USB sound card; [Mark] used a PreSonus Studio 26c, an adapter with DC-coupled inputs, which he found to be critical to getting good images. Also important was a USB isolator and good-quality cables, which greatly reduced jitter and made the image much more stable.
DC-coupled
AC-coupled
Displaying the image was as easy as connecting the left and right outputs from the sound card to the two scope inputs — [Mark] used a Keysight EDUX1052G — and setting it to X-Y mode. It took a fair amount of fiddling to get as far as he did, but we think the results speak for themselves. As for the sounds made by these images, he says it’s a bit like a hung sound card when a computer blue-screens. So, yeah — not exactly musical, but still an interesting way to have some fun with your digital scope.
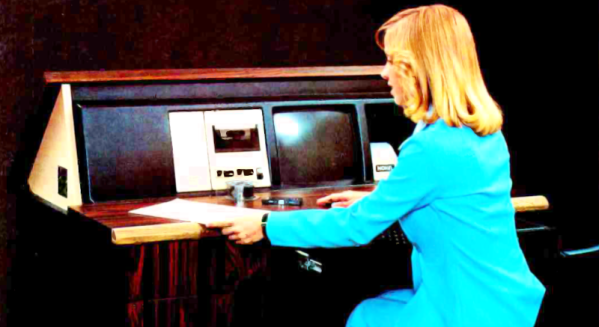
People argue about the first use of the computer desktop metaphor. Apple claims it. Xerox probably started it. Yet, when I think of computer desktops, I think of the NOVAL 760. Not a household name, to be sure, but a big ad spread in a June 1977 Byte magazine was proud to introduce it. At $2995, we doubt many were sold, but the selling point was… well… it was built into a “handsome wood desk, designed to compliment any decor.” The desk folded down when you were not using the computer, and the keyboard recessed into a drawer.
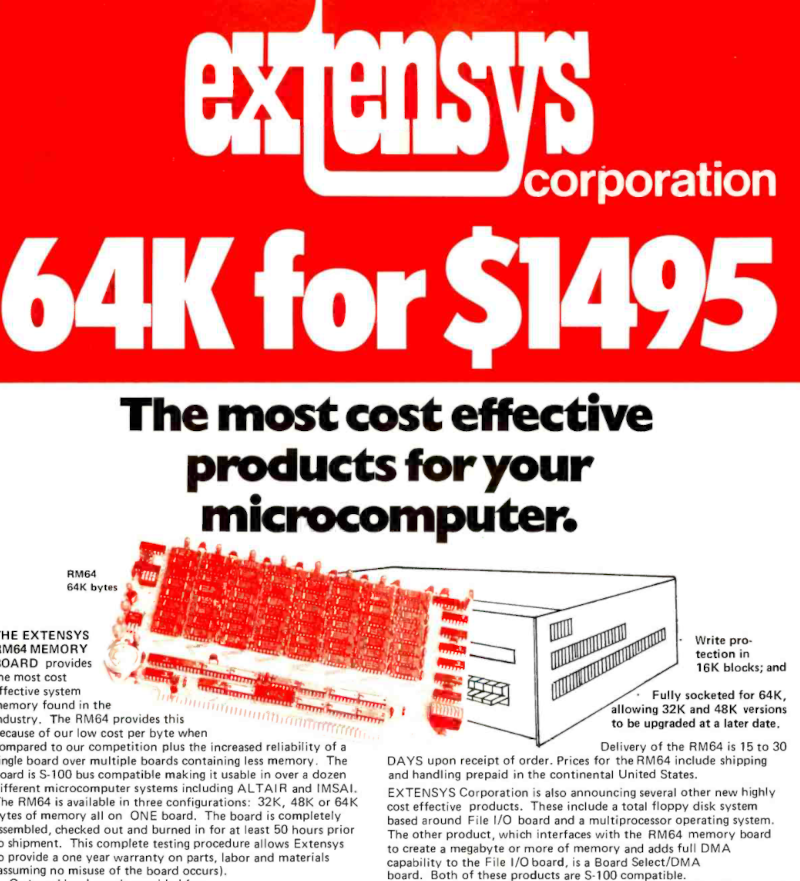
The computer itself was no slouch for 1977, but nothing you couldn’t find elsewhere. An 8080, speed unspecified, had 16 kB of RAM and 3 kB of PROM. There was also a display with a few kB of memory hanging around, too. And just in case you were worried, the bottom of the page entitled “The Ultimate in Home Computers” reads, “The NOVAL 760 COMPUTER. A fully-assembled, fully-tested personal computer … not a kit!” Of course, for us, that’s not really a selling point. If you wonder why the computer was memory limited, this is the time that Extensys bragged in an ad: 64 kB for $1495! If you ordered one, you could have it in 15 to 30 days, too!
There were options for more memory, and it wasn’t clear how many of the I/O devices in the ad were actually included in the advertised price. Some of the devices seemed very specialized, so we are guessing the basic system didn’t include some of them.
If you follow audiophile reviewers, you’ll know that their stock-in trade is a very fancy way of saying absolutely nothing of quantifiable substance about the subject while sounding knowledgeable about imagined differences between devices that are all of superlative quality anyway. If you follow us, we’ll tell you that the only reviews that matter are real-world measurements of audio performance, and blind listening tests. We don’t have to tell you how to listen to music, but perhaps it’s time in our Know Audio series to look at how audio performance is measured.
Before reaching for the bench, it’s first necessary to ask just what we are measuring. What are the properties which matter in an audio chain, or in other words, just what is it that makes an audio device good?
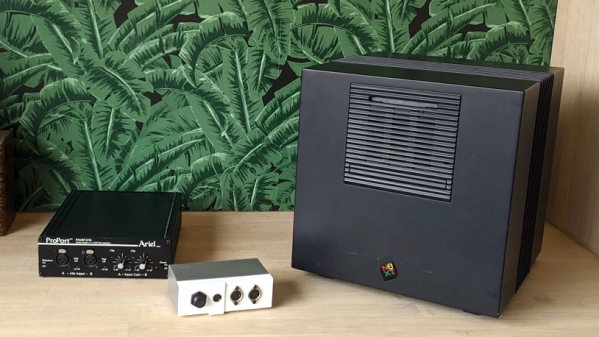
[Joren] recently did some work as part of an electronic music heritage project, and restored an 80s-era NeXTcube workstation complete with vintage sound card, setting it up with a copy of MAX, a graphical music programming environment. But there was one piece missing: MIDI. [Joren] didn’t let that stop him, and successfully created hardware to allow MIDI input and output.
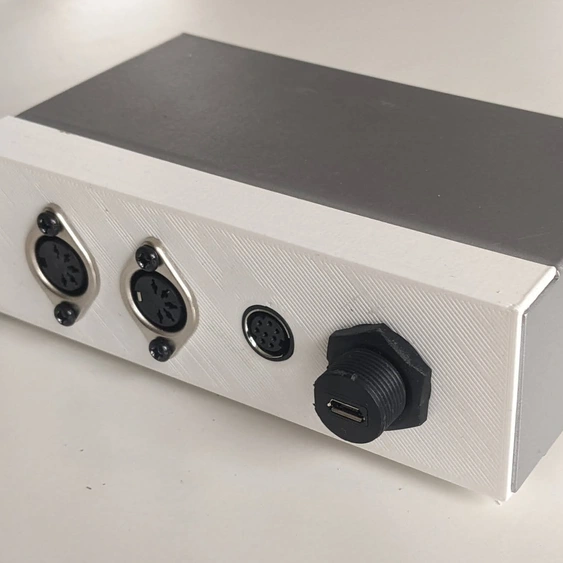
The new panel provides all the connectors necessary to interface with either classic MIDI devices, or MIDI over USB (where it appears as a USB MIDI device to any modern OS.)
Interestingly, the soundcard for the NeXTcube has an RS-422 serial port and some 8-pin mini DIN connectors. They are not compatible with standard MIDI signals, but they’re not far off, either.
A metal enclosure with a 3D-printed panel rounds out the device, restoring a critical piece of functionality to the electronic music-oriented workstation.
MIDI as a protocol isn’t technically limited to musical applications, though that’s one place it shines. And just in case it comes in handy someday, you can send MIDI over I2C if you really need to.
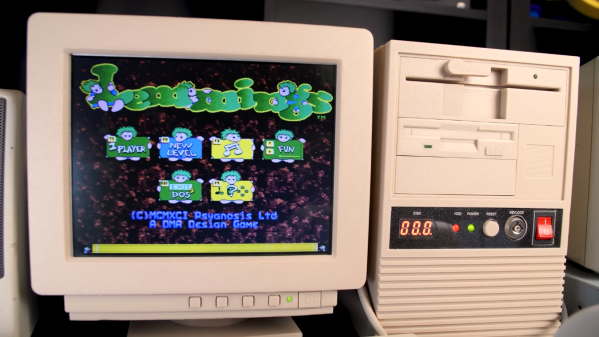
Emulators are easy and convenient, but for some retrocomputing enthusiasts nothing comes close to running classic software on actual era-appropriate hardware. This can become a problem, though, for those into vintage PC gaming: old PCs and their monitors are notoriously large and heavy, meaning that even a modest collection will quickly fill up a decent family home. There is a solution however, as [The Eric Experiment] demonstrates in his latest video. He designed and built a 3D-printed mini PC that runs on an actual 486 processor.
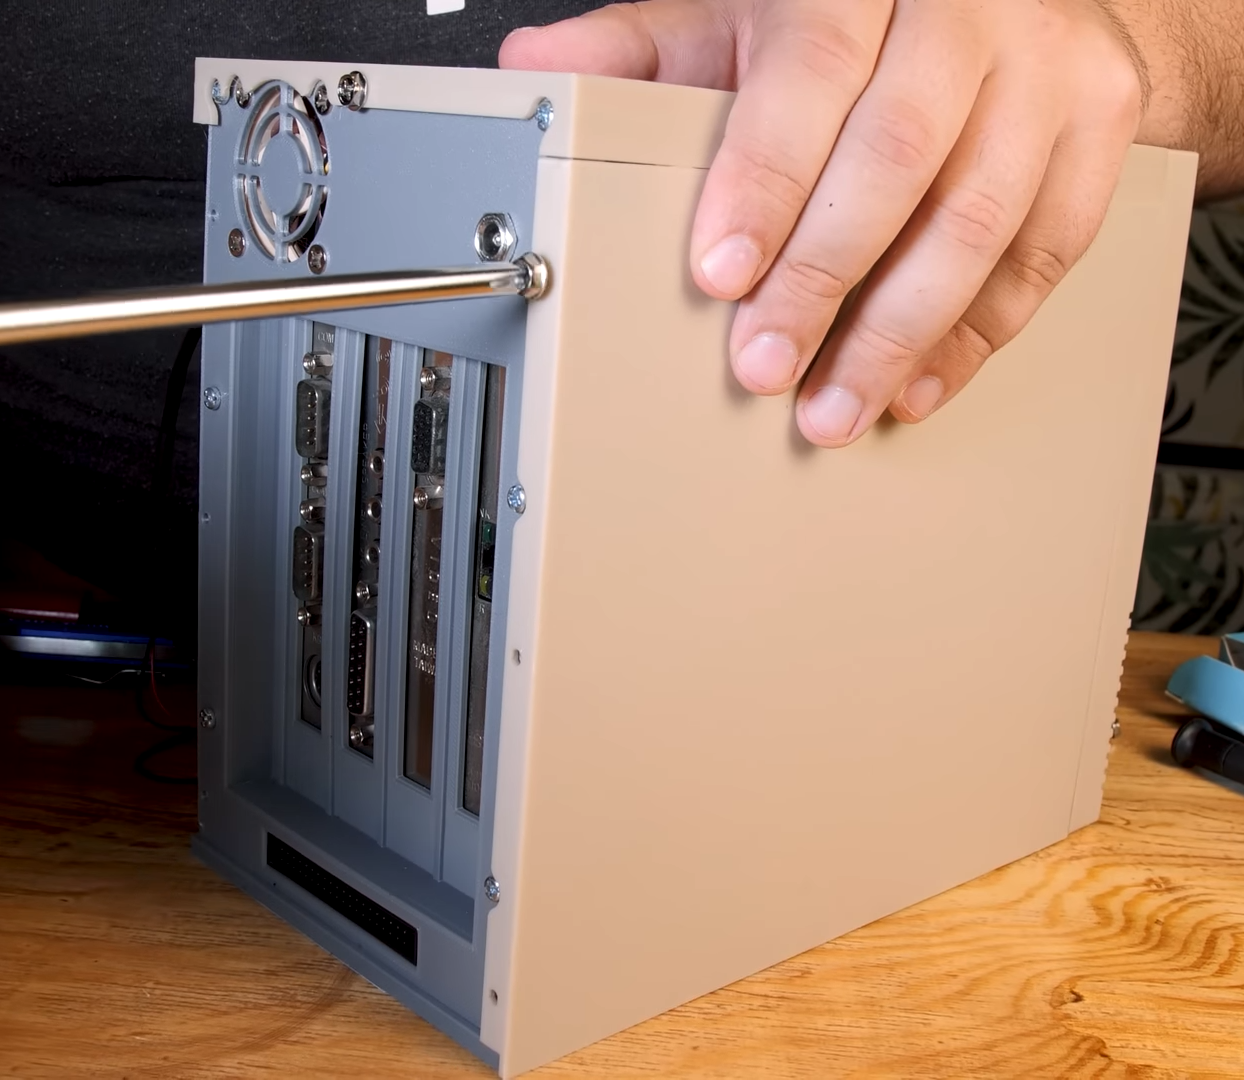
An ordinary desktop motherboard would have required a rather large case to begin with, so [Eric] started his project by buying an old industrial PC board. Such a device has the processor and all main motherboard components sitting on an ISA card, which then connects to other ISA cards through a backplane. This way, a complete system with expansion cards can be made way more compact than even the sleekest desktop PCs of the time. An SD-card-to-IDE converter makes for an extremely slim hard drive replacement, while a Gotek floppy emulator allows the system to boot as if there’s actually a floppy drive present.
Even the side panels slide in exactly like they do on real PC cases.
All of this is pretty neat to begin with, but by far the most impressive parts of the Tiny 486 project are the enclosures that [Eric] designed for the PC and its accompanying monitor. Both were modelled off real-world examples and are accurate down to the smallest details: the tilting stand that clips onto the base of the monitor for instance, or the moving latch on the faux 5.25″ floppy drive. That latch operates a cleverly hidden door that reveals the USB connector for the floppy emulator. The compulsory seven-segment LED display on the mini tower’s front panel now finally serves a useful purpose – indicating which floppy image is currently active.
Sporting an Intel 486-DX4 100 MHz processor, 32 MB of RAM, a Tseng ET4000 video card and an ESS Audiodrive for sound, the tiny 486 can run DOS or Windows 95, although performance in the latter is a bit limited due to the lack of a local-bus video card. It’s perfectly fine for most DOS games though, and a lot more practical than a full-sized desktop PC.