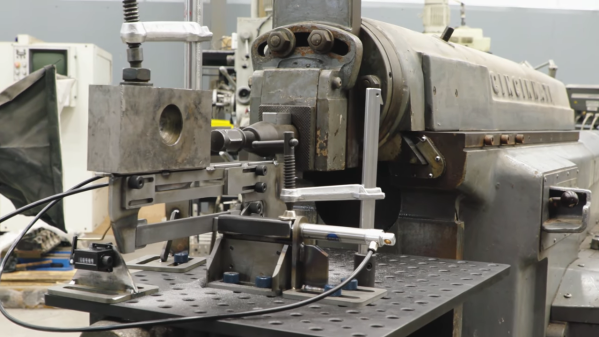
File testing rig

Science Vs Internet Trolls: Testing Another Kind Of File System

No matter what you do or say on the Internet, you’re always doing it wrong. Keyboard commandos are ready to pounce and tell you how it’s “ackchyually” supposed to be done. And so it was of little surprise when [Jason] of Fireball Tools was taken to task by the armchair millwright for his supposedly deficient method of filing metal.

But [Jason] chose to fight back not with words but deeds, building a system to test alternative methods of filing. His filing style is to leave the file in contact with the stock on both the front- and back-strokes, which enraged those who claim that a file must never be dragged back over the workpiece, lest the teeth become dull. The first video below shows the build of the test rig, which leveraged his enormous Cinncinatti shaper as the prime mover, as well as a pneumatic jig to hold the workpiece and imitate both styles of filing. Part two below shows the test rig in action, and [Jason] really outdoes himself with his experimental approach. He tested three different grades of Pferd files — nothing but the best, no expense spared — and did duplicates of each run using both the Internet-approved style and his lazier style.

The result? We won’t spoil that for you, but suffice it to say that the hive mind isn’t always right. And what’s more, [Jason]’s careful myth-busting yielded a few interesting and unexpected results. His channel is full of great shop tips and interesting builds, so check him out if you want to see how metalworking is done.

Continue reading “Science Vs Internet Trolls: Testing Another Kind Of File System”

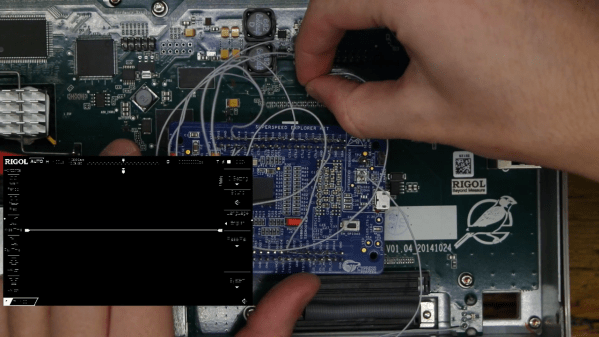
The insides of an oscilloscope

Oscilloscope Probes Itself To Add Video

Modern oscilloscopes are often loaded with features, but every now and then you run into a feature that seems easy to implement yet isn’t available. [kgsws] wanted to use his Rigol DS1074 to show live measurements in his YouTube videos, but found out that this scope doesn’t support video output. Not to be deterred, [kgsws] decided to add this feature himself. In the video embedded below, he describes in detail the process of adding a USB Video Capture (UVC) interface to his oscilloscope.

The basic idea was to find the signals going into the scope’s display and read them out using a Cypress EZ-USB board. This is a development board that can be used to design USB devices, and supports the UVC mode. However, with no documentation of any of the Rigol’s internal circuitry [kgsws] had to probe the display connector to find out which pin carried which signal. And since he had no other scope available than this Rigol, he hooked up the various bits of the disassembled instrument so that it could (awkwardly) probe its own internal signals.

After mapping out its own display signals, it was time to hook them up to the EZ-USB board. [kgsws] achieved this by soldering about two dozen tiny wires to SMD pads on the motherboard. The EZ-USB board itself was placed in the back of the scope’s case, but had to be stripped of unneeded components in order to save space and power. A very clever trick was the addition of a reed switch, which allowed [kgsws] to set the EZ-USB board to programming mode without having to open the scope’s case, by simply holding a magnet near the switch.

After soldering a USB connector into a spare slot in the RF shield the project was complete. The Rigol can now be connected to a PC and will simply appear as a video capture device, ready to be streamed or captured for [kgsws]’s future project videos. We’ve seen other hacks on the Rigol DS1000Z series to capture a series of screenshots or to enable additional bandwidth and features, but adding a live video output was not one of the options so far. Continue reading “Oscilloscope Probes Itself To Add Video”

Flip-up clock

A Flip Clock That Flips Up, Not Down

The venerable flip clock has become an outsized part of timekeeping culture that belies the simplicity of its mechanism. People collect and restore the electromechanical timepieces with devotion, and even seek to build new kinds of clocks based on split-flap displays. Designs differ, but they all have something in common in their use of gravity to open the leaves and display their numbers.

But what if you turned the flip clock on its head? That’s pretty much what [Shinsaku Hiura] accomplished with a flip clock that stands up the digits rather than flipping them down. The clock consists of three 3D-printed drums that are mounted on a common axle and linked together with gears and a Geneva drive. Each numeral is attached to a drum through a clever cam that makes sure it stands upright when it rotates to the top of the drum, and flops down cleanly as the drum advances. The video below makes the mechanism’s operation clear.

The build instructions helpfully note that “This clock is relatively difficult to make,” and given the extensive troubleshooting instructions offered, we can see how that would be so. It’s not the first time we’ve seen a mechanically challenging design from [Shinsaku Hiura]; this recent one-servo seven-segment display comes to mind.

Continue reading “A Flip Clock That Flips Up, Not Down”

Mechanical Musical Sculpture Recalls The Four Muses

Music was created by humans, but often we find ourselves creating performances with machines. [Alana Balagot] and [Federico Tobon] did just that, constructing the stunning 4 Muses musical sculpture with their combined talents.

4 Muses is made up of four individual instruments, under the command of a single keyboard controller. The keyboard can be used to play the instruments live, or alternatively, can learn from the player or be used as a sequencer. It can also act as a simple device to play back music using the four instruments.

The pipe instrument uses servo-controlled valves, which allow air from a blower fan to reach several wood pipes. The xylophone instead uses solenoids to play its 13 tines. Percussion is provided by a mechanized cajón drum, using motors to actuate mallets that strike the various sections of the box. Meanwhile, hackers will be familiar with the concept of the motor-noise instrument, which drives stepper motors at different frequencies to generate tones.

Inside, a cavalcade of microcontrollers make everything work, from Arduino Megas and Teensys to NRF24s sending wireless packets from the controller to the instruments. [Alana] and [Federico] go in-depth with their documentation, highlighting the challenges they faced putting together the various instruments and showing how the final build came together.

Built with and brass hardware and sporting a variety of exquisite wood finishes, the final result is a quartet of machines that play beautiful music composed by [Alana] herself. Musical sculptures are often a great example of the artistry possible when putting electrons to work. Video after the break.

Continue reading “Mechanical Musical Sculpture Recalls The Four Muses”

Turkey fryer

Why Deep Frying Turkey Can Go Very Wrong

Tomorrow is Thanksgiving and that means Americans across the United States will be cooking up a turkey feast. One of the most popular ways to cook the bird is by deep frying it in oil.

Local TV stations everywhere spend this week warning about turkey frying. They’re not wrong… if things get out of hand you can end up burning down your house, if not your entire street. Let’s talk the science behind November turkey fires, and hopefully avoid a turkeyferno.

Simple Errors

The typical setup for deep frying a turkey involves lowering the bird into a big pot full of oil sitting on a gas burner. Ropes and pulleys are often used to lower the turkey into the pot to avoid getting one’s hands near the hot oil. Ideally, this should be done in a backyard, away from structures, to provide good ventilation and plenty of room in the case something does go wrong.

Continue reading “Why Deep Frying Turkey Can Go Very Wrong”

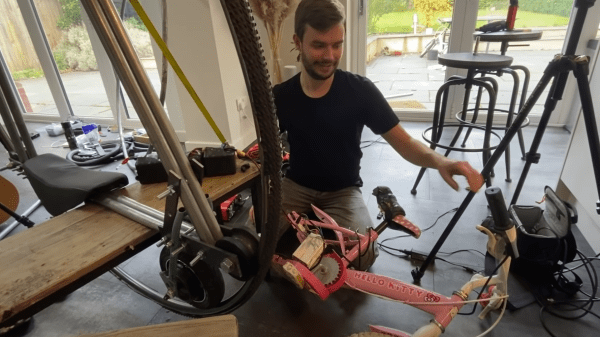
Sam testing the motor on his ebike

E-MonoWheel

Generally, monowheels are that wacky, wildly futuristic transport that we lump in the same category as hoverbikes and jetpacks: strange, currently impractical, but very cool. Not content with waiting for the distant future, [Sam Barker] made his own electric monowheel. (Video, embedded below.)

The hardest part of any monowheel is that the outside rim needs to stand enormous abuse. It supports the weight of the vehicle and provides most of the structural integrity, but also is the means of propulsion. [Sam]’s first thought was to use a trampoline frame as it is a round and reasonably sturdy tube steel. He 3D printed the rollers that connected the subframe to the trampoline frame. Flat bar stock was used to make the angles inside the subframe and straight tube steel connected the inner frame into a trapezoid. The trampoline frame was welded together and on the first test spin, it broke apart from the stress. It simply wasn’t strong enough.

Not to be dissuaded, he found a company that bends steel into custom shapes. He stole the e-bike kit from another bike he had converted earlier, and the wheel was turning. Some handles and foot-pedal later, it was time for a proper test drive. Overall, the result is pretty impressive and the double-takes [Sam] gets while riding down streets in town are wonderful. If you’re looking to scratch the monowheel itch, check out this wooden monowheel.

Continue reading “E-MonoWheel”

You Can’t Upgrade Soldered-On Laptop RAM? Think Again

Upgrading the memory in a computer is usually a straightforward case of swapping out a few DIMMs or SODIMMs, with the most complex task being to identify the correct type of memory from the many available. But sometimes a laptop manufacturer can be particularly annoying, and restrict upgradability by soldering the RAM chips directly to the board. Upgrading memory should then be impossible, but this reckons without the skills of [Greg Davill], who worked through the process on his Dell XPS13.

The write-up is a fascinating primer on how DRAM identification works, which for removable DIMMs is handled by an onboard FLASH chip containing the details of the chips on board. A soldered-on laptop has none of these, so instead it employs a series of resistors whose combination tells the BIOS what memory to expect. Some research revealed their configuration, at which point the correct chips were sourced. Surprisingly it’s not as easy as one might expect to buy small quantities of some RAM chips, but he was eventually able to find some via AliExpress. An aside is how he checked the chips he received for fakes, including the useful tip of hiring a dentist to take an x-ray.

The final step is the non-trivial task of reballing and reworking the new BGAs onto the board, before testing the laptop and finding the process to be a success. We’ll leave you with his final words though: “But next time I think I’ll just buy the 16GB variant upfront.“.

We’ve seen quite a lot of [Greg]’s work here at Hackaday, one of his most recent was this amazing LED D20.