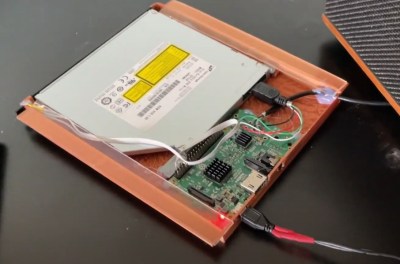
Access The Information Superhighway With A Mac Plus

For some time now, Apple has developed a reputation for manufacturing computers and phones that are not particularly repairable or upgradable. While this reputation is somewhat deserved, especially in recent years, it seems less true for their older machines. With the second and perhaps most influential computer, the Apple II, being so upgradable that the machine had a production run of nearly two decades. Similarly, the Macintosh Plus of 1986 was surprisingly upgradable and repairable and [Hunter] demonstrates its capabilities by bringing one onto the modern Internet, albeit with a few tricks to adapt the old hardware and software to the modern era.

The Mac Plus was salvaged from a thrift store, and the first issue to solve was that it had some rotten capacitors that had to be replaced before the computer could be reliably powered on at all. [Hunter] then got to work bringing this computer online, with the only major hardware modification being a BlueSCSI hard drive emulator which allows using an SD card instead of an original hard disk. It can also emulate an original Macintosh Ethernet card, allowing it to fairly easily get online.

The original operating system and browser don’t support modern protocols such as HTTPS or scripting languages like Javascript or CSS, so a tool called MacProxy was used to bridge this gap. It serves simplified HTML from the Internet to the Mac Plus, but [Hunter] wanted it to work even better, adding modular domain-specific handling to allow the computer to more easily access sites like Reddit, YouTube, and even Hackaday, although he does call us out a bit for not maintaining our retro page perhaps as well as it ought to be.

[Hunter] has also built an extension to use the Wayback Machine to serve websites to the Mac from a specific date in the past, which really enhances the retro feel of using a computer like this to access the Internet. Of course, if you don’t have original Macintosh hardware but still want to have the same experience of the early Internet or retro hardware this replica Mac will get you there too.

Continue reading “Access The Information Superhighway With A Mac Plus”

Ubiquitous Successful Bus: Version 2

I’ve talked a fair bit about USB-C before, explaining how it all works, from many different angles. That said, USB-C is just the physical connector standard, plus the PD part that takes care of voltages and altmodes – things like data transfer are still delegated to the two interfaces you invariably end up using on USB-C ports, USB 2, and USB 3.

You might think USB 2 and USB 3 are tightly related, but in many crucial ways, they couldn’t be more different. I have experience working with both, and, as you might guess, I want to share it all with you. You might be surprised to hear there’s plenty to learn about USB 2 in particular – after all, we’ve had it hang around for 30 years now. Well, let’s make sure you’re fully caught up!

The Ingredients

USB 2 is a point-to-point link – one side is “host” and another is “device”, with the host typically being a PC chipset or a single-board computer. USB 2 relies on a single pseudodifferential pair. It’s “pseudodifferential” because the wires don’t just do differential signaling – they also use digital logic levels and pullup/pulldown resistors to signal device presence, especially in the beginning when the USB link is still getting established. Indeed, you can imitate a USB device’s presence with just a resistor.
Continue reading “Ubiquitous Successful Bus: Version 2”

Hacker Chris Edwards demonstrating his wireless Amiga

Retro Wi-Fi On A Dime: Amiga’s Slow Lane Connection

In a recent video, [Chris Edwards] delves into the past, showing how he turned a Commodore Amiga 3000T into a wireless-capable machine. But forget modern Wi-Fi dongles—this hack involves an old-school D-Link DWL-G810 wireless Ethernet bridge. You can see the Amiga in action in the video below.

[Chris] has a quirky approach to retrofitting. He connects an Ethernet adapter to his Amiga, bridges it to the D-Link, and sets up an open Wi-Fi network—complete with a retro 11 Mbps speed. Then again, the old wired connection was usually 10 Mbps in the old days.

To make it work, he even revived an old Apple AirPort Extreme as a supporting router since the old bridge didn’t support modern security protocols. Ultimately, the Amiga gets online wirelessly, albeit at a leisurely pace compared to today’s standards. He later demonstrates an upgraded bridge that lets him connect to his normal network.

We’ve used these wireless bridges to put oscilloscopes and similar things on wireless, but newer equipment usually requires less work even if it doesn’t already have wireless. We’ve also seen our share of strange wireless setups like this one. If you are going to put your Amgia on old-school networking, you might as well get Java running, too.

Continue reading “Retro Wi-Fi On A Dime: Amiga’s Slow Lane Connection”

Hackaday Podcast Episode 289: Tiny Games, Two Modern Modems, And The Next Big Thing

This week on the Podcast, Hackaday’s Elliot Williams and Kristina Panos joined forces to bring you the latest news, mystery sound, and of course, a big bunch of hacks from the previous week.

First up in the news: we’ve announced the 2024 Tiny Games Contest winners! We asked you to show us your best tiny game, whether that means tiny hardware, tiny code, or a tiny BOM, and you did so in spades. Congratulations to all the winners and Honorable Mentions, and thanks to DigiKey, Supplyframe, and all who entered!

We also announced the first round of Supercon speakers, so if you haven’t gotten your ticket yet, now’s the second best time.

A square image with the Supercon 8 Add-On Contest art featuring six SAOs hanging from lanyards.But wait, there’s more! We’re already a few weeks into the next contest, where we want you to show us your best Simple Supercon Add-On. We love to see the add-ons people make for the badge every year, so this time around we’re really embracing the standard. The best SAOs will get a production run and they’ll be in the swag bag at Hackaday Europe 2025.

Then it’s on to What’s That Sound, which completely stumped Kristina once again. Can you get it? Can you figure it out? Can you guess what’s making that sound? If you can, and your number comes up, you get a special Hackaday Podcast t-shirt.

Now it’s on to the hacks, beginning with non-planar ironing for smooth prints, and a really neat business card that also plays tiny games. Then we’ll discuss USB modems, cool casts for broken wrists, and archiving data on paper. Finally, we ask two big questions — where do you connect the shield, and what’s the Next Big Thing gonna be? Inquiring minds want to know.

Check out the links below if you want to follow along, and as always, tell us what you think about this episode in the comments!

Download in DRM-free MP3 and savor at your leisure.

Continue reading “Hackaday Podcast Episode 289: Tiny Games, Two Modern Modems, And The Next Big Thing”

Raspberry Pi Becomes Secure VPN Router

OpenWRT is a powerful piece of open-source software that can turn plenty of computers into highly configurable and capable routers. That amount of versatility comes at a cost, though; OpenWRT can be difficult to configure outside of the most generic use cases. [Paul] generally agrees with this sentiment and his latest project seeks to solve a single use case for routing network traffic, with a Raspberry Pi configured to act as a secure VPN-enabled router configurable with a smartphone.

The project is called PiFi and, while it’s a much more straightforward piece of software to configure, at its core it is still running OpenWRT. The smartphone app allows most users to abstract away most of the things about OpenWRT that can be tricky while power users can still get under the hood if they need to. There’s built-in support for Wireguard-based VPNs as well which will automatically route all traffic through your VPN of choice. And, since no Pi router is complete without some amount of ad blocking, this router can also take care of removing most ads as well in a similar way that the popular Pi-hole does. More details can be found on the project’s GitHub page.

This router has a few other tricks up its sleeve as well. There’s network-attached storage (NAS) built in , with the ability to use the free space on the Pi’s microSD card or a USB flash drive. It also has support for Ethernet and AC1300 wireless adapters which generally have much higher speeds than the built-in WiFi on a Raspberry Pi. It would be a great way to build a guest network, a secure WiFi hotspot when traveling, or possibly even as a home router provided that the home isn’t too big or the limited coverage problem can be solved in some other way. If you’re looking for something that packs a little more punch for your home, take a look at this guide to building a pfSense router from the ground up.

Pulling Apart An Old Satellite Truck Tracker

Sometimes there’s nothing more rewarding than pulling apart an old piece of hardware of mysterious origin. [saveitforparts] does just that, and recently came across a curious satellite system from a surplus store. What else could he do, other than tear it down and try to get it humming? 

The device appeared to be satellite communication device for a tracking unit of some sort, complete with a long, thick proprietary cable. That led to a junction box with a serial port and an RJ45 port, along with some other interfaces. Disassembly of the unit revealed it contained a great deal of smarts onboard, including some kind of single-board computer. Comms-wise, it featured a cellular GPRS interface as well as an Orbcomm satellite modem. It also packed in GPS, WiFi, Xbee, Ethernet, and serial interfaces. It ultimately turned out to be a Digi ConnectPort X5 device, used as a satellite tracking system for commercial trucks.

What’s cool is that the video doesn’t just cover pulling it apart. It also dives into communicating with the unit. [saveitforparts] was able to power it up and, using the manufacturer’s software, actually talk to the device. He even found the web interface and tested the satellite modem.

Ultimately, this is the kind of obscure industry hardware that most of us would never come into contact with during our regular lives. It’s neat when these things show up on the secondary market so hackers can pull them apart and see what makes them tick. Video after the break.

Continue reading “Pulling Apart An Old Satellite Truck Tracker”

Where Do You Connect The Shield?

When it comes to polarizing and confusing questions in electronics, wiring up shields is on the top-10 list when sorted by popularity. It’s a question most of us need to figure out at some point – when you place a USB socket symbol on your schematic, where do you wire up the SHIELD and MP pins?

Once you look it up, you will find Eevblog forum threads with dozens of conflicting replies, Stackexchange posts with seven different responses plus a few downvoted ones, none of them accepted, and if you try to consult the literature, the answer will invariably be “it depends”.

I’m not a connector-ground expert, I just do a fair bit of both reading and hacking. Still, I’ve been trying to figure out this debate, for a couple years now, re-reading the forum posts each time I started a new schematic with a yet-unfamiliar connector. Now, of course, coming to this question with my own bias, here’s a summary you can fall back on.

Consumer Ports

Putting HDMI on your board? First of all, good luck. Then, consider – do you have a reason to avoid connecting the shield? If not, certainly connect the shield to ground, use jumpers if that’s what makes you comfortable, though there’s a good argument that you should just connect directly, too. The reason is simple: a fair few HDMI cables omit GND pin connections, fully relying on the shield for return currents. When your HDMI connection misfires, you don’t want to be debugging your HDMI transmitter settings when the actual No Signal problem, as unintuitive as it sounds, will be simply your shield not being grounded – like BeagleBone and Odroid didn’t in the early days. By the way, is a DVI-D to HDMI adapter not working for you? Well, it might just be that it’s built in a cheap way and doesn’t connect the shields of the two sockets together – which is fixable.

Continue reading “Where Do You Connect The Shield?”