Back when the IBM PC was new, laying out an ISA board was a daunting task. You probably didn’t have a very fast ‘scope, if you had one at all. Board layout was almost certainly done on a drafting table with big pieces of tape. It was hard for small companies, much less hobbyists, to make a new card. You could buy a prototype board and wirewrap or otherwise put together something, but that was also not for the faint of heart. But with modern tools, something like that is a very doable project and [profdc9] has, in fact, done it. The card uses an ATMega328P and provides two SD cards for use as mass storage on an old computer.
The design tries to use parts that won’t be hard to get in the future. At least for a while, yet. There’s capacity for expansion, too, as there is an interface for a Wiznet 5500 Ethernet adapter.
These days, video cards are virtually supercomputers. When they aren’t driving your screen, they are decoding video, crunching physics models, or processing large-language model algorithms. But it wasn’t always like that. The old video cards were downright simple. Once PCs gained more sophisticated buses, video cards got a little better. But hardware acceleration on an old-fashioned VGA card would be unworthy of the cheapest burner phone at the big box store. Not to mention, the card is probably twice the size of the phone. [Bits and Bolts] has a look at several old cards, including a PCI version of the Tseng ET4000, state-of-the-art of the late 1990s.
You might think that’s a misprint. Most of the older Tseng boards were ISA, but apparently, there were some with the PCI bus or the older VESA local bus. Acceleration here typically meant dedicated hardware for handling BitBlt and, perhaps, a hardware cursor.
The CherryTree-modded card next to the original RTX 2070 GPU. (Credit: Gamers Nexus)
In the olden days of the 1990s and early 2000s, PCs were big and videocards were small-ish add-in boards that blended in with other ISA, PCI and AGP cards. These days, however, videocards are big and computers are increasingly smaller. That’s why US-based CherryTree Computers did what everyone has been joking about, and installed a PC inside a GPU, with [Gamers Nexus] having the honors of poking at the creatively titled GeeFarce 5027POSMicro Computer.
As CherryTree describes it on their website, this one-off build was the result of a joke about how GPUs nowadays are more expensive than the rest of the PC combined. Thus they did what any reasonable person would do and put an Asus NUC 13 with a 13th gen Core i7, 64 GB of and 2 TB of NVMe storage inside an (already dead) Asus Aorus RTX 2070 GPU.
In the [Gamers Nexus] video we can see that it’s definitely a quick-and-dirty build, with plenty of heatshrink and wires running everywhere in addition to the chopped off original heatsink. That said, from a few meter away it still looks like a GPU, can be installed like a GPU (but the PCIe connector does nothing) and is in the end a NUC PC inside a GPU shell that you can put a couple of inside a PC case.
Presumably the next project we’ll see in this vein will see a full-blown x86 system grafted inside a still functioning GPU, which would truly make the ‘install the PC inside the GPU’ meme a reality.
It’s not really an understatement to say that over the years videocards (GPUs) — much like CPU coolers — have become rather chonky. Unfortunately, the PCIe slots they plug into were never designed with multi-kilogram cards in mind. All this extra weight is of course happily affected by gravity.
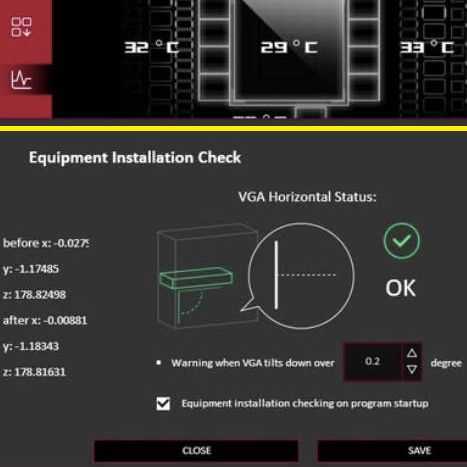
The problem has gotten to the point that the ASUS ROG Astral RTX 5090 card added a Bosch Sensortec BMI323 inertial measurement unit (IMU) to provide an accelerometer and angular rate (gyroscope) measurements, as reported by [Uniko’s Hardware] (in Chinese, see English [Videocardz] article).
There are so-called anti-sag brackets that provide structural support to the top of the GPU where it isn’t normally secured. But since this card weighs in at over 6 pounds (3 kilograms) for the air cooled model, it appears the bracket wasn’t enough, and active monitoring was necessary.
The software allows you to set a sag angle at which you receive a notification, which would presumably either allow you to turn off the system and readjust the GPU, or be forewarned when it is about to rip itself loose from the PCIe slot and crash to the bottom of the case.
Typically, if you want to build an FPGA project inside a PC, you’d need a fairly expensive development board that plugs into the bus. However, [CircuitValley] found some IBM RS-485 boards that are little more than a PCIe board with an Intel FPGA onboard. These are widely avaiable on the surplus market for around $20 shipped. He’s been documenting how to use them.
The FPGA onboard is a Cyclone IV with about 21,000 logic elements and a little over 750 kbits of memory. The board itself has configuration memory, power management, and a few connectors. The JTAG header is unpopulated, but the footprint is there. You simply need to supply a surface-mount pin header and an external JTAG probe, and you can program. Even if you aren’t interested in using an FPGA board, the reverse engineer steps are fun to watch.
The situation reminds us a little of the RTL-SDR — when a device uses a programmable device to perform nearly all of its functions, it is subject to your reprogramming. What would you do with a custom PCIe card? You tell us. Need a refresher on the bus? We can help. Thinking of building some sort of FPGA accelerator? Maybe try RIFFA.
Old computers meant for big jobs often had an external unit to crunch data in specific ways. A computer doing weather prediction, for example, might have an SIMD (single instruction multiple data) vector unit that could multiply a bunch of numbers by a constant in one swoop. These days, there are many computers crunching physics equations so you can play your favorite high-end computer game. Instead of vector processors, we have video cards. These cards have many processing units that can execute “kernels” or small programs on large groups of data at once.
Awkward Years
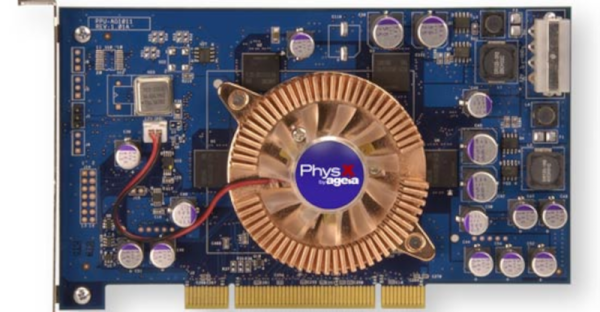
However, there was that awkward in-between stage when personal computers needed fast physics simulation, but it wasn’t feasible to put array processing and video graphics on the same board. Around 2006, a company called Ageia produced the PhysX card, which promised to give PCs the ability to do sophisticated physics simulations without relying on a video card.
Keep in mind that when this was built, multi-core CPUs were an expensive oddity and games were struggling to manage everything they needed to with limited memory and compute resources. The PhysX card was a “PPU” or Physics Processor Unit and used the PCI bus. Like many companies, Ageia made the chips and expected other companies — notably Asus — to make the actual board you’d plug into your computer.
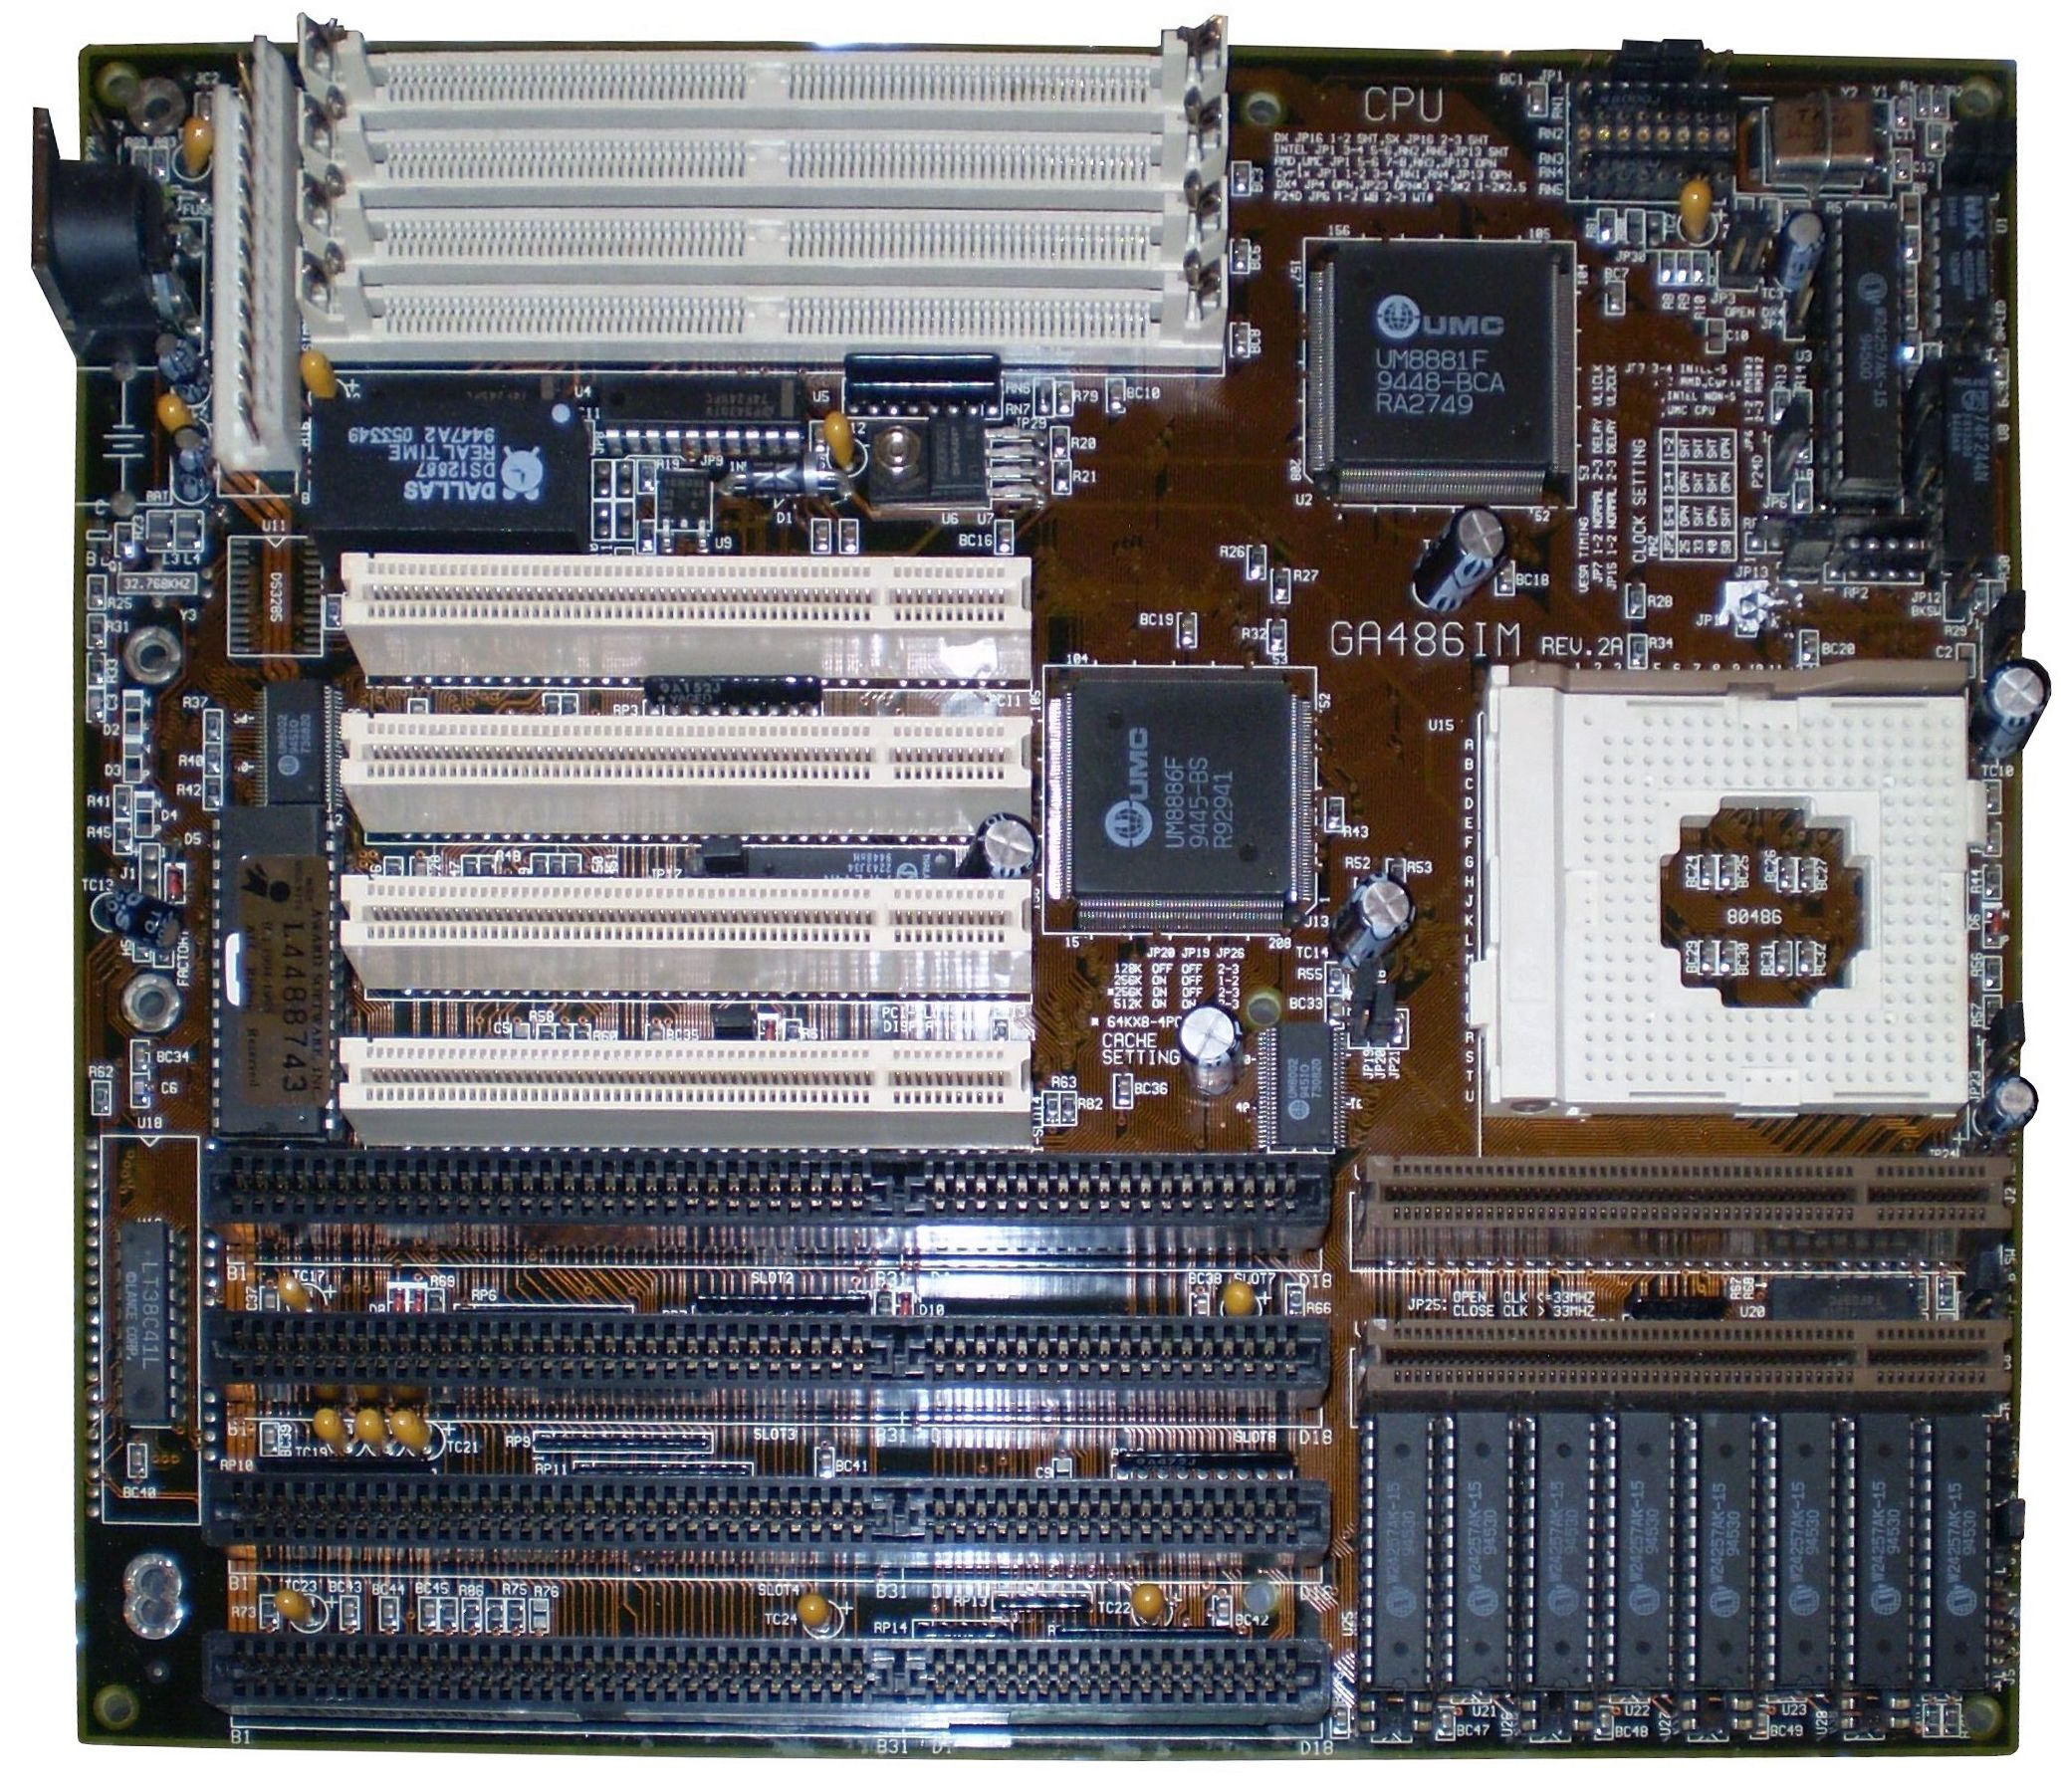
Gigabyte GA486IM mainboard from 1994 with ISA, VLB and PCI slots. (Credit: Rjluna2, Wikimedia)
The early days of home computing were quite a jungle of different standards and convoluted solutions to make one piece of hardware work on as many different platforms as possible. IBM’s PC was an unexpected shift here, as with its expansion card-based system (retroactively called the ISA bus) it inspired a new evolution in computers. Of course, by the early 1990s the ISA bus couldn’t keep up with hardware demands, and a successor was needed. Many expected this to be VESA’s VLB, but as [Ernie Smith] regales us in a recent article in Tedium, Intel came out of left field with its PCI standard after initially backing VLB.
IBM, of course, wanted to see its own proprietary MCA standard used, while VLB was an open standard. One big issue with VLB is that it isn’t a new bus as such, but rather an additional slot tacked onto the existing ISA bus, as it was then called. While the reasoning for PCI was sound, with it being a compact, 32-bit (also 64-bit) design with plug and play and more complex but also more powerful PCI controller, its announcement came right before VLB was supposed to be announced.
Although there was some worry that having both VLB and PCI in the market competing would be bad, ultimately few mainboards ended up supporting VLB, and VLB quietly vanished. Later on PCI was extended into the Accelerated Graphics Port (AGP) that enabled the GPU revolution of the late 90s and still coexists with its PCIe successor. We covered making your own ISA and PCI cards a while ago, which shows that although PCI is more complex than ISA, it’s still well within the reach of today’s hobbyist, unlike PCIe which ramps up the hardware requirements.
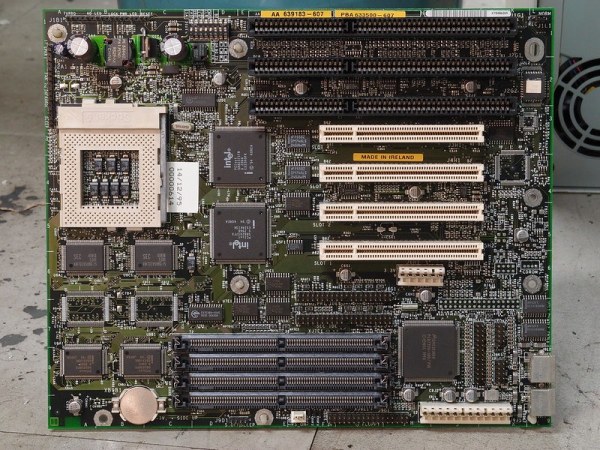
Top image: PC AT mainboard with both 16-bit ISA and 32-bit PCI slots. (Credit: htomari, Flickr)