While there is a time and place for wirelessly controlled devices, sometimes you want something you can just reach out and touch to interact with, no apps to install or devices to configure. In this case [John] wanted a lamp that was just that. Drawing inspiration from the rotary phone, he created the LightComposer.
This small lamp, just a bit smaller than a hockey puck, uses a 3D printed enclosure and a straightforward PCB. It’s a very accessible project to recreate. The 3D prints are well thought out including a TPU ring on the bottom to keep the lamp from sliding around. The light source comes from 32 SK6812 LEDs, which are very similar to NeoPixels. An ATmega328P microcontroller powers the project and can easily be programmed using the Arduino IDE. A rotary encoder in the center, coupled to the top diffuser, lets you control LED brightness and color by turning it. The firmware also includes some fun hidden light-effect modes.
Head over to [John]’s site for all the files needed to make your own LightComposer, or links to buy a premade one. What devices have you made that use a straightforward physical user interface in lieu of an app? Be sure to check some of the other lamp builds we’ve featured before.
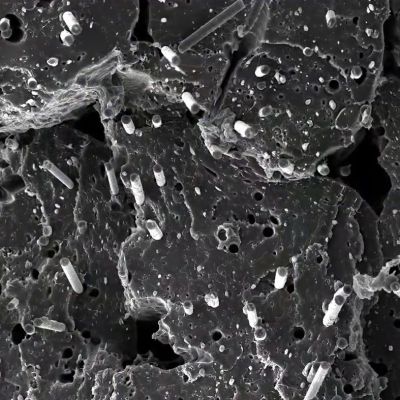
After recently publishing a few videos covering research into the poor adhesion between chopped carbon fiber (CCF) and the thermoplastic filaments as used with FDM 3D printing, some of the feedback received by [I built a thing] included the idea that the missing step to make CCF additives work was post-print annealing. Naturally this claim had to be investigated, both through the resulting physical characteristics as well as on a microscopic level in the same scanning electron microscope (SEM) as before.
Post-annealing SEM scan, showing clear voids. (Credit: I built a thing, Youtube)
Theories as to why annealing the parts would help here seem to focus on increased bonding and filling of voids in the printed CCF-infused material, while there are the typical worries with annealing such as parts warping and shrinking to also take into account as potential downsides of this treatment.
For the sample materials PETG and PETG-CF, as well as PLA and PLA-CF filaments are used, with each filament type featuring an annealed and not annealed version. These were then tested for tensile strength, stiffness and failure type, as well as dimensional accuracy and warping, before being examined under the SEM. A total of 160 samples were used, with 20 samples per material and annealing state.
Perhaps the biggest surprise here was how much PETG benefits from annealing, making it much more resilient to breaking, whereas neither PLA nor PLA-CF seemed to see much benefit. Shocking was how much worse PETG-CF performs than PETG, with the former being worse than both PLA and PLA-CF here.
In terms of dimensional accuracy, annealing caused a Z direction expansion while shrinking the samples in the other directions. The CCF addition here actually prevented much of the shrinking and expansion, showing the first clear benefit of this additive. Yet despite annealing at right above the glass transition temperature as is proper, this would seem to be the limit of this approach in terms of practical benefits.
Compared to the previous research that focused on PLA-CF, PETG-CF would seem to make the case even more strongly that there’s no real purpose to CCF additives, especially since you can already account for parts shrinkage during annealing before printing. That there’s no improvement to the CCF and thermoplastic interface adhesion is also no mystery, considering the science behind how e.g. thermoset materials create bonds with CF.
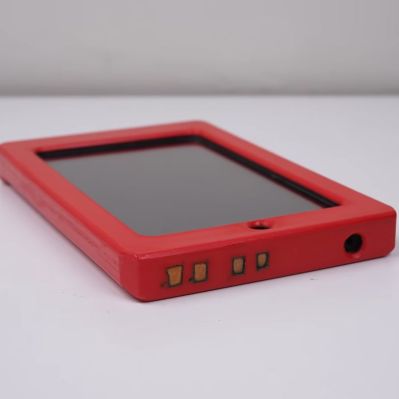
Usually the term ‘jailbreaking’ isn’t meant to be taken quite that literally, but in the case of the US prison tablet that [Hugh Jeffreys] got sent, it’s really quite apt. Unlike the typical transparent prison electronics, this tablet is hermetically sealed inside an opaque plastic case, with the Windows 10 install firmly locked-down and not allowing anything more to be done with it than access some prison-provided services via the browser in kiosk mode.
The first challenge was to see whether it could be booted at all, with just four metal pads visible on the side of the case. These turn out to correspond to USB pins, but the tablet only briefly tries to turn on with a charger connected. This means that a teardown is required, which ended up involving a hacksaw due to the sealed case.
Inside the case is the Windows tablet with the back cover removed, presumably for easy access to extend its USB port. All of this is embedded in foam and more gunk that makes disassembly rather messy. With the case opened it becomes clear that the likely reason why this tablet was junked was due to a bad third-party charger board, as using the tablet’s own USB port it charges happily and even turns on.
From there it’s a bit of a fight with the locked-down Windows installation, but as it’s just a Windows 10 Home installation, there’s no drive encryption or such to get in the way. This allows for the device to be fully jailbroken, revealing its specifications as an Iview Optimus-C-8001, powered by an Intel Atom Z8350 at 1.44 GHz with a blistering 2 GB of RAM. The Windows installation was from 2018, with apparently no updates since.
Despite the very high school arts-and-crafts appearance of the case itself, the tablet itself isn’t too shabby considering the limited hardware specifications. Although getting the case off is a bit of a pain, it’s not a bad catch if you can find one of these puppies in the e-waste bin.
Modern video game consoles rarely have expansion ports, but in the 80s and 90s it was practically guaranteed. With the speed that hardware was advancing it made sense to build in some way to upgrade a system’s capabilities throughout its lifespan. But while this gave us things like the Sega CD and N64 Expansion Pak, many ports ultimately went unused. Given this recent project from [decrazyo], one wonders if unused port on the bottom of the Nintendo Entertainment System could have been used to expand its graphical capabilities.
The basis of this upgrade is the fact that the Picture Processing Unit (PPU) on the NES has four pins that are grounded. These four pins tell the NES to display the background color if the pixel is transparent. Since they’re normally grounded, this means the NES can only display a limited background image, but there’s no reason these pins must be grounded. By using a second PPU configured to output graphics information and wiring it to these four pins on the first PPU, the NES can be given all kinds of new abilities, such as adding parallax effects to backgrounds, rendering more sprites, and showing more colors in the backgrounds.
Of course, the hardware requirements for this will require a donor NES to get the second PPU as well as the necessary memory chip for it, and we don’t recommend tearing apart perfectly good retro consoles for experimentation if it can be avoided. Presumably, you could use this open-source NES hardware alternative instead. But for those with the parts and the gumption, creating a demo or adding graphics features to homebrew games using this second graphics chip is within reach.
As great and streamlined as the Windows desktop experience is, one area where it’s at best disappointing and at worst rage-inducing is when it comes to its command line interface (CLI) offerings. In Windows 9x/ME this could be excused by the fact that it was essentially just a dressed-up MS-DOS CLI experience, but on Windows NT-based OSes no such excuse exists.
Yet even after Microsoft finally acknowledged the shortcomings of the cmd.exe shell by 2006, they then proceeded to go their own way with PowerShell, industry standards be damned. Especially for those of us who have no beef with the UNIX/BSD/Linux CLI experience and the joys of shell scripting, this insistence was disappointing. Simultaneously, everyone from OS X/MacOS to Haiku were happily offering a familiar CLI environment alongside POSIX compatibility.
Although Windows NT OSes were POSIX compliant, they never offered a suitable shell along with it, nor any of the other things you’d expect in a modern-day BSD, Haiku or Linux CLI environment. In a recent article by my esteemed colleague Al Williams, these sore points were somewhat addressed as far as basic CLI tools go, but the issue goes obviously much deeper than just the basic userland tools. Which is where MSYS2 comes into the picture.
Many oscilloscopes have provisions to be connected to a computer and used remotely, but most of those interfaces are fairly rudimentary. To address this, [Winfried] has developed the SDS-Remote, a remote interface for the Siglent SDS 1000X-E series oscilloscopes.
The 1000X-E series oscilloscopes have both USB and network interfaces, and the SDS-Remote can use either (though the USB interface is still somewhat experimental). SDS-Remote allows for remote controlling the oscilloscope, capturing waveforms super handy as it lets you export a CSV file of the waveforms for further analysis. You can also capture screenshots of the scope through the web interface, making it much easier to compare waveforms as you’re working on a project. The built-in data logging lets you run long experiments and save out their results. The macro recorder lets you automate complex tests using SCPI commands and brings basic scripting to the interface without needing to run separate code. There’s also a mechanism to integrate an AI LLM to help translate common language into the correct scope configuration.
Thanks [Winfried] for sharing this awesome web interface for the oscilloscope no doubt it’ll be a welcome upgrade for those already remote controlling their Siglent scope. Head over to his GitHub page and check it out for yourself! Have you written any improved user interfaces for your equipment? Be sure to let us know what you’ve done so we can share with others who may find use in an interface that offers more than came with the product.
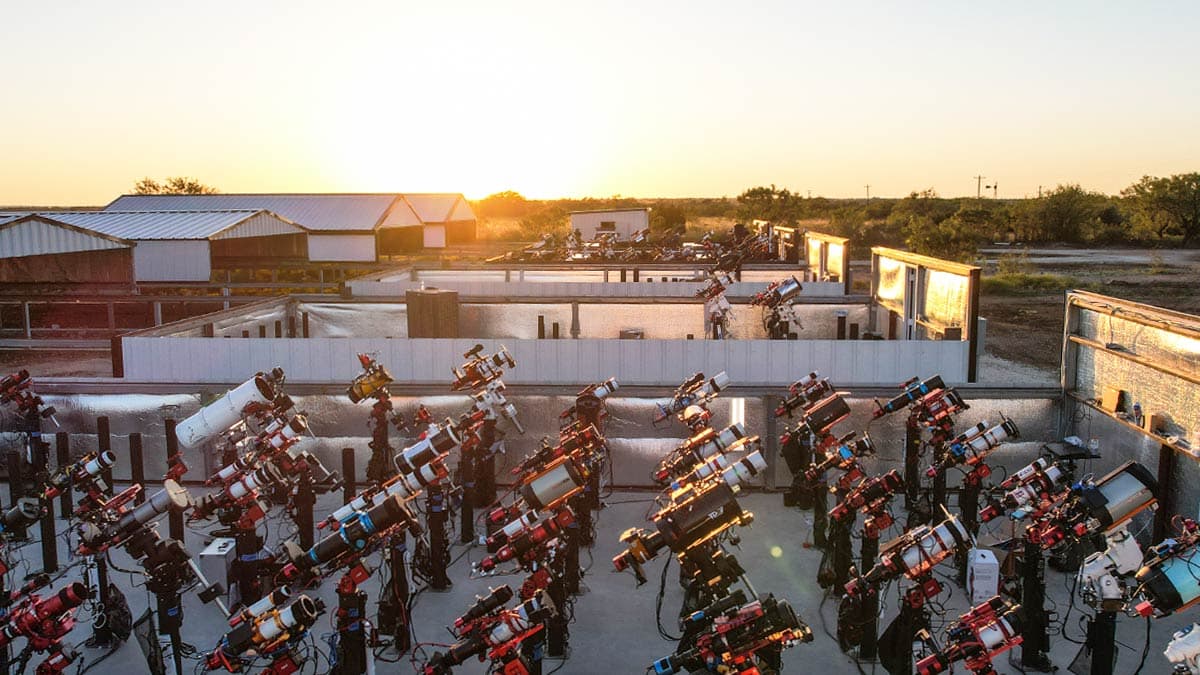
McCulloch County, Texas, is smack dab in the middle of a very large state. We wouldn’t exactly call it the middle of nowhere, but given there’s so little light pollution it scores a 1 on the Bortle Scale, it’s not exactly the Big Apple, either. [Bray Falls] lives there, and has a job description we have become immediately jealous of: [Bray] is a telescope rancher.
Like the song goes, the stars really are big and bright at night deep in the heart of Texas. Not only is his ranch free of the light pollution that plagues more urban locations, central Texas is pretty dry, with only a few days of rain in any given month. That’s not great for agriculture, but it’s great for astronomy since it means the skies are most often cloud-free. Combine that with access to high-speed internet, and you have the makings of a telescope ranch.
Telescopes being let out of the barns for the night. Image: Starfront Observatory
It’s brilliant in its simplicity: along with his own ‘scopes, [Bray]’s Starscope Observatory hosts hundreds of other people’s CCD equipped goto telescopes, all set up to be remote controlled over the information superhighway. On clear nights– which again, is most of them–the roofs roll off the telescope barns and observations can begin. Pad rental comes with tech support, too, so you don’t have to fly out to heart of darkest Texas if your mount gets jammed or you lose signal for any reason. That said, you should be sure to read the fine print before signing up, because said tech support probably doesn’t apply if you 3D printed your own ‘scope, or built your own mount.
That said, having gone to the effort of doing all that, would you really send your baby away to a farm upstate? Best reserve that for the old Celestron collecting dust in the corner. If you think we should be leaving these observations to the pros, be aware [Bray] has apparently discovered a very oddly-placed supernova remnant, 40 degrees off the galactic plane in Virgo. So this isn’t just a rewarding hobby; it’s still science, too.


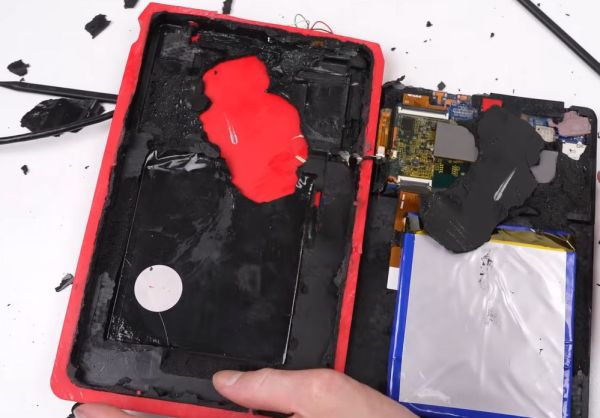
 The first challenge was to see whether it could be booted at all, with just four metal pads visible on the side of the case. These turn out to correspond to USB pins, but the tablet only briefly tries to turn on with a charger connected. This means that a teardown is required, which ended up involving a hacksaw due to the sealed case.