Node-RED Laser Shooting Gallery Goes Anywhere

When you think of a shooting gallery, you might envision a line of tin cans set up along a split-rail fence, or a few rows of ducks or bottles lined up at a carnival. But what do these have in common? You, standing in one spot, and shooting in the same general direction. You’re exposed! If those targets could shoot back, you’d be dead within seconds. Wouldn’t it be more fun if the targets were all around you in 360°? We think so, too.

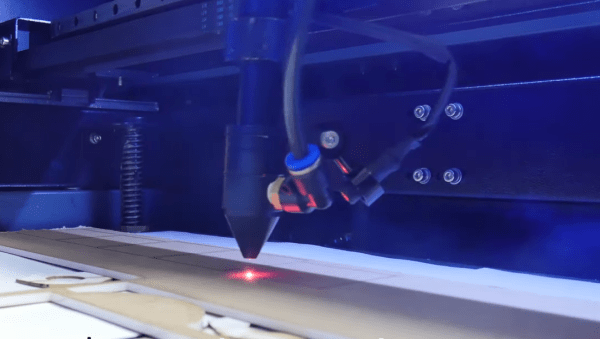
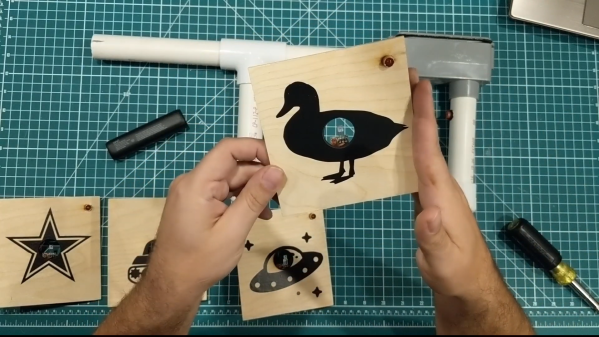
So how could you possibly set up a shooting gallery this way? [Another Maker] already solved that problem for you with ESP32s and Node-RED (YouTube). Each target has an ESP32, a laser sensor, and an LED that lights up when the target is ready, and turns off once it’s been hit. They all make an enticing ‘shoot me’ sound that goes with their graphics, and a second mp3 plays upon direct hit.

The PVC gun houses an ESP8266, a laser module at the end of the barrel, and runs on a cylindrical USB battery slipped down in the secondary grip. [Another Maker] can spread the targets out far and wide, as long as they all stay in range of the localized WiFi access point.

The best part is that the Node-RED system is target-agnostic — it doesn’t care how many you have or how they’re made, and it can juggle up to 250 of them. Because of the way the target objects are programmed, it would be quite easy to add actuators that make them drop down or fall backward when hit. You could also implement [Another Maker]’s fantastic suggestion of hitting arcade buttons with NERF darts instead. Charge those lasers and fire at the break button to see the demo and walk-through video.

If you plan to knock the targets down or over in your implementation, you’ll want an easy way to reset them. Here’s a scrap-built shooting gallery that uses a windshield wiper motor to set ’em back up.

Continue reading “Node-RED Laser Shooting Gallery Goes Anywhere”

Word Clock Does The Job With Laser-Etched Acrylic

As far as telling the time, word clocks go out of their way to spell it out for you. As long as you know the language, they’re a stylish and effective way to get the message across. [Simon] built an elegant, stripped-back word clock of his own, with a laser cutter helping to get the job done.

The core of the build is an Arduino Nano, hooked up to a string of 22 WS2812B LEDs, driven via the FastLED library. An NXP PCF8563T serves as the real-time clock, to ensure stable and accurate timekeeping. The electronics are all housed inside an enclosure that appears to be constructed from PCBs, with instructions on operating the clock printed on the base.

The actual display is via laser-cut and laser-etched acrylic. The display piece slides into the top of the clock, with the LEDs edge lighting various segments to display the relevant words that make up the current time. The clock is designed in such a way that these display slides can be easily switched out to change the look of the clock, with different fonts and designs.

It’s a quick and clean take on the popular word clock design, and one any makerspace could whip up in a weekend. As far as word clocks go, however, the sky really is the limit when it comes to complexity. Video after the break.

Continue reading “Word Clock Does The Job With Laser-Etched Acrylic”

Laser Welding With A Tattoo Removal Gun

Dating as far back as the early 1960’s, researchers were zapping tattoo inks with laser light was an effective way to remove the markings from human skin. At the time it was prohibitively expensive. But the desire to have an undo-button for badge choices is strong, and thus the tattoo removal gun was born.

These days you can pick up one of these zappy, burn-y wonders for far less than a flagship cellphone put their high-power-output to alternative use. [Andrew] recently discovered that these devices can be readily repurposed into a laser welding tool with just a bit of work under the hood.

He first came across the technology via videos from [styropyro], whose work we’ve featured before. The tattoo removal gun features a YAG laser, which is pulsed to create a high power density. In initial testing, the pulses were too short and of too high intensity to effectively weld with; instead, the pulses simply cratered the metal.

After delving in further, [Andrew] discovered that by removing the Q-switch optical component, the pulses from the laser could be lengthened. This reduces the power density, and allows the tool to weld various materials even on its lower power settings. Success was found welding steel, titanium, and other materials, though attempts to weld copper and silver faced little success. Test pieces included razor blades and small screws, which could easily be welded with the tool. Results of the razor blade welding is spectacular, with a high-quality welding bead achieved by taping the laser to a CNC mill for precise movement.

It could prove to be a useful tool for those experimenting with complex projects involving bonding metals at very fine scales. If you’re pursuing something exotic yourself, we want to hear about it!

Use Blueprint Process To Print On Fabric With Lasers

[Shih Wei Chieh] has built a laser cyanotype printer for fabrics. You know, for art!

How do you get an inkjet head on a shoe or a couch? Most printing processes require a flat surface to print. But hearkening back to the days when a blueprint was a blueprint, a mixture of an iron salt and an acid are mixed and applied to a surface an interesting reaction occurs when the surface is exposed to UV light. The chemicals react to form, of all things, prussian blue. After the reaction occurs simply washing away the remaining chemicals leaves a stable print behind.

[Shih Wei Chieh] uses two galvanometers and a laser to cure the fabric. He uses a slightly newer process which reduces the exposure time required. This lets him print very large pictures, but also on uneven surfaces. As you can see in the video, viewable after the break, the effect is very pretty. There’s a new way to have the coolest pen plotter on the block.

Continue reading “Use Blueprint Process To Print On Fabric With Lasers”

Fun With A 200-kW Fiber Laser

We’ve all heard the “Do not stare into laser with remaining eye” joke. It’s funny because it’s true, as pretty much any laser a hobbyist can easily come by can cause permanent damage to eyes unless the proper precautions are taken. But a fiber laser with 200kW peak power is in another hazard class entirely.

Granted, outsized power ratings like this are a bit misleading, based as they are on femtosecond-long pulses. And to be sure, the fiber laser that [Marco Reps] tears down in the video below was as harmless as a kitten when he got it, thanks to its output optics having been unceremoniously shorn from the amplifier by its former owner. Reattaching the output and splicing the fiber would be necessary to get the laser lasing again, but [Marco] had other priorities in mind. He wanted to understand the operation of a fiber laser, but the tangle of fibers on two separate levels inside the chassis was somewhat inscrutable. The coils of fiber wrapped around the aluminum drums inside the chassis turned out to be the amplifier; fed by a semiconductor seed laser, the light pulse travels through the ytterbium-doped fiber of the two-stage amplifier, which is the active gain medium where stimulated emission, and therefore amplification, occurs.

With a little reverse engineering and the help of an online manual, he was able to understand the laser’s operation. A laser company helped him splice the optics back together – seeing the splicing rig in action is worth the price of admission alone – and the unit seems to be in more or less working order at this point. Normally the most powerful laser we see around here are the CO2 lasers in those cheap Chinese laser cutters, so we’re looking forward to learning more about fiber lasers.

Continue reading “Fun With A 200-kW Fiber Laser”

A Super Easy Laser Engraver

CNC comes in all shapes and sizes, from huge industrial lathes to homebuilt wire benders. [MJKZZ] has built their own compact rig, using optical drive parts to create a cute but effective laser engraver. (Video embedded below.)

The build aims to keep things simple by holding the laser stationary, and moving the bed instead. The laser in question is a 500 mW unit, driven by the Z axis on the Arduino CNC shield used to run the system. A DVD drive is taken apart, and the worm drive stepper motor assembly is used to slew the carriage back and forth, atop which is glued a bed. Upon this bed, a copy of the same assembly is then installed, offset 90 degrees, giving the X and Y axes.

The result of this setup is a lightweight moveable bed, controllable through Gcode with GRBL. With the laser situated above on some camera mounting gear, paper can be installed on the bed and engraved with ease. The resulting accuracy is admirable, and at full power, the laser is capable of cutting through the paper.

While it’s a lightweight rig, it could serve a purpose as a cheap and easy way to produce stencils from computerized artwork. Optical drives remain popular in the DIY CNC scene, as they’re a great way to source a moveable platform with all the mechanical considerations already worked out.

Continue reading “A Super Easy Laser Engraver”

Making Models With Lasers

Good design starts with a good idea, and being able to flesh that idea out with a model. In the electronics world, we would build a model on a breadboard before soldering everything together. In much the same way that the industrial designer [Eric Strebel] makes models of his creations before creating the final version. In his latest video, he demonstrates the use of a CO2 laser for model making.

While this video could be considered a primer for using a laser cutter, watching some of the fine detail work that [Eric] employs is interesting in the way that watching any master craftsman is. He builds several cubes out of various materials, demonstrating the operation of the laser cutter and showing how best to assemble the “models”. [Eric] starts with acrylic before moving to wood, cardboard, and finally his preferred material: foam core. The final model has beveled edges and an interior cylinder, demonstrating many “tricks of the trade” of model building.

Of course, you may wish to build models of more complex objects than cubes. If you have never had the opportunity to use a laser cutter, you will quickly realize how much simpler the design process is with high-quality tools like this one. It doesn’t hurt to have [Eric]’s experience and mastery of industrial design to help out, either.

Continue reading “Making Models With Lasers”