If civilization goes sideways and you need to survive, what are the bare essentials that should go in your bunker? Food and fresh water, sure. Maybe something to barter with in case things go full on The Postman. That’s all sensible enough, but how’s that stuff going to help you get a LAN party going? If you’re anything like [Jay Doscher], you’ll make sure there’s a ruggedized Raspberry Pi system with a self-contained network with you when the bombs drop.
 Or at least, it certainly looks the part. He’s managed to design the entire project so it doesn’t require drilling holes through the Pelican case that serves as the enclosure, meaning it’s about as well sealed up as a piece of electronics can possibly be. The whole system could be fully submerged in water and come out bone dry on the inside, and with no internal moving parts, it should be largely immune to drops and shocks.
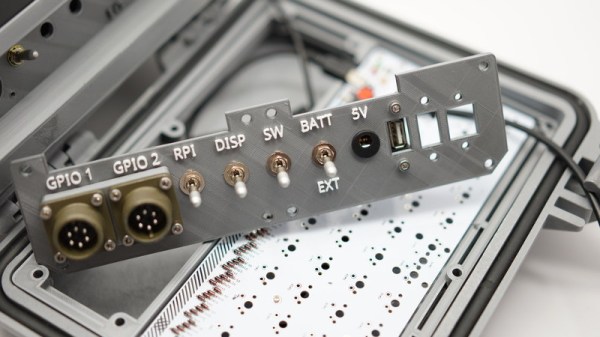
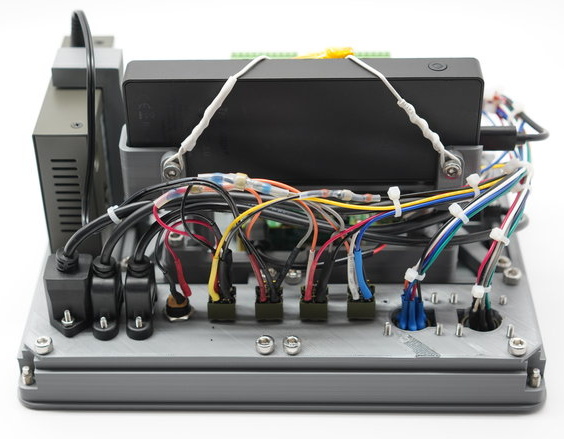
But we imagine [Jay] won’t actually need to wait for nuclear winter before he gets some use out of this gorgeous mobile setup. With the Pi’s GPIO broken out to dual military-style panel mount connectors on the front, a real mechanical keyboard, and an integrated five port Ethernet switch, you won’t have any trouble getting legitimate work done with this machine; even if the closest you ever get to a post-apocalyptic hellscape is the garage with the heat off. We especially like the 3D printed front panel with integrated labels, which is a great tip that frankly we don’t see nearly enough of.
This is actually an evolved version of the Raspberry Pi Field Unit (RPFU) that [Jay] built back in 2015. He tells us that he wanted to update the design to demonstrate his personal growth as a hacker and maker over the last few years, and judging by the final product, we think it’s safe to say he’s on the right path.


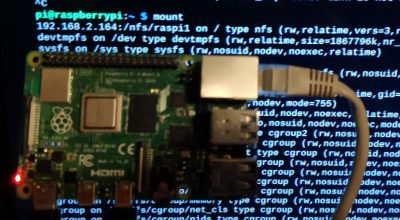 What are the downsides, I hear you ask? You might see slower speeds going across the network compared to a high quality SD card, particularly with the Pi 4 and its improved SD card slot. PXE does require an Ethernet cable; WiFi is not enough, so you have that restriction to contend with. And finally, this isn’t a portable option — you are tethered to that network cable while running, and tethered to your network to boot at all.


