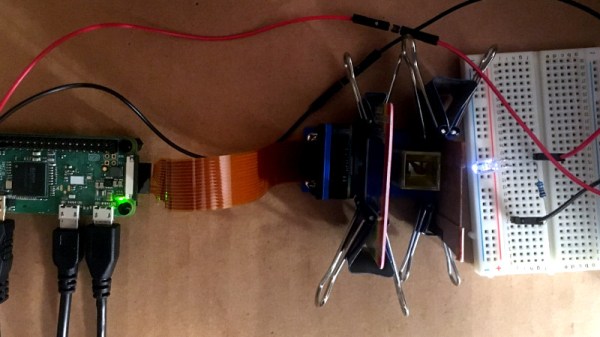
Bare Metal Programming With Only Three Buttons

For anyone who’s seen a 1970’s era microcomputer like the Altair 8800 doing its thing, you’ll know the centerpiece of these behemoths is the array of LEDs and toggle switches used as input and output. Sure, computers today are exponentially more capable, but there’s something undeniably satisfying about developing software with pen, paper, and the patience to key it all in.

If you’d like to get a taste of old school visceral programming, but aren’t quite ready to invest in a 40 year old computer, then [GClown25] might have the answer for you. He’s developed a pocket sized “computer” he’s calling the BIT4 that can be programmed with just three tactile switches. In reality it’s an ATMega4809 running C code, but it does give you an idea of how the machines of yesteryear were programmed.

In the video after the break, [GClown25] demonstrates the BIT4 by entering in a simple binary counter program. With a hand-written copy of the program to use as a reference, he steps through the memory addresses and enters in the command and then the value he wishes to operate on. After a few seconds of frantic button pushing, he puts the BIT4 into run mode and you can see the output on the array of LEDs along the top edge of the PCB.

All of the hardware and software is open source for anyone who’s interested in building their own copy, or perhaps just wants to take a peak at how [GClown25] re-imagined the classic microcomputer experience with modern technology. Conceptually, this project reminds us of the Digirule2, but we’ve got to admit the fact this version isn’t a foot long is pretty compelling.

Continue reading “Bare Metal Programming With Only Three Buttons”

Modular CNC Build Gets You Both A Mill And A Laser Cutter

CNC builds come in all shapes and sizes. There’s delta manipulators, experimental polar rigs, and all manner of cartesian builds, large and small. After completing their first CNC build, [jtaggard] took what they learned and applied it in the development of a new machine.

It’s a desk-sized cartesian design, with a frame built from V-slot extrusion cut to size by circular saw. This is a great way to get quality extrusion for a custom build, and is readily available and easy to work with. The gantry rides on wheels, with the X and Y axes being belt driven, plus a screw drive for Z. A couple of NEMA 17s and a NEMA 23 provide motive power, and an Arduino Uno with stepper drivers is the brains of the operation. 1/4″ thick PLA plates are used to assemble everything, and while [jtaggard] intended to replace these with aluminium down the track, so far the plastic has proved plenty rigid enough for early tests of both machining and engraving wood.

It’s a great entry-level CNC build, which has proved usable with both a 500W spindle and a 2.5W laser for engraving. Being modular in nature, it would be easy to add other tools, such as a pen plotter or vinyl cutting blade for further versatility.

DIY CNC builds are always popular, as you end up with a useful tool as a reward for your hard work. Video after the break.

Continue reading “Modular CNC Build Gets You Both A Mill And A Laser Cutter”

Better Debating Through Electronics

Watch any news panel show these days, and you’ll see that things can very quickly become unruly. Guests compete for airtime by shouting over one another and attempting to derail their opponent’s talking points. [cutajar.sacha] had encountered this very problem in the workplace, and set about creating a solution.

The result is the Debatable Deliberator, and it combines the basics of “Talking Stick” practices with behavioural training through humiliation. Two participants each wear a headband, fitted with electronics. The holder of the magic ball may speak for as long as the timer counts down. If their opponent speaks during this time, their headband reprimands them with gentle slapping to the face. If the holder speaks over their assigned time, they are similarly treated to mechanical slapping.

It’s an amusing way to help police a discussion between two parties, and it’s all made possible with a trio of WeMos D1 ESP8266 boards. The headbands act as clients, while the ball acts as a server and keeps track of how many times each speaker has broken the rules.

WiFi projects such as this one have become much easier in the past few years with the wide availability of chips like the ESP8266. Of course, if you need more grunt, you can always upgrade to the ESP32.

Continue reading “Better Debating Through Electronics”

Mathics: How To Do Hard Math When You’re Not An MIT Janitor

Algebra is the bane of many a student, but it is surprisingly useful when it comes to electronics. Sure, you can just memorize all the permutations of things like Ohm’s law. But it is better if you can remember one form and deduce the others on the fly.

There are many occasions where you — as our old Algebra teacher used to say — need to use what you know to get what you don’t know. The gold standard, of course, is a computer program called Mathematica. For home and student use, the software is “only” about $160-$600, but commercial versions range from about $1,000 to nearly $8,000. Of course, there are free alternatives, and the one we’re looking at today is Mathics. It will run in your browser or as a desktop application powered by Python, and it’s available for free.

The program does a nice job of displaying mathematical formulae and you can get an idea of its power by visit the online version. which has examples if you click the question-mark in the upper right and look for the fourth item down. There’s also a standalone version of the online help.

We did have a little trouble with some of the gallery examples timing out, as well as the site certificate being expired. We also had a bit of difficulty remembering the linear algebra classes we took a long time ago! If you want something easy to play with try this:

Solve[4x+3==20,x]

Don’t forget to press Shift+Enter in the browser to get the solution.

Under the hood, MathJax and SymPy do a lot of the heavy lifting. In fact, we imagine a lot of the program’s intended audience would wind up using Jupyter notebooks with Python underneath. Of course, there are copies of Wolfram software on stock Raspberry Pi’s, too.

3D-Printed Mobius Strip Of Gears

Exploring the mathematics behind everyone’s favourite unorientable single-sided surface can be quite the mind-bending exercise, so it’s nice that it’s so easy to make a Mobius strip out of paper and a single piece of tape. That demonstration was far from enough for [elmins]. who printed this Mobius strip of gears. The teeth fit together, and all the gears move, but there is still only one side and one edge (we think).

This animation helped spawn the project.

The idea to tackle the project came from seeing an animation of Mobius gears. Wondering if it would be possible to actually create such a thing, [elmins] got to work. The design is printed in 60 pieces, 30 each for the inner and outer parts. The entire assembly is printed in PETG, an unconventional choice but by no means unsuitable. 285 ball bearings help the rings rotate.

The gears use a standard involute bevel profile, though [elmins] suspects this could be an area of further optimisation. The parts were printed in an orientation to ensure the print lines run around the races, allowing for minimal finishing and smooth rolling of the bearings. This is a good study of just what can be achieved with some smart modelling and perseverance.

If you’re thirsty for more madcap machining, consider exploring the concept of the Reuleaux triangle bearing.

Battle Tested Current Limiter For Cheap DC Motor Controllers

Running a brushed motor in muddy or dusty environments takes a toll on controllers, with both heavy back EMF and high stall currents. This explains one of the challenge in Europe’s Hacky Racer series, which is decidedly more off-road than America’s Power Racing Series.

In pushing these little electric vehicles to the limits, many builders use brushless Chinese scooter motors since they’re both available and inexpensive. Others take the brushed DC route if they’re lucky enough to score a motor — and then the challenge becomes getting the most performance without burning up your controller. To fix this, [MechanicalCat] has come up with a current limiter for cheap DC motor controllers.

Circuit protection added to motor controller

The full write-up is in the included PDF file, and describes the set-up of an Arduino Nano sitting between throttle and controller, and taking feedback from a current sensor. The controller in question is a 4QD Porter 10 so an extra component is a DC-to-DC converter to provide a floating ground for the Arduino. However, there is also the intriguing possibility of the same set-up being used with absurdly cheap Chinese motor controllers. There is also advice on fitting flyback diodes, something which might have saved one controller in the Hackaday pits last year.

It’s yet to be seen what effect this will have on Hacky Racer competitiveness, however its applications go far beyond that field into anywhere a reliable small DC motor drive on the cheap is required. Meanwhile, if you’re unsure where this Hacky Racer stuff came from, you could start here.

What’s More Accurate Than A GPS Clock? The OpenPPS GPS Clock

Making a GPS clock is a relatively straightforward process on the face of it. Buy a GPS module for a few dollars, hook it up to a microcontroller board of your choice, pick the appropriate library and write a bit of code, et voila! A clock with time-wonk bragging rights!

Of course, your GPS clock will always tell the right time, but it won’t be really right. Your microcontroller will introduce all sorts of timing errors and jitter, so at best it’ll only be nearly right. [Rick MacDonald] has been striving to quantify and minimise these errors in his OpenPPS project, which aims to be as accurate a GPS time and frequency reference as possible.

In a very comprehensive multi-page write-up, he details his progression, through the GPS modules he used, his experience with timing jitter when he used an ESP32 alone to process their output, and then his experiments with an FPGA and then temperature-compensated oscillators. It moves from being a mere description of a GPS clock into a fascinating run-down of both GPS timing itself and the development pitfalls he encountered along the way. At the end of it all he has a GPS clock in a smart 3D-printed enclosure which he admits as yet doesn’t do anything more than tell the time, but as he points out it’s a clock with minimised jitter, delay, and drift, and it remains an ongoing project that will evolve into a full-blown time and frequency standard.

If your taste in GPS clocks is far more simple, there are plenty of projects showing how a more basic one can be produced.