It seems as if everyone has finally decided to stop pretending that standing in front of a desk for 8+ hours was something anyone actually wanted to do, and once again embrace the classic adjustable office chair. But whether you’re writing code in a cubicle or are one of those people who apparently makes a living by having people watch them play video games, one thing is certain: your chair needs to be cool enough to make up for the years shaved off your life by sitting in it all day.
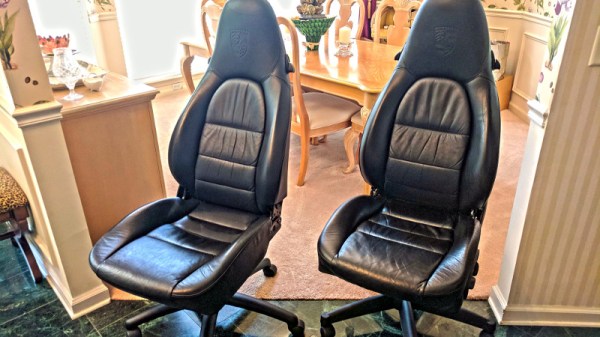
 Case in point, these chairs that were made out of seats salvaged from a Porsche 996 by [Colby Newman]. You might never be able to afford the car they came out of on your salary, but at least you can pretend you’re power shifting into fifth while doing your TPS reports.
The first step, and arguably the most important one, was getting the seats from a Porsche. [Colby] wisely cautions the reader that they should avoid seats with air bags, as the last thing you want is your chair to explode while you’re streaming Fortnite. This is especially true if you are looking to salvage the seats yourself from the junkyard, as special care needs to be taken on how you remove them from the vehicle.
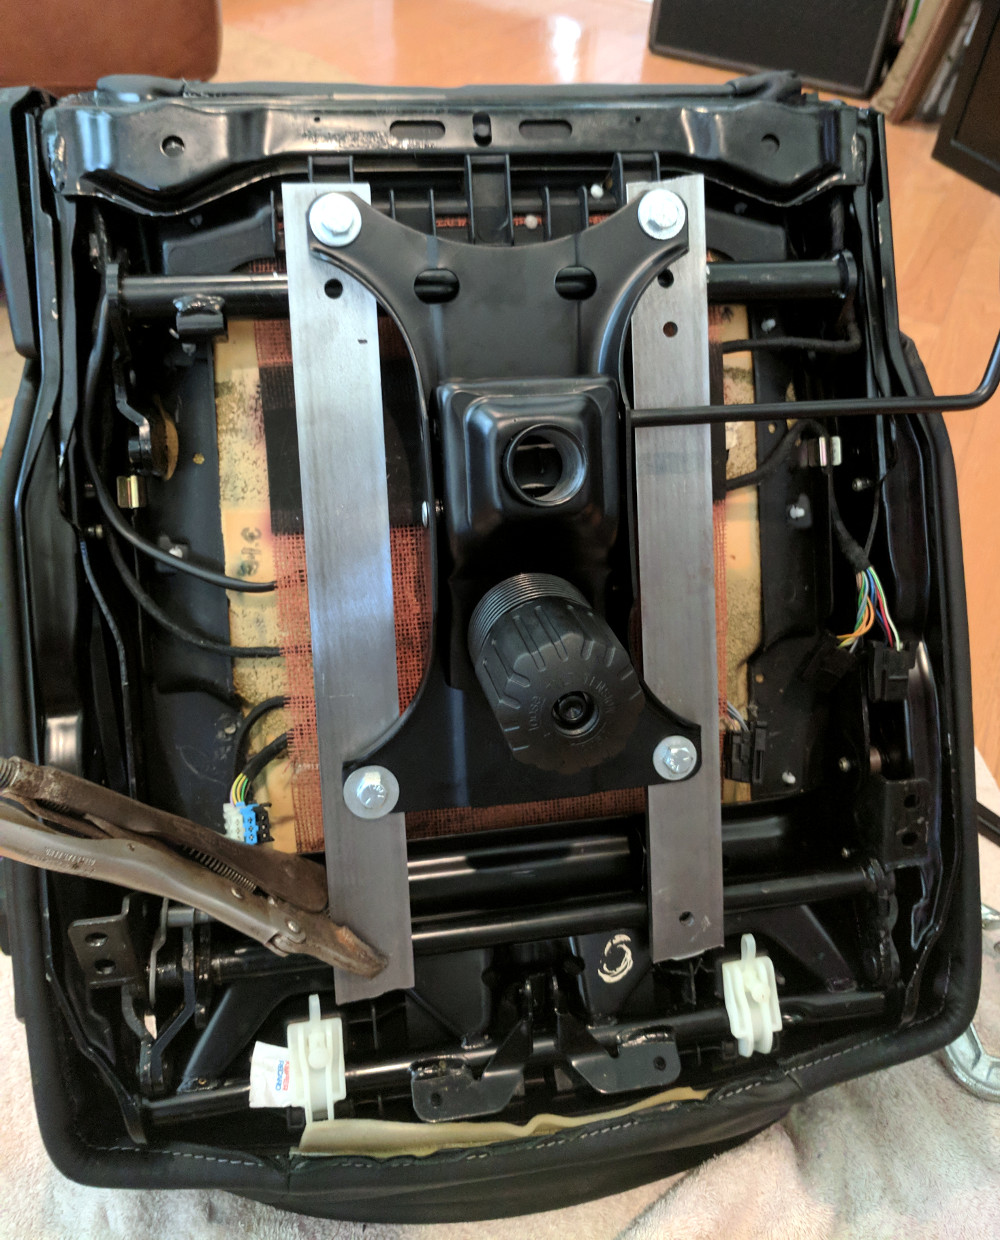
Assuming you got the seat without blowing yourself up, the next step is to mate it to the adjustable base. This part is going to depend on the make and model of vehicle you got the seats out of, but in this case it was fairly easy to use some flat steel bars to adapt the tubular frame of the Porsche’s seat to the base from the donor office chair. [Colby] put everything together with nuts and bolts, but this could potentially be an excuse to drag out the welder.
We’ve previously seen the driver seat salvaged from a wrecked car for use in a simulator, and a standard office chair upgraded with force feedback. We wonder who will be the first to combine all these ideas into one ultimate office racing chair…
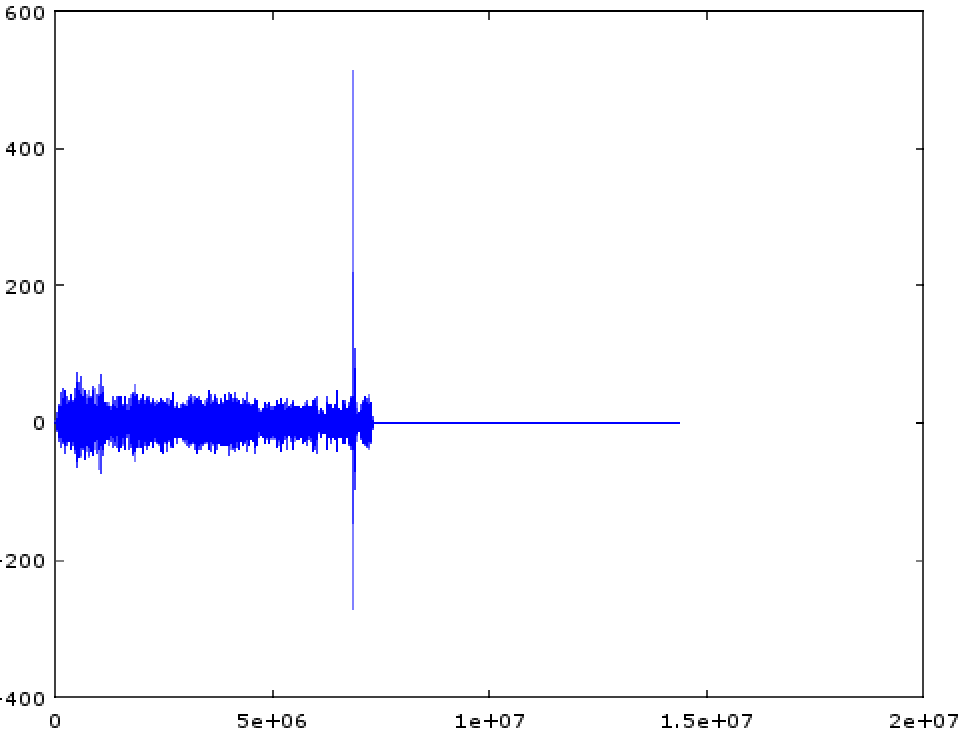 [tomek] was aware of this hip knowledge domain called Digital Signal Processing but hadn’t done any of it themselves. Like many algorithmic problems the first step was to figure out the fastest way to bolt together a prototype to prove a given technique worked. We were as surprised as [tomek] by how simple this turned out to be. Fundamentally it required a single function – cross-correlation – to measure the similarity of two data samples (audio files in this case). And it turns out that
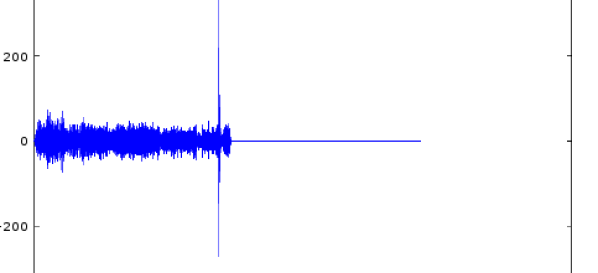
 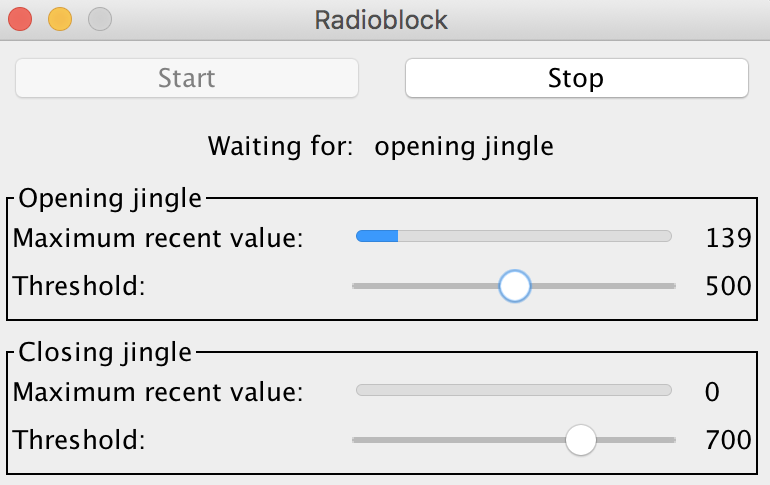 At this point all that was left was packaging it all into a one click tool to listen to the radio without loading an entire analysis package. Conveniently Octave is open source software, so [tomek] was able to dig through its sources until they found the bones of the critical xcorr() function. [tomek] adapted their code to pour the audio into a circular buffer in order to use an existing Java FFT library, and the magic was done. Piping the stream out of ffmpeg and into the ad detector yielded events when the given ad jingle samples were detected.