A persistence-of-vision business card which displays information when shaken (not stirred).

2024 Business Card Challenge: Make Them Shake Your Handiwork

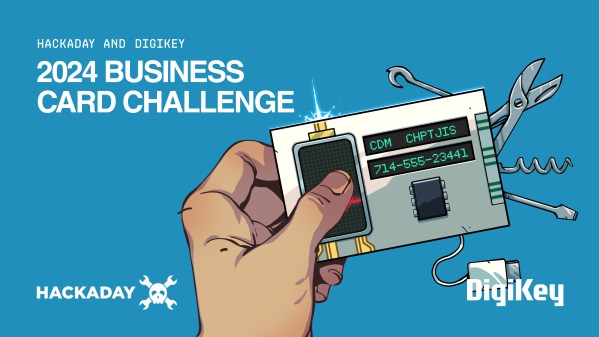
Before COVID, people traditionally sealed their initial introduction to each other with a handshake. Nowadays, that activity seems kind of questionable. But you can still give them something to shake if you build this persistence of vision (POV) business card from [chaosneon] to show your credentials in blinkenlights form.

As you might have guessed, the input comes from a tilt switch. The user simply shakes the card back and forth, and the sensor detects the direction and cadence of the shake. Cleverly, the pattern plays forward-ways on the swing, and backwards on the back stroke, which just reinforces the POV effect. Don’t worry about how slow or fast to shake it, because the timing adjusts for your speed.

The first version used individual white LEDs, hand-soldered to an ATtiny2313. Now, in the updated version which you can see in the demo video after the break, [chaosneon] is using an RGB NeoPixel strip, which only needs one data wire to connect to the microcontroller. Thanks to this, [chaosneon] was able to to downsize to an ATtiny85.

Continue reading “2024 Business Card Challenge: Make Them Shake Your Handiwork”

A business card-sized love detector in a 3D-printed package.

2024 Business Card Challenge: Who Do You Love?

When you hand your new acquaintance one of your cards, there’s a chance you might feel an instant connection. But what if you could know almost instantly whether they felt the same way? With the Dr. Love card, you can erase all doubt.

As you may have guessed, the card uses Galvanic Skin Response. That’s the fancy term for the fact that your skin’s electrical properties change when you sweat, making it easier for electricity to pass through it. There are two sensors, one on each short end of the card where you would both naturally touch it upon exchange. Except this time, if you want to test the waters, you’ll have to wait 10-15 seconds while Dr. Love assesses your chemistry.

The doctor in this case is an RP2040-LCD-0.96, which is what it sounds like — a Raspberry Pi Pico with a small LCD attached. For the sensors, [Un Kyu Lee] simply used 8mm-wide strips of nickel. If you want to build your own, be sure to check out the build guide and watch the video after the break for a demonstration of Dr. Love in action.

Continue reading “2024 Business Card Challenge: Who Do You Love?”

The 2024 Business Card Challenge Starts Now

If you want to make circuits for a living, what better way to impress a future employer than to hand them a piece of your work to take home? But even if you’re just hacking for fun, you can still turn your calling into your calling card.

We are inviting you to submit your coolest business card hacks for us all to admire, and the top three entries will win a $150 DigiKey shopping spree.  If your work can fit on a business card, create a project page for it over on Hackaday.io and enter it in the 2024 Business Card Contest. Share your tiny hacks!

To enter, create a project for your hacked business card over at Hackaday IO, and then enter it into the 2024 Business Card Challenge by selecting the pulldown on the left. It’s that easy.

Continue reading “The 2024 Business Card Challenge Starts Now”

Retrogadgets: The Ageia PhysX Card

Old computers meant for big jobs often had an external unit to crunch data in specific ways. A computer doing weather prediction, for example, might have an SIMD (single instruction multiple data) vector unit that could multiply a bunch of numbers by a constant in one swoop. These days, there are many computers crunching physics equations so you can play your favorite high-end computer game. Instead of vector processors, we have video cards. These cards have many processing units that can execute “kernels” or small programs on large groups of data at once.

Awkward Years

However, there was that awkward in-between stage when personal computers needed fast physics simulation, but it wasn’t feasible to put array processing and video graphics on the same board. Around 2006, a company called Ageia produced the PhysX card, which promised to give PCs the ability to do sophisticated physics simulations without relying on a video card.

Keep in mind that when this was built, multi-core CPUs were an expensive oddity and games were struggling to manage everything they needed to with limited memory and compute resources. The PhysX card was a “PPU” or Physics Processor Unit and used the PCI bus. Like many companies, Ageia made the chips and expected other companies — notably Asus — to make the actual board you’d plug into your computer.

Continue reading “Retrogadgets: The Ageia PhysX Card”

Homebrew Network Card With No CPU

A modern normal network card will have onboard an Ethernet controller which, of course, is a pre-programmed microcontroller. Not only does it do the things required to keep a computer on the network, it can even save the primary CPU from having to do certain common tasks required for communicating. But not [Ivan’s]. His homebrew computer — comprised of 7 colorful PCBs — now has an eighth card. You guessed it. That card connects to 10BASE-T Ethernet.

There’s not a microcontroller in sight, although there are RAM chips. Everything else is logic gates, flip flops, and counters. There are a few other function chips, but nothing too large. Does it work? Yes. Is it fast? Um…well, no.

The complete computer.

He can ping others on the network with an 85 ms round trip and serve web pages from his homebrew computer at about 2.6 kB/s. But speed wasn’t the goal here and the end result is quite impressive. He even ported a C compiler to his CPU so he could compile uIP, a networking stack, avoiding the problems of writing his own from scratch.

Some compromises had to be made. The host computer has to do things you normally expect a network card to do. The MTU is 1024 bytes (instead of the more common 1500 bytes, but TCP/IP is made to expect different MTU sizes, which used to be more common when more network interfaces looked like this one).

Even on an FPGA, these days, you are more likely to grab some “IP” to do your Ethernet controller. Rolling your own from general logic is amazing, and — honestly — the design is simpler than we would have guessed. If you check out [Ivan]’s blog, you can find articles on the CPU design, its ALU, and even a VGA video card all from discrete logic. The whole design, including the network card is up on GitHub.

We love the idea of building a whole computer system soup to nuts. We wish we had the time. If you need a refresher on what’s really happening with Ethernet, our [Arya Voronova] can help.

Recovering A Physically Broken SD Card

There is much to be found online about recovering data from corrupt SD cards, but [StezStix Mix] had an entirely different problem with his card. He’d filmed an important video to it, then dropped it and ran his office chair over it, snapping it almost in half. He’s put up a couple of videos showing how he recovered the data, and we’ve put them below the break.

A modern SD card is mostly just plastic, as in the decades since the format was created, the size of the circuitry on it has decreased dramatically. So his stroke of luck was that the card circuitry was a tiny PCB little bigger than the contact pad area on a full size SD card. There was a problem though, it wouldn’t be easy to fit in an SD card socket. So in the first video he goes through physically wiring it to a USB card reader, which results in reading the data after a false start in remembering that an SD card activates a switch.

This however is not the end of the story, because he had viewers asking why he didn’t simply attach an SD card shaped bit of cardboard. So the second video below goes through this, trying both card, and an SD to micro SD adapter. We find that making something to fit an SD socket is a lot less easy than it looks, but eventually he manages it.

Meanwhile those of you with long memories may recall this isn’t the first SD surgery we’ve brought you.

Continue reading “Recovering A Physically Broken SD Card”

Probes connected from a Pi Pico board to the SPI flash chip, with other end of the probes connected tot the level shifter circuit resistors

Motherboard Revived With Simplest 1.8V SPI Shifter Ever

If you have ever had to fix a modern desktop motherboard, you might have noticed that the BIOS (UEFI) SPI flash is 1.8V – which means you can no longer use a Raspberry Pi or a CH341 adapter directly, and you’d need to use a 1.8V level shifter of some sort. Now, some of us can wait for a 1.8V level shifter adapter from an online store of your choosing, but [treble] got a “BIOS flash failed” motherboard from Facebook Marketplace, and decided to make it work immediately.

She tells us a story about reviving the motherboard, and there’s one thing she shows that is interesting in particular – a very simple way to level shift 3.3V signals from a serprog-flashed Pi Pico down to the 1.8V that the flash chip required, something you are guaranteed to be able to build out of the parts in your parts bin, only requiring nine resistors and an NPN transistor. If you ever need to reflash BIOS on a modern motherboard, take note. As for 1.8V rail, she ended up tapping the 1.8V power pin of the SPI chip the motherboard itself to power the chip while programming it.

In the end, after swapping the two BIOS chips places and fixing a broken trace mishap, the motherboard booted, and works wonderfully to this day, a much-needed upgrade to [treble]’s toolkit that allows her to do RISC-V cross-compiling with ease nowadays. This is not the first time we see people reflash modern boards with 1.8V chips – if you want to learn more, check out this incredibly detailed writeup! Need to do some further debugging? Use your Pico as a POST card!