Tiny, Wearable 8-Bit VT100 Terminal

In the modern era of computing, the end-user is often quite far removed from the machine they’re using. At least in terms of abstraction levels, the user experience of most computers, smart phones, and the like are very far away from the zeros and ones. If you need to get down to that level though, you’ll have to make your way to a terminal somehow, and reminisce fondly about the days when everything was accessed through a serial line.

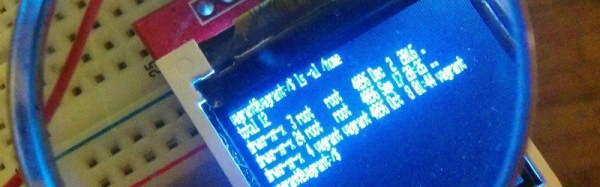
Nowadays, some harmless nostalgia is often accompanied by a challenge as well, as [Nick] demonstrated with his tiny serial terminal. It mimics the parsing and rendering of a VT100 console using an Arduino Uno and a 1″x1″ TFT screen. His goal was to make it wearable like a wristwatch would be, using two buttons as an HID device. With the size and simple interface, [Nick] also explores the possibility of mounting such a terminal to a pair of glasses.

While not everyone may want to interact with a serial terminal with only two buttons, it’s certainly a great demonstration of what is possible when it comes to implementing retro software in unique ways. There have been serial terminals implemented in many other unique places as well, such as old oscilloscopes and replicas from popular video games.

Write Your Own X86 Bootloader

What if you want to make a very lean machine and do without any operating system? Or maybe you want to try to write your own OS, even just for the challenge or fun? Maybe you were reading up on a cool OS architecture and thought to yourself, “I can write that!”. Well, before diving into your code, you’d first have to write something called a bootloader.

A bootloader is code that runs early on in a PC’s, Mac’s, Raspberry Pi’s or microcontroller’s boot sequence, before anything like an operating system is up. Often its job is to set up minimal hardware, such as RAM, and then load the OS or your embedded code.

[Alex Parker] has written a three-part series of clear blog posts that make writing the bootloader part easy, at least for x86 machines. And the nice thing is that you don’t need an x86 to get started. He does it on a Mac using the QEMU processor emulator, though he also talks about doing it under Windows and Linux.

In the first part of the series, the bootloader leaves you in the x86’s real mode, with 16-bit instructions and access to one megabyte of memory — think pre-80286 days, or 1982 for those of us who were computing back then. To prove it works, he uses BIOS calls to display “Hello world!”. This also shows that through the BIOS, you have a set of peripherals you can work with.

In the second part, he shows how to set up 32-bit protected mode and a Global Descriptor Table, making access to a large amount of memory easier.

In the first two parts, the code is written in assembly, so in the third part he finishes the series by showing how to load C++ code into memory and execute it. That C++ code would of course be your application, which we’ll leave to your imagination.

It’s reasonably rare to write bootloader code for a desktop computer — much less so for microcontrollers. For instance, [Dmitry Grinberg] wrote his own bootloader so that he could have encrypted ROM images for his AVR on USB. And we’ve talked about [Lady Ada]’s guide to burning Arduino bootloaders. But if you want to get down to the bare metal on your x86, the bootloader is the place to start. And it’s not so bad.

Don’t Miss The Bus: A One-Day Build

Sometimes the most satisfying hacks are those that spring from a situation where resources are limited, either by choice or by chance. Constraints tend to stir the creative juices.

Serial Hackaday poster [limpkin] limited himself to a one-day build with what he had on hand for this bus-route countdown timer. Full points for actually building something useful, and extra credit for making something to keep his wife from being late for work.

The principle is simple: scrape a web page to find out how much time is left before either of two busses leaves his wife’s stop, and display the number of minutes left on a huge LED display. The parts bin gave up everything needed, including an ESP8266, a boost converter, a charge controller, and the display and driver. We’re skeptical that the PCB was fabricated the same day; looks like [limpkin] is only counting the design and coding time in his 10-hour build. Still, it’s a testament to what’s possible with a deep inventory and the skills to put it to use.

Check out some of [limpkin]’s other hacks, like this Formula-E race car PCB or his adventures in laundry larceny. Oh, and he also used to write for Hackaday.

Tinning Solution From The Hardware Store

Making your own printed circuit board at home often leads to a board which looks homemade. Exposed copper is one of the tell-tale signs. That may be your aesthetic and we won’t cramp your style, but exposed copper is harder to solder than tinned copper and it likes to oxidize over time. Tinning at home can bring you a step closer to having a full-featured board. In the video after the break, famed chemist [nurdrage] shows us how to make tinning solution at home in the video below the break.

There are only three ingredients to make the solution and you can probably find them all at a corner hardware store.

  • Hydrochloric acid. Also known as muriatic acid.
  • Solid lead-free solder with ≥ 95% tin
  • Silver polish containing thiourea

Everything to pull this off is in the first three minutes of the video. [nurdrage] goes on to explain the chemistry behind this reaction. It doesn’t require electricity or heat but heat will speed up the reactions. With this kind of simplicity, there’s no reason to make untinned circuit boards in your kitchen anymore. If aesthetics are very important, home tinning yourself allows you to mask off certain regions and have exposed copper and tin on the same board.

[nurdrage] is no stranger to Hackaday, he even has an article here about making your own PCB etchants and a hotplate to kick your PCB production into high gear.

Thanks for the tip, [drnbutyllithium].

Continue reading “Tinning Solution From The Hardware Store”

Are Microwave Guns For Real?

Almost exactly one year ago, [Kreosan] published a video detailing an EM “weapon” built out of three magnetrons, some batteries, and a taser. It all seemed a bit too good to be true, so [Allen] decided to try and replicate the results for himself.

[Kreosan]’s original video was impressive, showing everything from home stereos to a humble moped exploding when in the presence of their powerful device. However, many of those watching the video doubted the footage. Most criticism centered around the nature of the power supply to the magnetron falling short of the usual 700-1000W seen in a microwave oven.

Initial testing with a single magnetron. This setup could light the bulb at a distance of a few centimeters.

[Allen] starts by experimenting with a single magnetron, successfully using it to light a compact fluorescent bulb at a range of a few centimeters. Scaling up to the full triple magnetron setup with a cardboard and foil feedhorn, [Allen] is, at best, able to crash a calculator at a distance of a few feet.

The microwaves cause no explosions, and the device doesn’t seem to have anywhere near the 50-foot range claimed by [Kreosan] for their device. [Allen] puts forth the theory that the explosions seen in the original footage are far more likely to be from small firecrackers rather than any electronic components dying from microwaves.

Overall it’s a solid attempt to recreate someone else’s work to verify the results, a cornerstone of science. We did bristle somewhat at the valiant 18650 being described as a “vape battery”, however. For more microwave goodness, check out this attempt to recreate the TSA’s body scanners.

Hackaday Prize Entry: Programming FPGAs With Themselves

It’s been a few years since the introduction of the first Open Source toolchain for FPGAs. You would think a free and Open way to program FPGAs would be a boon for hardware development, but so far we’re really not seeing much in the way of a small, cheap, clever device that brings FPGAs to the masses.

We don’t know if [Luke]’s entry to the Hackaday Prize is the killer project that will do it, but it is very neat. He’s designed a tiny FPGA development board using a Lattice iCE40 FPGA that’s able to program itself over USB. It’s small, it’s cheap, it’s easy to use, and there are working examples of FPGA development using this board.

If you’re thinking this tiny little board looks familiar, you’re right. [Luke] has been working on a similar board, the A-Series, but this latest version has a USB port instead of pins for a JTAG adapter. This USB functionality is pretty clever — instead of using a seperate microcontroller, [Luke] is using the FPGA itself to reprogram the user configuration into a Flash chip. Once that’s up and running, the bootloader is removed and doesn’t consume any FPGA resources.

[Luke] is also working on an amazing hobbyist guide to FPGAs that leans heavily on the Open Source toolchain available for these Lattice FPGAs and his board. That’s a huge benefit to the community, and an excellent entry to the Hackaday Prize.

What Makes A Hacker

I think I can sum up the difference between those of us who regularly visit Hackaday and the world of non-hackers. As a case study, here is a story about how necessity is the mother of invention and the people who invent.

Hackaday has overlap with sites like Pinterest and Instructables but there is one vital difference, we choose to create something new and beautiful with the materials at hand. Often these tools and techniques are very simple. We look to make things elegant by reducing the unnecessary clutter, not adding glitter. If something could be built with a 555 timer we will let you know. If there is a better choice for a processor, we will tell you.

My first real work commute was a forty-minute eastward drive every morning and a forty-minute westward drive every evening. This route pointed my car directly into the sun twice a day. Staring into a miasma of incandescent plasma for an hour and a half a day isn’t fun, and probably isn’t safe, but we can fix that.

Continue reading “What Makes A Hacker”