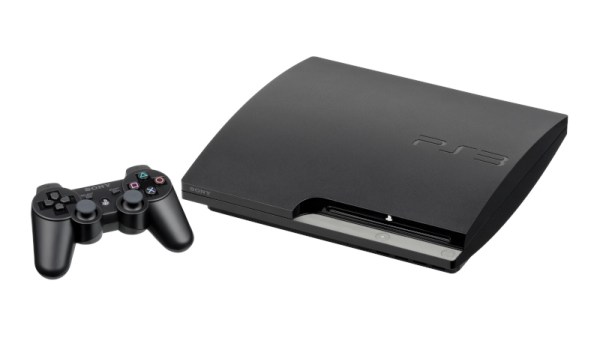
The World Wide Web And The Death Of Graceful Degradation

In the early days of the World Wide Web – with the Year 2000 and the threat of a global collapse of society were still years away – the crafting of a website on the WWW was both special and increasingly more common. Courtesy of free hosting services popping up left and right in a landscape still mercifully devoid of today’s ‘social media’, the WWW’s democratizing influence allowed anyone to try their hands at web design. With varying results, as those of us who ventured into the Geocities wilds can attest to.

Back then we naturally had web standards, courtesy of the W3C, though Microsoft, Netscape, etc. tried to upstage each other with varying implementation levels (e.g. no iframes in Netscape 4.7) and various proprietary HTML and CSS tags. Most people were on dial-up or equivalently anemic internet connections, so designing a website could be a painful lesson in optimization and targeting the lowest common denominator.

This was also the era of graceful degradation, where us web designers had it hammered into our skulls that using and navigating a website should be possible even in a text-only browser like Lynx, w3m or antique browsers like IE 3.x. Fast-forward a few decades and today the inverse is true, where it is your responsibility as a website visitor to have the latest browser and fastest internet connection, or you may even be denied access.

What exactly happened to flip everything upside-down, and is this truly the WWW that we want?

Continue reading “The World Wide Web And The Death Of Graceful Degradation”

An Awful 1990s PDA Delivers AI Wisdom

There was a period in the 1990s when it seemed like the personal data assistant (PDA) was going to be the device of the future. If you were lucky you could afford a Psion, a PalmPilot, or even the famous Apple Newton — but to trap the unwary there were a slew of far less capable machines competing for market share.

[Nick Bild] has one of these, branded Rolodex, and in a bid to make using a generative AI less alluring, he’s set it up as the interface to an LLM hosted on a Raspberry Pi 400. This hack is thus mostly a tale of reverse engineering the device’s serial protocol to free it from its Windows application.

Finding the baud rate was simple enough, but the encoding scheme was unexpectedly fiddly. Sadly the device doesn’t come with a terminal because these machines were very much single-purpose, but it does have a memo app that allows transfer of text files. This is the wildly inefficient medium through which the communication with the LLM happens, and it satisfies the requirement of making the process painful.

We see this type of PDA quite regularly in second hand shops, indeed you’ll find nearly identical devices from multiple manufacturers also sporting software such as dictionaries or a thesaurus. Back in the day they always seemed to be advertised in Sunday newspapers and aimed at older people. We’ve never got to the bottom of who the OEM was who manufactured them, or indeed cracked one apart to find the inevitable black epoxy blob processor. If we had to place a bet though, we’d guess there’s an 8051 core in there somewhere.

Continue reading “An Awful 1990s PDA Delivers AI Wisdom”

The five picos on two breadboards and the results of image convolution.

PentaPico: A Pi Pico Cluster For Image Convolution

Here’s something fun. Our hacker [Willow Cunningham] has sent us a copy of their homework. This is their final project for the “ECE 574: Cluster Computing” course at the University of Maine, Orono.

It was enjoyable going through the process of having a good look at everything in this project. The project is a “cluster” of 5x Raspberry Pi Pico microcontrollers — with one head node as the leader and four compute nodes that work on tasks. The software for both types of node is written in C. The head node is connected to a workstation via USB 1.1 allowing the system to be controlled with a Python script.

The cluster is configured to process an embarrassingly parallel image convolution. The input image is copied into the head node via USB which then divvies it up and distributes it to n compute nodes via I2C, one node at a time. Results are given for n = {1,2,4} compute nodes.

It turns out that the work of distributing the data dwarfs the compute by three orders of magnitude. The result is that the whole system gets slower the more nodes we add. But we’re not going to hold that against anyone. This was a fascinating investigation and we were impressed by [Willow]’s technical chops. This was a complicated project with diverse hardware and software challenges and they’ve done a great job making it all work and in the best scientific tradition.

It was fun reading their journal in which they chronicled their progress and frustrations during the project. Their final report in IEEE format was created using LaTeX and Overleaf, at only six pages it is an easy and interesting read.

For anyone interested in cluster tech be sure to check out the 256-core RISC-V megacluster and a RISC-V supercluster for very low cost.

An Open-Source Wii U Gamepad

Although Nintendo is mostly famous for making great games, they also have an infamous reputation for being highly litigious not only for reasonable qualms like outright piracy of their games, but additionally for more gray areas like homebrew development on their platforms or posting gameplay videos online. With that sort of reputation it’s not surprising that they don’t release open-source drivers for their platforms, especially those like the Wii U with unique controllers that are difficult to emulate. This Wii U gamepad emulator seeks to bridge that gap.

The major issue with the Wii U compared to other Nintendo platforms like the SNES or GameCube is that the controller looks like a standalone console and behaves similarly as well, with its own built-in screen. Buying replacement controllers for this unusual device isn’t straightforward either; outside of Japan Nintendo did not offer an easy path for consumers to buy controllers. This software suite, called Vanilla, aims to allow other non-Nintendo hardware to bridge this gap, bringing in support for things like the Steam Deck, the Nintendo Switch, various Linux devices, or Android smartphones which all have the touch screens required for Wii U controllers. The only other hardware requirement is that the device must support 802.11n 5 GHz Wi-Fi.

Although the Wii U was somewhat of a flop commercially, it seems to be experiencing a bit of a resurgence among collectors, retro gaming enthusiasts, and homebrew gaming developers as well. Many games were incredibly well made and are still experiencing continued life on the Switch, and plenty of gamers are looking for the original experience on the Wii U instead. If you’ve somehow found yourself in the opposite position of owning of a Wii U controller but not the console, though, you can still get all the Wii U functionality back with this console modification.

Thanks to [Kat] for the tip!

3D Printing Uranium-Carbide Structures For Nuclear Applications

Fabrication of uranium-based components via DLP. (Zanini et al., Advanced Functional Materials, 2024)

Within the nuclear sciences, including fuel production and nuclear medicine (radiopharmaceuticals), often specific isotopes have to be produced as efficiently as possible, or allow for the formation of (gaseous) fission products and improved cooling without compromising the fuel. Here having the target material possess an optimized 3D shape to increase surface area and safely expel gases during nuclear fission can be hugely beneficial, but producing these shapes in an efficient way is complicated. Here using photopolymer-based stereolithography (SLA) as  recently demonstrated by [Alice Zanini] et al. with a research article in Advanced Functional Materials provides an interesting new method to accomplish these goals.

In what is essentially the same as what a hobbyist resin-based SLA printer does, the photopolymer here is composed of uranyl ions as the photoactive component along with carbon precursors, creating solid uranium dicarbide (UC2) structures upon exposure to UV light with subsequent sintering. Uranium-carbide is one of the alternatives being considered for today’s uranium ceramic fuels in fission reactors, with this method possibly providing a reasonable manufacturing method.

Uranium carbide is also used as one of the target materials in ISOL (isotope separation on-line) facilities like CERN’s ISOLDE, where having precise control over the molecular structure of the target could optimize isotope production. Ideally equivalent photocatalysts to uranyl can be found to create other optimized targets made of other isotopes as well, but as a demonstration of how SLA (DLP or otherwise) stands to transform the nuclear sciences and industries.

Overengineered Freezer Monitor Fills Market Void

A lot of projects we see around here are built not just because they can be built, but because there’s no other option available. Necessity is the mother of invention, as they say. And for [Jeff] who has many thousands of dollars of food stowed in a chest freezer, his need for something to keep track of his freezer’s status was greater than any commercial offering available. Not only are freezers hard on batteries, they’re hard on WiFi signals as well, so [Jeff] built his own temperature monitor to solve both of these issues.

The obvious solution here is to have a temperature probe that can be fished through the freezer in some way, allowing the microcontroller, battery, and wireless module to operate outside of the harsh environment. [Jeff] is using K-type thermocouples here, wired through the back of the freezer. This one also is built into a block of material which allows him to get more diffuse temperature readings than a standard probe would provide. He’s also solving some other problems with commercially available probes here as well, as many of them require an Internet connection or store data in a cloud. To make sure everything stays local, he’s tying this in to a Home Assistant setup which also allows him to easily make temperature calibrations as well as notify him if anything happens to the freezer.

Although the build is very robust (or, as [Jeff] himself argues, overengineered) he does note that since he built it there have been some additional products offered for sale that fit this niche application. But even so, we always appreciate the customized DIY solution that avoids things like proprietary software, subscriptions, or cloud services. We also appreciate freezers themselves; one of our favorites was this restoration of a freezer with a $700,000 price tag.

Easy Panels With InkJet, Adhesives, And Elbow Grease

Nothing caps off a great project like a good, professional-looking front panel. Looking good isn’t easy, but luckily [Accidental Science] has a tutorial for a quick-and-easy front panel technique in the video below.

It starts with regular paper, and an inkjet or laser printer to print your design. The paper then gets coated on both sides: matte varnish on the front, and white spray paint on the back. Then it’s just a matter of cutting the decal from the paper, and it gluing to your panel. ([Accidental Science] suggests two-part epoxy, but cautions you make sure it does not react to the paint.)

He uses aluminum in this example, but there’s no reason you could not choose a different substrate. Once the paper is adhered to the panel, another coat of varnish is applied to protect it. Alternatively, clear epoxy can be used as glue and varnish. The finish produced is very professional, and holds up to drilling and filing the holes in the panel.

We’d probably want to protect the edges by mounting this panel in a frame, but otherwise would be proud to put such a panel on a project that required it. We covered a similar technique before, but it required a laminator.If you’re looking for alternatives, Hackaday community had a lot of ideas on how to make a panel, but if you have a method you’ve documented, feel free to put in the tip line. Continue reading “Easy Panels With InkJet, Adhesives, And Elbow Grease”