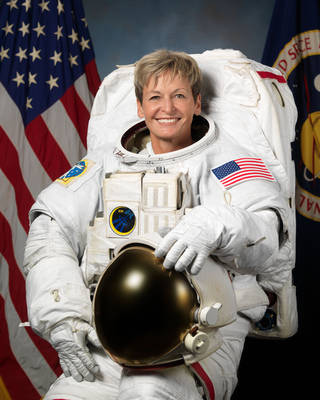
When astronaut Dr. Peggy Whitson returned from space earlier this year, it was a triumphant conclusion to a lifelong career as a scientist, explorer, and leader. Whitson is a biochemist who became one of the most experienced and distinguished astronauts ever to serve. She’s got more time logged in space than any other American. There’s a reason that she’s been called the Space Ninja.
Education and Early Life
Some people find their vocation late in life, but Peggy Whitson figured it out in her senior year of high school. It was 1979 and NASA had just accepted its first class of female astronauts, including Christa McAuliffe and Judith Resnik who ultimately died aboard the Challenger.
Born on a family farm in Iowa in 1960, Whitson began working on her plan, with the stereotypical Midwestern work ethic seeming to prime her for the hard slog ahead. She earned a BS in Biology/Chemistry, Summa, from Iowa Wesleyan, before earning a Ph.D. in biochemistry from Rice in 1985. A person can write about Whitson blazing through to a doctorate in a single sentence, but the truth is that it’s just a lot of hard work, and that’s one of the aspects of her career that stands out: she worked tirelessly.
Scientist Career
After getting her doctorate, Whitson worked as a research associate at Johnson Space Center as part of a post-doctoral fellowship. She put in a couple of years as a research biochemist, working on biochemical payloads
like the Bone Cell Research Experiment in STS-47, which was run in space by fellow badass Dr. Mae Jamison. Whitson hadn’t given up on her dream of becoming an astronaut herself, and the whole time she worked at Johnson she was applying to NASA. It took ten years and five applications before she made it in.
In the meantime, however, Whitson was given a lot of very cool projects and also began to establish her credentials as a leader, serving as Project Scientist of the Shuttle-Mir Program from 1992 till 1995. For three years she helped lead Medical Sciences Division at Johnson. The two years after that she co-chaired the NASA committee on US-Russian relations. And because she still had more time to crush it, she also worked as an adjunct professor at the University of Texas Medical Branch as well as at Rice.
Then, in April of 1996, she learned that her hard work had paid off and that she had been accepted into astronaut school. Peggy Whitson was going to space.
Ad Astra
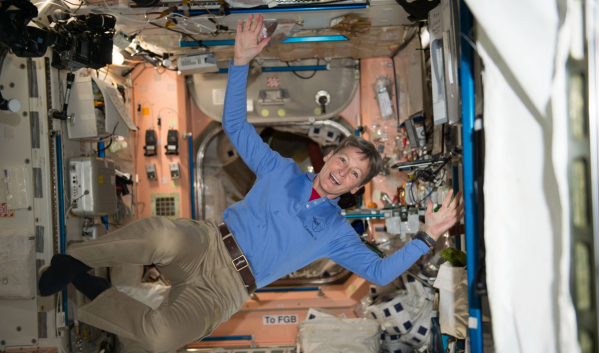
It would be eight more years before she made it to space, however. Two years of intense training was followed by ground-based technical duties, including two years spent in Russia in support of NASA crews there. However, in 2002 she got her chance, flying in a Soyuz up to the International Space Station as part of Expedition 5. There she conducted science experiments and helped install new components in the space station, logging 164 days in space.
Back on earth, Whitson continued to kick ass as a scientist, astronaut, and leader. In 2003 she commanded a 10-day underwater mission that helps trains astronauts for extended stays in space, preparing her for her signature accomplishments: two tours where she commanded the ISS.
In 2008 she led Expedition 16, in which three additional modules were added to the ISS. Because of the new construction, and despite her science focus, Whitson became one of NASA’s most prolific spacewalkers, making 10 EVAs in her career — second only to cosmonaut Anatoly Solovyev’s 16 and her cumulative EVA time of 60 hours is third best in the world.
The three years that followed she served as Chief Astronaut, before she returned to space in November 2016 as commander of Expedition 50. Compared to 16 it was much more mellow, albeit with hundreds of biochemistry experiments conducted. In April of 2017, Whitson surpassed the U.S. space endurance record, earning her a call from the President. She ended up with 665 days in space, returning September 2 as a hero.
Dr. Peggy Whitson’s brilliance and tireless drive have earned her innumerable awards and commendations. Her elementary school has a science lab named after her. This year Glamour named her one of their women of the year. She serves as an inspiration to anyone who aspires to a career in science, math, or space exploration: it won’t be easy, and it will take a really long time, but it’s the kind of work that makes the world a distinctly better place.
Photo Credit: NASA