Chandelier Mimics The Solar Analemma

The solar analemma is the shape the sun traces out when photographed each day at the same time and same location for a whole year – but you probably knew that already. [makendo] decided to use this skewed figure-eight shape as the inspiration for a chandelier, and the results are stunning.

A laser cutter was used to cut out segments of the analemma shape in plywood, such that they could slot together into the full form. These were then glued together on to a plywood sheet as a template to cut out the full-size form in a single piece. Some laminate edging was then added and the entire thing was given a coat of black gloss paint. String lights were cut up to provide the many globe fittings required, and installed on the back of the chandelier.

[makendo] notes that with a full 51 bulbs in the chandelier, it’s way too bright for most dining room settings. A dimmer is thus used to tone down the output to reduce eyestrain at mealtimes. It’s a fun build, and we’ve always loved light fixtures that are inspired by astronomy. If you like the moon more than the sun, though, there’s a build for you too!

For The ESP’s Next ESP Trick…

It is a pretty stale dad joke to tell someone you have ESP when you mean you have an ESP8266 or ESP32 in your hand. However, [Naufil Metkar] uses an ESP device to pretend — via a magic trick — that he does have ESP. The trick requires a bit of 3D printing, an MPU6050 gyro sensor, and a lot of showmanship.

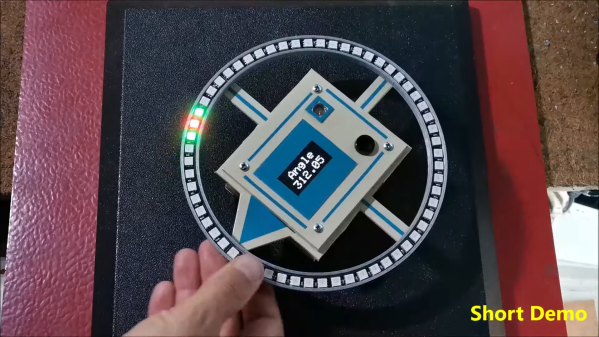
We hate to spoil an illusion, but you can probably figure it out from the list of things you need. The die has a gyro in it and uses a small ESP module to transmit its current orientation out to a display. There is a small reed switch that lets you turn off the device with a magnet. Without it, the battery dies quickly.

Continue reading “For The ESP’s Next ESP Trick…”

This Week In Security: Malwarebytes Goes Nuts, Uber

I got a rude awakening Wednesday morning this week. HaD writers don’t necessarily keep normal hours — don’t judge. A local client called, complaining that Google Maps was blocking on one of their computers, and the browser stated that it was a malicious site. Well that got my attention. Standard incident response: “Turn off the affected computers, I’m on my way.” Turns out, it was Malwarebytes that was complaining and blocking Google Maps, as well as multiple other Google domains. That particular machine happened to have a fresh install of the program, and was still in the trial period of Malwarebytes premium, which includes the malicious IP and domain blocking feature.

Oof, this could be bad. The first possibility that came to mind was a DNS hijack. The desktop’s DNS was set to the router, and the router’s DNS was set to the ISP’s. Maybe the ISP had their DNS servers compromised? Out came the cell phone, disconnected from the WiFi, for DNS lookups on some Google domains. Because Google operates at such a massive scale, they have multiple IPs serving each domain, but since the two different results were coming from the same subnet, the suspicious DNS server was likely OK. A whois on the blocked IP also confirmed that it was a Google-owned address. We were running out of explanations, and as a certain fictional detective was known for saying, “whatever remains, however improbable, must be the truth.” And, yes, Malwarebytes did indeed accidentally add Google to its bad list. The upside was that my customer wasn’t compromised. The downside? I had to answer a phone call before my first cup of coffee. Blegh.

Continue reading “This Week In Security: Malwarebytes Goes Nuts, Uber”

Snooping On Starlink With An RTL-SDR

With an ever-growing constellation of Starlink satellites whizzing around over our heads, you might be getting the urge to start experimenting with the high-speed internet service. But at $100 or more a month plus hardware, the barrier to entry is just a little daunting for a lot of us. No worries, though — if all you’re interested in is tracking [Elon]’s birds, it’s actually a pretty simple job.

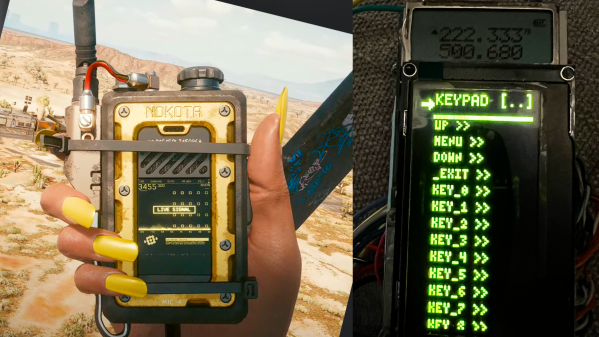
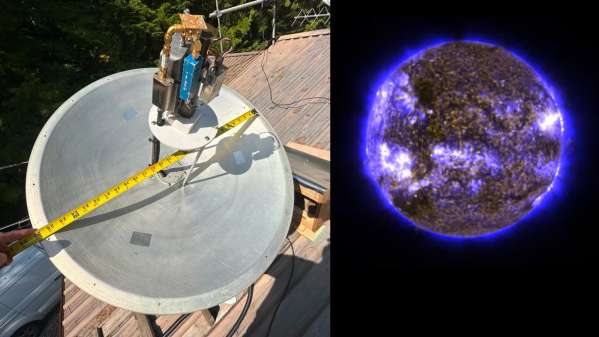
Now, we’re not claiming that you’ll be able to connect to Starlink and get internet service with this setup, of course, and neither is the delightfully named [saveitforparts]. Instead, his setup just receives the beacon signals from Starlink satellites, which is pretty interesting all by itself. The hardware consists of his “Picorder” mobile device, which sports a Raspberry Pi, a small LCD screen, and a host of sensors, including an RTL-SDR dongle. To pick up the satellite beacons, he used a dirt-cheap universal Ku-band LNB, or low-noise block downconverter. They’re normally found at the focal point of a satellite TV dish, but in this case no dish is needed — just power it up with a power injector and point it to the sky. The signals show up on the Picorder’s display in waterfall mode; curiously, the waterfall traces look quite similar to the patterns the satellites make in the night sky, much to the consternation of astronomers.

Of course, you don’t have to have a Picorder to snoop in on Starlink — any laptop and SDR should work, despite [saveitforparts]’ trouble in doing so. You shouldn’t have much trouble replicating the results by following the video below, which also has a few tips on powering an LNB for portable operations.

Continue reading “Snooping On Starlink With An RTL-SDR”

Robots Chase Down Balls In Fun Outdoor Game

Art installations aren’t always about static sculpture or pure aesthetics. In the case of Operation Kiba, they can be fun games for everyone to enjoy.

The aim of Operation Kiba is for the players to collect all the “balls” on the playing field, which are intended to represent scoops of ice cream. Collecting the balls is done via robot. Each player is ostensibly tasked with collecting one color of ball or the other, but players often decide to work together in harmony instead. The balls are released at the start of the game by tipping over a big bowl. This is half the fun, and is achieved by tugging a string which upends the vessel and scatters the balls.

The remote-control robots themselves come from an earlier art installation the group built called Bubble Blast. They’re built using a 3D printed chassis, with wheels on each side driven by DC gear motors. With tank-style steering, they can rotate on the spot, providing good maneuverability. An Arduino Nano runs the show, receiving commands over a 433 MHz radio link. Power is via DeWalt cordless drill batteries, and the robots are controlled via arcade sticks. They’re color-coded to match the balls in the game.

As far as art installations go, it may not be fancy or pretentious, but it certainly looks like a lot of fun. We’re sure it could eventually guide many players towards the exciting world of antweight combat robotics. Video after the break.

Continue reading “Robots Chase Down Balls In Fun Outdoor Game”

Better Scope Measurements

There was a time when few hobbyists had an oscilloscope and the ones you did see were old military or industrial surplus that were past their prime. Today you can buy a fancy scope for about what those used scopes cost that would have once been the envy of every giant research lab. However, this new breed of instrument is typically digital and while they look like an old analog scope, the way they work leads to some odd gotchas that [Arthur Pini] covers in a recent post.

Some of his tips are common sense, but easy to forget about. For example, if you stack your four input channels so each uses up a quarter of the screen, it makes sense, right? But [Arthur] points out that you are dropping two bits of dynamic range, which can really jack up a sensitive measurement.

Continue reading “Better Scope Measurements”

Hackaday Prize 2022: Solar Powered LoRa Weather Station For The Masses

[Debasish Dutta] has designed a few weather stations in the past, and this, the fourth version of the system has had many of the feature requests from past users rolled in. The station is intended to be used with an external weather sensor unit, provided by Sparkfun. This handles wind speed and direction, as well as measuring rainfall. A custom PCB hosts an ESP32-WROOM module and an Ai-Thinker Ra-02 LoRa module for control and connectivity respectively. A PMS5003 sits on the PCB to measure those particulate densities, but most sensors are connected with simple 4-way I2C connectors. Temperature, humidity, and pressure are handled by a BME280 module, UV Index (SI1145), visible light (BH1750) even soil humidity and temperature with a cable-mounted SHT10 module.

All this is powered by a solar panel, which charges a 18650 cell, and keeps the show running during the darker hours. For debugging and deployment, a USB-C power port can also be used to provide charge. A 3D printed Stevenson screen type enclosure allows the air to circulate amongst the PCB-mounted sensor modules, without hopefully too much moisture making it in there to cause mischief.

On the data collection and visualization side, a companion LoRa receiver module is in progress, which is intended to pass along measurements to a variety of services. Think Home Assistant, ESP home, and that kind of thing. Software is still a work in progress, so maybe check back later to see how [Debasish] is getting on with that?

This kind of multi-sensor hosting project is nothing new here, here’s a 2019 Hackaday prize entry along the same lines. Of course, gathering and logging measurement data is only part of the problem, visualization of those measurements is also important. Why not use a mechanical approach, such as a diorama?