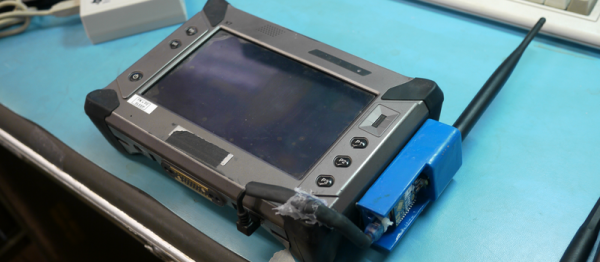
Protopen

Mechanical Pencil Hack Dispenses Wire

Looking for an easy way to manage wire when prototyping PCBs? Ever consider using a mechanical pencil to dispense it? Turns out, it works pretty well — and all you need is a 3D printed attachment!

[Proto G] is using a Papermate 0.5mm mechanical pencil, which means if you get 0.5mm wire (or solder) you can use it to dispense the wire without tangling your spool. In the demonstration, he uses 0.5mm magnet wire which has a thin enamel coating on it and melts away easily when you solder it.

The 3D printed wire-spool and guide snap onto the back of the mechanical pencil allowing you to load it up with a considerable amount of wire for prototyping. He has all the .STL files available on his Instructable in case you want to add this tool to your workshop.

Continue reading “Mechanical Pencil Hack Dispenses Wire”

Arduino Based Remote Shutter For Beme

The well-dressed hacker [Sean Hodgins] has put together a neat little project: a battery powered remote shutter. He built it for use with Beme, the latest Snapchat clone that all of the cool kids are now using.

This service is designed to get away from the selfie culture by starting to record when you hold your phone against your chest, so you are looking at the thing being recorded, not your phone. [Sean] wanted a bit more control than that, so he built a remote control that starts the recording by moving the servo arm over the proximity sensor.

He built this neat little device from an Arduino Pro Mini, a battery, a small servo, a couple of power control boards and a cheap RF link from SeedStudio, all glued onto an iPhone case. It’s a bit rough around the edges (the servo makes some noise that is picked up on the recording, for one thing), but it is a great example of how to lash together a quick prototype to test a project out.

Continue reading “Arduino Based Remote Shutter For Beme”

Hackaday Prize Entry: Vertical Aeroponics

For his Hackaday Prize entry, [MIPS ARMSTRONG] is working on an open-source terrarium that will be one of the fastest way to grow foodstuffs or other edible greens. He’s calling it Project EDEN, and it’s shaping up to be one of the most advanced homebrew horticultural devices ever made.

There are a few things that make this indoor greenhouse unique. The most obvious is the incredible number of LEDs used as grow lights. [MIPS] is using 900 Watts worth of Royal Blue and Deep Red LEDs. To water these plants, [MIPS] is taking a cue from NASA and building a High Pressure Aeroponics system – a device that shoots droplets of water only 50 microns in diameter directly onto the roots of the plants.

One of the more interesting aspects of EDEN is the CO2 system. The bulk of plant biomass – like humans – comes from carbon, and plants get their carbon from the atmosphere. Studies have shown that increasing the concentration of CO2 in a grow chamber can increase plant growth. There is a limit before CO2 becomes toxic to plants, so [MIPS] will have to keep a close eye on the CO2 levels with gas sensors.

With high-pressure watering, a CO2 system, and an amazing array of LEDs, this is one of the most advanced homebrew horticulture projects on the planet. It’s also a great fit for this year’s Hackaday prize theme of ‘build something that matters’, and we can’t wait to see [MIPS]’s future developments of his awesome aeroponic terrarium.

The 2015 Hackaday Prize is sponsored by:

Cardboard Aided Design Is The New CAD

The term “workflow” gets thrown around a lot these days. For example, say you own a 3D printer and you just came up with an idea. The temptation is to go straight to your favorite CAD tool, start designing the finished product, and then hit print. That, in many cases, can be the worst thing you could do. You would be missing out on all the variation and design choices you can easily try out with a simple series of drawings.

So, you’ve worked out your drawing, played with the design a bit, and now it is time to design in 3D on the computer right?  Not so fast. Depending on the nature of the design, you might want to follow this nice tutorial from [Willy Nicholas] on how to quickly make a cardboard prototype.

Now, obviously this won’t work on all designs. But it’s a tool everyone should keep in their bag of tricks. It allows for basically free, quick mock ups that you can hold in your hand. That last bit is important, because having something you can touch and see is a huge part of the design process.

You can also use cardboard as an excellent device for making templates for working with materials such as sheet metal. In case you have seen it, check out “Project Binky” to see what a couple of blokes in England are able to accomplish with nothing much more than a welder, a grinder and some cardboard.

Alcove: Blinky Art With A Killer Story

We should come clean right up front. We like blinky stuff, tech art, smoke machines, and dark atmospheric electronic music. This audiovisual installation piece (scroll down) by [supermafia] ticks off all our boxes. As the saying doesn’t really go, writing about site-specific audiovisual art pieces is like dancing about architecture, so go ahead and watch the video (Vimeo) below the break.

Continue reading “Alcove: Blinky Art With A Killer Story”

Watch Those VOCs! Open Source Air Quality Monitor

Ever consider monitoring the air quality of your home? With the cost of sensors coming way down, it’s becoming easier and easier to build devices to monitor pretty much anything and everything. [AirBoxLab] just released open-source designs of an all-in-one indoor air quality monitor, and it looks pretty fantastic.

Capable of monitoring Volatile Organic Compounds (VOCs), basic particulate matter, carbon dioxide, temperature and humidity, it takes care of the basic metrics to measure the air quality of a room.

Exploded CAD View

All of the files you’ll need are shared freely on their GitHub, including their CAD — but what’s really awesome is reading back through their blog on the design and manufacturing process as they took this from an idea to a full fledged open-source device.

Did we mention you can add your own sensors quite easily? Extra ports for both I2C and analog sensors are available, making it a rather attractive expandable home sensor hub.

To keep the costs down on their kits, [AirBoxLab] relied heavily on laser cutting as a form of rapid manufacturing without the need for expensive tooling. The team also used some 3D printed parts. Looking at the finished device, we have to say, we’re impressed. It would look at home next to a Nest or Amazon Echo. Alternatively if you want to mess around with individual sensors and a Raspberry Pi by yourself, you could always make one of these instead.

Wooden Escalator Fit For A Slinky

Our favorite mechanical master of woodworking, [Matthias Wandel], is at it again, this time making an endless staircase for a Slinky. Making an escalator out of 2×4’s and other lumber bits looks fairly easy when condensed down to a two and a half minute video. In reality a job like this requires lots of cuts, holes, and a ton of planning.

The hard part of this build seemed to be the motor arrangement. There is a sweet spot when it comes to Slinky escalator speeds. Too fast, and you’ll outpace the Slinky. Too slow, and the Slinky flies off the end of the escalator. Keeping the speed in check turned out to be a difficult task with the coarse speed control of a drill trigger. The solution was to ditch the drill and build a simple hand crank mechanism. The Slinky now can cascade down stairs as long as your arm holds out.

Join us after the break for 3 videos, the making of the escalator, a 140 step demonstration video, and a followup video (for geeks like us) explaining where the idea came from, whats wrong with the machine and possible improvements.

Thanks to [Jim Lynch] for the tip

Continue reading “Wooden Escalator Fit For A Slinky”