Become Very Unpopular Very Fast With This DIY EMP Generator

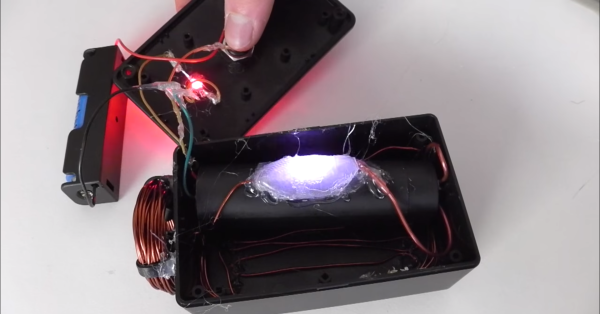
Taking a break from his book, “How to Gain Enemies and Encourage Hostility,” [FPS Weapons] shows us how to build our own handheld EMP generator which can be used to generate immediate dislike from anyone working on something electronic at the hackerspace.

The device is pretty simple. A DC source, in this case an 18650 lithium battery cell, sends power to an “Ultra High Voltage 1000kV Ignition Coil” (as the eBay listing calls it), when a button is pressed. A spark gap is used to dump a large amount of magic pixies into the coil all at once, which generates a strong enough magnetic pulse to induce an unexpected voltage inside of a piece of digital electronics. This usually manages to fire a reset pin or something equivalent, disrupting the device’s normal operation.

While you’re not likely to actually damage anything in a dramatic way with this little EMP, it can still interrupt an important memory write or radio signal and damage it that way. It’s a great way to get the absolute shock of your life if you’re not careful. Either from the HVDC converter or the FCC fines. Video after the break.

Continue reading “Become Very Unpopular Very Fast With This DIY EMP Generator”

Honey, They Shrunk The Transistor

Silicon transistors keep shrinking (current state of the art is about 20 nanometers). However–in theory–once the gate goes to 5 nanometers, the electrons tunnel through the channel making it impossible to turn the transistor off. Berkeley researchers have used a different material to produce a transistor with a 1-nanometer gate. For point of reference, a human hair is about 50,000 nanometers thick.

The secret is to switch away from silicon in favor of another semiconductor. The team’s choice? Molybdenum disulfide. Never heard of it? You can buy it at any auto parts store since it is a common lubricant. Electrons have more effective mass as they travel through molybdenum disulfide than silicon. For a larger transistor, that’s not a good thing, but for a small transistor, it prevents the electron tunneling problem.

Continue reading “Honey, They Shrunk The Transistor”

Measuring capacitance with wax dielectric

How To Measure The Dielectric Constant For DIY Capacitors

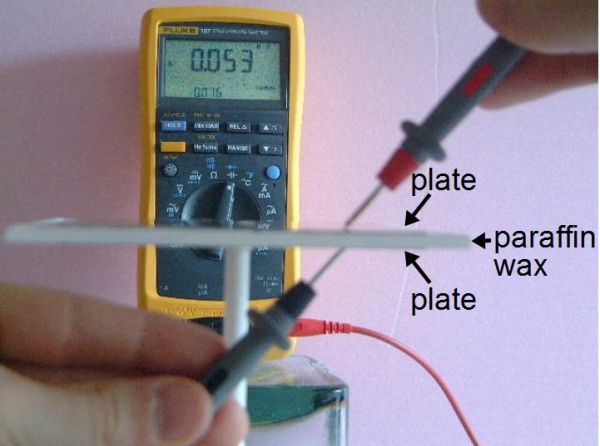
Every now and then you need to make your own capacitor. That includes choosing a dielectric for it, the insulating material that goes between the plates. One dielectric material that I use a lot is paraffin wax which can be found in art stores and is normally used for making candles. Another is resin, the easiest to find being automotive resin used for automotive body repairs.

The problem is that you sometimes need to do the calculations for the capacitor dimensions ahead of time, rather than just throwing something together. And that means you need to know the dielectric constant of the dielectric material. That’s something that the manufacturer of the paraffin wax that makes it for art stores won’t know, nor will the manufacturers of automotive body repair resin. The intended customers just don’t care.

It’s therefore left up to you to measure the dielectric constant yourself, and here I’ll talk about the method I use for doing that.

Continue reading “How To Measure The Dielectric Constant For DIY Capacitors”

An Easy Home Made Electroadhesive

There was a time when if you wanted to scale a wall you had to turn a camera on its side and call [Adam West] or [Lionel Ritchie]. Unless you were a gecko, that is. Their host of tiny bristles and intramolecular forces allow them to run up walls and across the ceiling with ease.

You may have seen synthetic gecko-like adhesive surfaces using the same effect. Some impressive wall-climbing robots have used these materials, though they’ve all shared the same problem. Gecko adhesion can’t be turned off. Happily, for the robot wall climber unwilling to expend the extra force to detach a foot there is an alternative approach. Electroadhesives use electrostatic force to attach a plate held at a high potential to a surface, and today’s featured video is [Carter Hurd]’s home-made electroadhesive panel (YouTube).

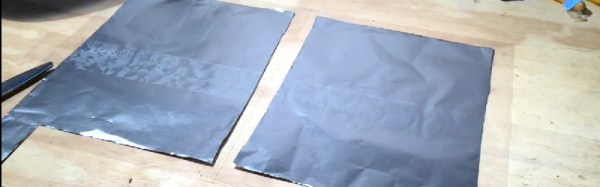
He cites this paper and this description of the technology as the influences on his design, two aluminium foil electrodes sandwiched between plastic sheet and sticky tape. He applies 6kV from an Emco DC to DC converter to his plates, and as if by magic it sticks to his drywall. Of course, it’s not quite as simple as that, he tried several surfaces before finding the one it stuck to. Adhesion is fully under control, and such a simple device performs surprisingly well. The Emco converters are sadly not cheap, but they are an extremely efficient product for which he only needs a few AA cells on the low voltage side.

His full description is in the video below the break.

Continue reading “An Easy Home Made Electroadhesive”

Get Hands-On: Workshop Tickets Now Available

Get together with awesome hackers and build something cool. That’s the exact description for the workshops of the Hackaday SuperConference. Previously we announced all of the talks and some of the workshop presenters, but starting right now you can reserve your space in these inspiring hands-on sessions.

You must have a SuperCon ticket in order to purchase a workshop ticket. We anticipate SuperCon to be sold out before the end of this week so buy your ticket now! This is the ultimate hardware conference, held in Pasadena California on November 5th and 6th.

Workshops start at $5. This is a “skin in the game” rate to help encourage everyone who registers to show up. Space is limited and will surely sell out (last year the waiting list for some of the workshops was far bigger than the actual workshop). Any tickets above the $5 price are to cover the material expense for that workshop.

Delve into ultrasonics, try your hand at rapid prototyping connected devices, head out on the town with your robot, or get building with PCBs, FPGAs, conductive ink, and servo motors. These workshops span a range of very interesting skill sets and will send you away inspired to explore that next big hack.

Continue reading “Get Hands-On: Workshop Tickets Now Available”

Ask Hackaday: DIY Handwriting Recognition

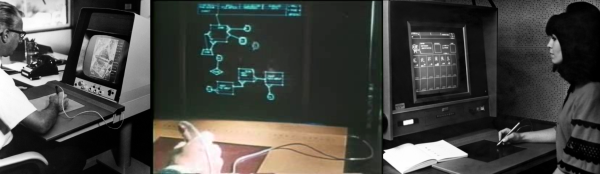
Computer handwriting recognition is very cool by itself, and it’s something that we’d like to incorporate into a project. So we went digging for hacker solutions, and along the way came up with an interesting bit of history and some great algorithms. We feel like we’ve got a good start on that front, but we’re stuck on the hardware tablet sensor itself. So in this Ask Hackaday, we’re going to make the case for why you could be using a tablet-like device for capturing user input or doing handwriting recognition, and then we’re going to ask if you know of any good DIY tablet designs to make it work.

Continue reading “Ask Hackaday: DIY Handwriting Recognition”

Raspberry Pi Boots CP/M

Retrocomputing is an enjoyable and educational pursuit and — of course — there are a variety of emulators that can let you use and program a slew of old computers. However, there’s something attractive about avoiding booting a modern operating system and then emulating an older system on top of it. Part of it is just aesthetics, and of course the real retrocomputing happens on retro hardware. However, as a practical matter, retrocomptuters break, and with emulation, you’d assume that CPU cycles spent on the host operating system (and other programs running in the background) will take away from the target retrocomputer.

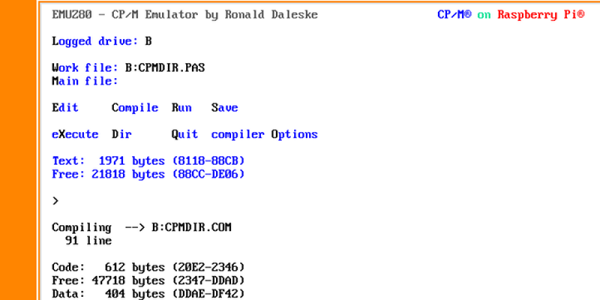
If you want to try booting a “bare metal” Z80 emulator with CP/M on a Raspberry Pi, you can try EMUZ80 RPI. The files reside on an SD card and the Pi directly boots it, avoiding any Linux OS (like Raspian). It’s available for the Raspberry Pi Model B, A+, and the Raspberry Pi 2 Model B. Unlike the significant boot times of the standard Linux distros on the earliest models of Pi, you can boot into CP/M in just five seconds. Just like the old days.

The secret to this development is an open source system known as Ultibo, a framework based on Open Pascal which allows you to create bare metal applications for the Raspberry Pi. The choice of Free Pascal will delight some and annoy others, depending on your predilections. Ultibo is still very much in active development, but the most common functions are already there; you can write to the framebuffer, read USB keyboards, and write to a serial port. That’s all you really need to make your own emulator or write your own Doom clone. You can see a video about Ultibo (the first of a series) below.

Continue reading “Raspberry Pi Boots CP/M”