Intel Makes A Cool Robot Brain In Latest Attempt To Pry Hackers From Their Wallets

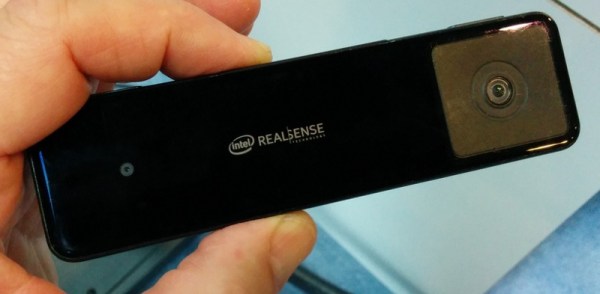
Hackerboards got a chance to sit down with Intel’s latest attempt to turn hackers into a willing and steady revenue stream, the, “Euclid.” The board is cool in concept, a full mini computer with stereo cameras, battery, Ubuntu, and ROS nicely packaged together.

We would be more excited if we knew how much it costs, but in principle the device is super cool. From a robotics research perspective it’s a sort of perfect package. ROS is a wonderful distributed and asynchronous robotic operating system, test, and development platform. The Intel developers designed this unit around the needs of ROS and it comes pre-installed on the camera.

For those who haven’t used ROS before, this is a really cool feature. ROS is natively distributed. It really doesn’t care where the computer supplying its data lives. So, for example, if you already had a robot and wanted to add stereo vision to it. You could offload all the vision processing components of your existing ROS codebase to the Euclid and continue as if nothing changed.

The other option is to use the board as the entire robot brain. It’s self contained with battery and camera. It’s a USB to serial connection away from supercharging any small robotics project.

Unfortunately the board is still a demo, and based on Intel’s history, likely to be too expensive to lure ordinary hackers away from the RasPis and import cameras they already know how to hack together into more or less the same thing. Universities will likely be weak at the knees for such a development though.

From Project To Kit: The Final Furlong

This article is the fifth in a series looking at the process of bringing an electronic kit to market from a personal project. We’ve looked at market research, we’ve discussed making a product from your project and writing the best instructions possible before stuffing your first kits ready for sale. In this article we’ll tackle the different means of putting your kits out there for sale.

Given a box of ready-to-sell kits, what next? You have to find some means of selling them, getting them in front of your customer, making the sale, sending them to the purchaser, and safely collecting their money. A few years ago this was an expensive and risky process involving adverts in print magazines and a lot of waiting, but we are fortunate. The Internet has delivered us all the tools we need to market and sell a product like an electronic kit, and in a way that needn’t cost a fortune. We’ll now run through a few of those options for selling your kits, before looking at shipping, marketing, and post-sales support in the final article in the series.

Continue reading “From Project To Kit: The Final Furlong”

Making A Thinkpad Great Again

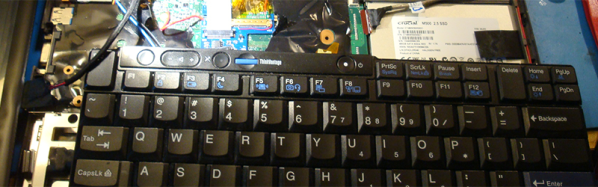
The Thinkpad X220 is almost a perfect laptop. The X220 is small, light, was the last small Thinkpad to use 35W CPUs, has great Linux support, incredible battery life, and can be found used very inexpensively. For the Thinkpad Mafia, the X220 is a badge of honor, but it does have one glaring drawback: the LCDs in these laptops are capped at 1366×768 resolution.

A few wizards in Japan and China have taken up the X220 and developed an adapter to give this tiny laptop the display it deserves. Mentions of a FHD mod – the Lenovo-speak for a Thinkpad display upgrade – can be found on Taobao, but the anglosphere doesn’t get these cool toys. [Vectro] decided his X220 wasn’t up to snuff and decided to build his own Thinkpad mod to give his trusty companion a bigger and brighter display. He succeeded, and did it in a way that’s much better than any previous attempt.

Stock, the X220 uses an LVDS bus for internal video, and there aren’t enough lanes on this bus for a 1080 display. The usual way of modifying the X220 for a display with higher resolution is tapping into the eDP present on the Thinkpad dock connector. [Vectro]’s solution differs slightly from the usual way of doing things – instead of using an I2C EEPROM to report the resolution, DPI, and model of display, he’s using a microcontroller. This gives him the ability to control the power state and brightness level of the display. It’s a great solution, and is designed to be a relatively easy drop-in mod.

The new display works, and Thinkpadding at 1080 is awesome, but there’s still work to be done. The dock connector is incompatible with this mod, and hopefully scaling this up for small-scale production. Producing a few X220 FHD kits is going to be a problem, as each wire in the eDP cable is individually soldered to the connector. It doesn’t scale well, but there is certainly a demand to make the greatest Thinkpad even better.

Police Baffled? Send For The Radio Amateurs!

The police force in Evanston, Illinois had a problem on their hands. A mystery transmitter was blocking legal use of radio devices, car key fobs, cellphones, and other transmitters in an area of their city, and since it was also blocking 911 calls they decided to investigate it. Their first call for help went to the FCC who weren’t much use, telling them to talk to the manufacturers of the devices affected.

Eventually they approached the ARRL, the USA’s national amateur radio organisation, who sent along [Kermit Carlson, W9XA] to investigate. He fairly quickly identified the frequencies with the strongest interference and the likely spot from which it originated, and after some investigation it was traced to a recently replaced neon sign power supply. Surprisingly the supply was not replaced with a fault-free unit, its owner merely agreeing to turn it off should any further interference be reported.

The ARRL are highlighting this otherwise fairly unremarkable case to draw attention to the problem of devices appearing on the market with little or no pretence of electromagnetic compatibility compliance. In particular they are critical of the FCC’s lacklustre enforcement response in cases like this one. It’s a significant problem worldwide as huge numbers of very cheap switch-mode mains power supplies have replaced transformers in mains power applications, and in any center of population its effects can be readily seen with an HF radio in the form of a significantly raised RF noise floor. Though we have reported before on the FCC’s investigation of the noise floor problem we’d be inclined to agree with the ARRL that it is effective enforcement of EMC regulations that is key to the solution.

City of Evanston police vehicle picture, [Inventorchris] (CC BY-NC 2.0) via Flickr.

Hackaday Prize Entry: A CNC Scribe For Making Circuit Boards

We’re interested in any device that can make a PCB out of a copper-clad board, and this entry for the Hackaday Prize might be the simplest machine for PCB fabrication yet. It’s called the Projecta, and it’s a simple way to turn Eagle and KiCad files into a real circuit board.

For the home PCB fabricator, there are two ways to go about the process of turning a copper clad board into a real circuit board. The first is a CNC machine. Drop a piece of FR4 under a cutter, and you’ll get a circuit board and a lot of fiberglass dust. The Othermill is great for this, but it is a bit pricey for all but the most ambitious weekend warrior.

The second method of home PCB fabrication chemically etches the copper away. The etch resist mask can be laid down with dry film resist, or with the ever-popular laser printer, magazine, and laminator trick. Either way, the result is an acid-proof covering over the copper you don’t want to get rid of.

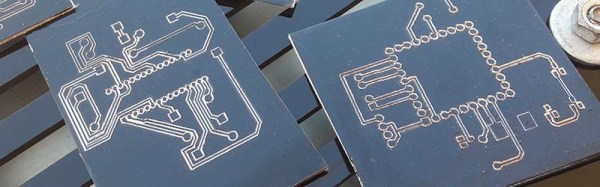
While the Projecta looks and sounds like a miniature CNC machine, it doesn’t chew through copper and produce a ton of fiberglass dust. The Projecta scribes the pattern of a circuit board after the copper has been masked off with a sharpie, marker, or other ink-based resist. When the board comes out of the Projecta, there’s a perfect pattern of circuits on a board, ready for the etch tank.

This technique of putting a copper clad board into a CNC machine and etching it later is something we haven’t seen before. There’s a good reason for that – if you’re putting a board under a cutter already, you might as well just chew away the copper while you’re at it.

Just because we haven’t seen this technique before doesn’t mean it’s a bad idea. Because the Projecta is only scribing a bit of ink off a board, the CNC mechanism doesn’t need to be that complex. It doesn’t need to throw a spindle around, and the Projecta can be built down to a price rather easily.

The Projecta is on Kickstarter right now, with the Kickstarter non-early bird price of $600. You can check out the video demo of the Projecta in action below.

Continue reading “Hackaday Prize Entry: A CNC Scribe For Making Circuit Boards”

Exoskeleton Designed For Children

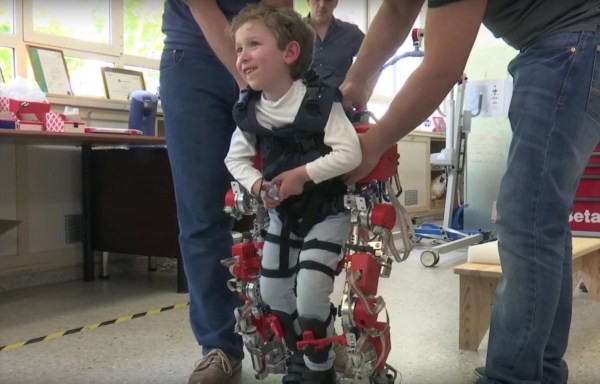
Exoskeletons are demonstrably awesome, allowing humans to accomplish feats of strength beyond their normal capacity. The future is bright for the technology — not just for industrial and military applications, but especially in therapy and rehabilitation. Normally, one thinks of adults who have lost function in their limbs, but in the case of this exoskeleton, developed by The Spanish National Research Council (CSIC), children with spinal muscular atrophy are given a chance to lead an active life.

Designing prosthetics for children can be difficult since they are constantly growing, and CSIC’s is designed to be telescopic to accommodate patients between the ages 3-14. Five motors in each leg adapt to the individual symptoms of the patient through sensors which detect the child’s intent to move and simulates what would be their natural walking gait.

Continue reading “Exoskeleton Designed For Children”

The Mystery Behind The Globs Of Epoxy

When Sparkfun visited the factory that makes their multimeters and photographed a mysterious industrial process.

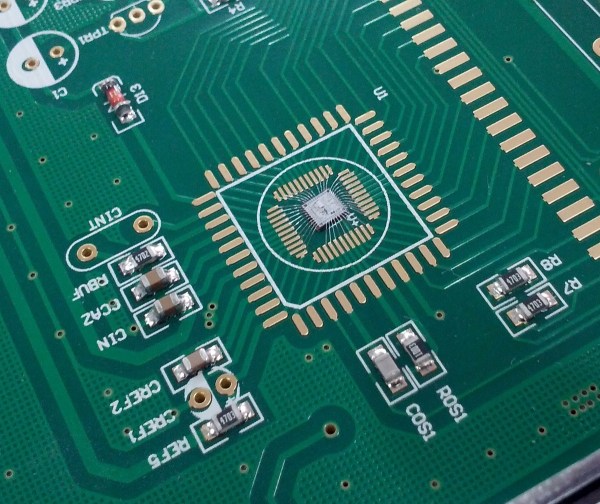
We all know that the little black globs on electronics has a semiconductor of some sort hiding beneath, but the process is one that’s not really explored much in the home shop.  The basic story being that, for various reasons , there is no cheaper way to get a chip on a board than to use the aptly named chip-on-board or COB process. Without the expense of encapsulating  the raw chunk of etched and plated silicon, the semiconductor retailer can sell the chip for pennies. It’s also a great way to accept delivery of custom silicon or place a grouping of chips closely together while maintaining a cheap, reliable, and low-profile package.

As SparkFun reveals, the story begins with a tray of silicon wafers. A person epoxies the wafer with some conductive glue to its place on the board. Surprisingly, alignment isn’t critical. The epoxy dries and then the circuit board is taken to a, “semi-automatic thermosonic wire bonding machine,” and slotted into a fixture at its base. The awesomely named machine needs the operator to find the center of the first two pads to be bonded with wire. Using this information it quickly bonds the pads on the silicon wafer to the  board — a process you’ll find satisfying in the clip below.

The final step is to place the familiar black blob of epoxy over the assembly and bake the board at the temperature the recipe in the datasheet demands. It’s a common manufacturing process that saves more money than coloring a multimeter anything other than yellow.

Continue reading “The Mystery Behind The Globs Of Epoxy”