Everyone needs a place to work. While some of us have well equipped labs with soldering stations, oscilloscopes, and a myriad of other tools, others perform their hacks on the kitchen table. Still, some hackers have to be on the go – taking their tools and work space along with them on the road. This week’s Hacklet is all about the best toolbox and workbench projects on Hackaday.io!
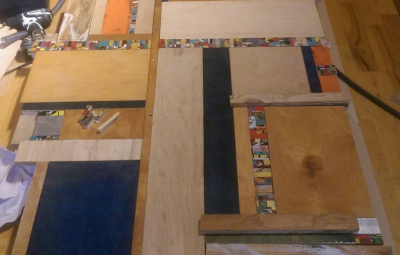 We start at the top – in this case, a bench top. [KickSucker] created Mondrian Inspired Work Table as a multi-use tabletop for all kinds of projects. Rather than slap down a piece of plywood, [KickSucker] took a more artistic route. Piet Mondrian was a dutch artist known for painting irregular grids of black and white lines. He’d fill a few of the rectangles up with primary colors, but leave most of them white. Between different off-cuts of wood, and colorful bits of skateboard deck [KickSucker] had the makings of an awesome work surface. The frame of the bench is an IKEA expedite shelf unit. The frame is made from MDF, with the offcuts laid on top of it. The fun part was arranging all the pieces to make lines and colors. The result is a great custom work table, and a heck of a lot less wood scraps lying around the shop. That’s a double win in our book!
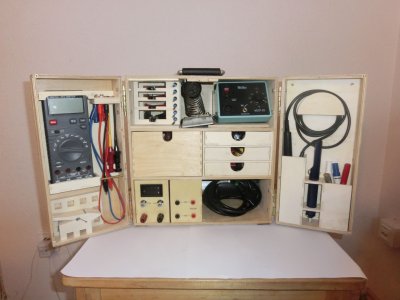 Next up is [M.Hehr] with Portable Workbench & mini Lab. [M.Hehr] has wanted a portable electronic workstation for years. We’re betting he’s seen a few of them here on the blog. While cleaning up the lab before Christmas, [M.Hehr] found a couple of wooden IKEA boxes. Each box held some drawers. An idea formed in [M.Hehr’s] head. It was time to put the plan in motion! The boxes were attached and hinged. Custom brackets were cut on a Shapeoko 2 router. Everything – even the screws were recycled. [M.Hehr] created a perfect space for each tool, ensuring that things won’t end up in a tangled mess when the box is carried around. We really love the retractable power point and custom-made power supply!
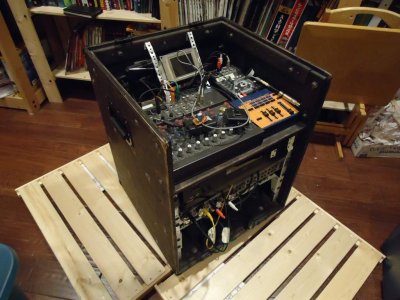 Next we’ve got [Tim Trzepacz] with Musician’s Road Box with 9 space rack. [Tim’s] sister [Tina] was playing a lot of music on the road, and needed a way to organize her gear. There are plenty of commercial solutions for this, but [Tim] decided to roll the perfect solution. He designed a plywood box with a 9U rack. [Tina’s] mixer and backing sound sources were located on the top, while effects and other modules were located in the rack. [Tim] spent a good amount of time designing the box. He was able to get the cut list down to a single piece of plywood, with room to spare. This is perfect for a 4′ x 8′ router like the ShopBot. When it comes time to hit the road, the case seals up to a rugged package. Standard roadcase corners and twist-latches finish this awesome piece.
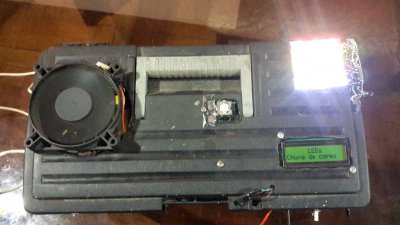 Finally we have [Géllo] with protoBox. [Géllo] is into induction heating, which requires a Zero Voltage Switching (ZVS) flyback driver. ProtoBox started life as a place for [Géllo] to store his ZVS. It has evolved to become a small portable electronics lab. [Géllo] powers the box with a set of lithium-ion batteries sourced from old laptops. This particular ZVS design is plenty powerful enough to heat metal red hot, or create some nice arcs. [Géllo] added an Arduino Mega, a Bluetooth radio, and a 2×16 character LCD. The system is controlled with relays. A bluetooth enabled smartphone can be used to enable or disable any feature. [Géllo’s] assembly techniques are a bit scary, especially considering the fact that this is a high power design. However, this is a great proof of concept!
If you want to see more workbench and toolbox projects, check out our new workbench and toolbox list! If I missed your project, don’t be shy! Just drop me a message on Hackaday.io. That’s it for this week’s Hacklet. As always, see you next week. Same hack time, same hack channel, bringing you the best of Hackaday.io!




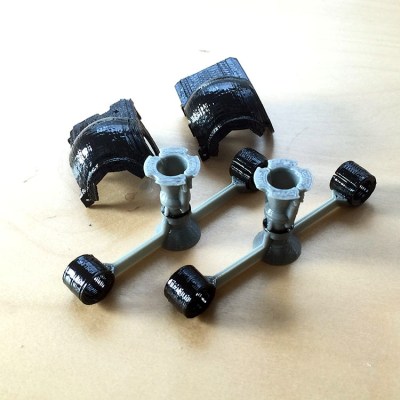 First off, he’s starting with very small commodity quadcopters that are cheap (and legal) for anyone to own and fly. Both are variations of the Hubsan X4; the H107C and the H107L. The stock arms of these quadcopters extend from the center of the chassis, but that needs to change for TFFF (Tie Fighter Form Factor). The solution is of course 3D Printing. The designs


