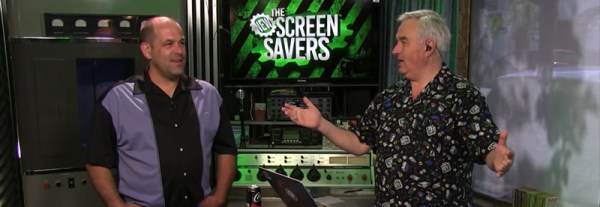
Review: DSLogic Logic Analyzer

Logic analyzers historically have been the heavy artillery in an engineer’s arsenal. For many of us, the name invokes mental images of large HP and Tektronix iron with real CRT screens. Logic connections were made through pods, with hundreds of leads weaving their way back to the test equipment. The logic analyzer came out when all else failed, when even a four channel scope wasn’t enough to figure out your problems. Setting them up was a pain – if you were lucky, the analyzer had a PC keyboard interface. If not, you were stuck typing your signal names into the front panel keyboard. Once setup though, logic analyzers were great at finding bugs. You can see things you’d never see with another tool – like a data bus slowly settling out after the read or write strobe.

There have been a number of USB based logic analyzers introduced in recent years, but they didn’t really catch on until Saleae released their “Logic” line of devices. Low cost, high-speed, and easy to use – these devices were perfect. They also inspired an army of clone devices based upon the same Cypress Semiconductor parts. DSLogic designed by DreamSource Labs, can be thought of as an open source evolution of the original Saleae device.

DSLogic appeared in 2013 as a Kickstarter campaign for an open source logic analyzer with an optional oscilloscope extension. I think it’s safe to say that they did well, raising $111,497 USD, more than 10 times their initial goal of $10,000 USD. These days both the DSLogic and the oscilloscope extension are available at The Hackaday Store. In this review we’re focusing on the logic analyzer portion of the tool. 

Click past the break for the full story!

Continue reading “Review: DSLogic Logic Analyzer”

LayerOne Demoscene Demoboard Party

The LayerOne conference is over, and that means this last weekend saw one of the biggest demoscene parties in the USA. Who won? A European team. We should have seen this coming.

There were two categories for the LayerOne demo compo, the first using only the LayerOne Demoscene Board. It’s a board with a PIC24F microcontroller, VGA out, and a 1/8″ mono audio out. That’s it; everything that comes out of this board is hand coded on the PIC. A few months ago, [JKing] wrote a demo to demonstrate what this demoboard can do. According to him, it’s the only reason Hackaday sold a single Demoboard in the Hackaday store:

Continue reading “LayerOne Demoscene Demoboard Party”

hand in hand clock

Odd Clock Moves Minute Hand To Hour Hand

We see a lot of clocks here on Hackaday. Some make it easy to tell the time, others are more cryptic. [dragonator] has done something that is so simple, we are surprised it isn’t more common. In a typical mechanical hand clock the minute and hour hands rotate around the same axis. [dragonator] decided to take the minute hand and move it out to the tip of the hour hand.

It works because of a gear system hidden behind the thick hour hand. As the hour hand turns, the gear system rotates, the last gear of which is connected to the minute hand. Since the minute hand rotates 12 times for every one revolution of the hour hand, the gear ratio can easily be calculated.

hand in hand clockThe 3D printed parts were designed by [dragonator] himself. All of the design files are available here for anyone who wants to build one of these neat clocks.

The clock uses a Trinket microcontroller board to keep track of the time and to send step signals to a StepStick that drives a NEMA 17 stepper motor. There is no on-board battery power for this clock, 9-12vdc comes in via a wall wart and is stepped down to 5v by the micro controller’s regulator. Even still, this is a great project that makes it fun to watch time pass, check the video out after the break.

Continue reading “Odd Clock Moves Minute Hand To Hour Hand”

The Hackaday Prize: An Ultra Low Cost 3D Printer Controller

This isn’t a Hackaday Prize entry that will change the world, but that doesn’t mean there’s not a place for it. [vdirienzo] is building an ultra low-cost 3D printer controller for 3D printers and other CNC machine. It’s not going to change the world, but it is a rather interesting little device.

This printer controller is very minimal, with a single-sided circuit board with just enough parts and components to make this board useful. The stepper motor drivers are from Pololu, and most of the other components are stuff you could pull out of a reasonably stocked junk drawer. The microcontroller is rather interesting; it’s an Arduino Nano. Instead of the ATMega644 and ‘Mega1280 microcontrollers found on other 8-bit printer controller boards, [vdirienzo] slimmed down the Teacup firmware to fit on the ATMega328 in the Arduino Nano.

The SinapTec is not by any means the first effort to create an ultra low-cost controller board for a 3D printer that can be assembled at home. The RepRap Gen 7 electronics can be manufactured on a RepRap or small CNC mill. There’s not much to these boards – just a small, single-sided board. If you want a small, simple, and cheap controller board for a 3D printer, this is all you need.

While a cheap 3D printer controller board doesn’t really fit with the ‘change the world’ theme of The Hackaday Prize, that doesn’t mean there’s still not a place in the contest for [vdirienzo]’s entry; we have a Best Product category, with a $100k prize and a six month residency in the Hackaday Design Lab. If that’s not enough reason to build something cool – even if it won’t change the world – we don’t know what is.


The 2015 Hackaday Prize is sponsored by:

Covert Remote Protest Transmitters

As a piece of protest art, “Covert Remote Protest Transmitters” ticks all the boxes. An outdoor covert projector that displayed anti-globalization messages at a G20 summit is protest. To disguise it inside a surveillance camera body housing — sticking it to the man from inside one of his own tools — is art. And a nice hack.

However you feel about the politics of globalization (and frankly, we’re stoked to be able to get cheap tech from anywhere in the world) the open-source DIY guidebook to building the rig (PDF) makes up for it all.

They installed the camera/projector long before the summit, where it sat dormant on a wall. A cell phone inside turned on the projector’s light with each ring because they attached a relay to the cell phone’s speaker circuit. In the instructions there’s an example of using a light-dependent resistor (CdS cell) to do the same thing, relying on the phone’s backlight functionality instead. There are a lot of ways to go here.

The optics consist of a couple of lenses aligned by trial and error, then fixed in place to a balsa wood frame with hot glue. A big fat Cree LED and driver provide the photons.

The video documentation of the piece is great. It’s mostly the news media reacting to the art piece as a “security breach”. A security breach would be a gun or a bomb. This was an overhead projector displaying messages that were out of the organizers’ control. Equating security with the supression of dissent is double-plus-ungood. Touché, CRPT.

Anyway, while you’re getting prepped for your next protest, have a look at the Image Fulgurator.

Sea Rendering

Project Sea Rendering Autonomously Renders Sea Bottoms

[Geir] has created a pretty neat device, it’s actually his second version of an autonomous boat that maps the depths of lakes and ponds. He calls it the Sea Rendering. The project is pretty serious as the hull was specially made of fiberglass. The propulsion is a simple DC motor and the rudder is powered by an RC servo. A light and flag adorn the top deck making the small craft visible to other larger boats that may be passing by. Seven batteries are responsible for all of the power requirements.

Sea Rendering

The craft’s course is pre-programmed in Mission Planner and uses ArduPilot loaded on an Arduino to steer to the defined way points. An onboard GPS module determines the position of the boat while a transducer measures the depth of the water. Both position and depth values are then saved to an SD card. Those values can later be imported into a software called Dr Depth that generates a topographic map of the water-covered floor.

[Geir] has sent this bad boy out on an 18 km journey passing through 337 way points. That’s pretty impressive! He estimates that the expected run time is 24 hours at a top speed of 3 km/h, meaning it could potentially travel 72 km on a single charge while taking 700 depth measurements during the voyage.

Continue reading “Project Sea Rendering Autonomously Renders Sea Bottoms”

The Biggest Game Boy Ever?

Feeling nostalgic? Miss the solid feel of an original Nintendo Game Boy? You could smash a window with one and keep playing Pokemon the whole time!  Well, [Raz] was, and he built what might just be the biggest Gameboy ever. Gameboy XXL: The Texas Edition.

Actually, it was commissioned for a Belgian music festival called Nintendoom — picture video game music + rave. Anyway, the organizer thought it would be so cool to have a giant functional Game Boy, so [Raz] got to work. He made it out of 10 square meters of 3mm thick MDF, which he laser cut into shape at the Brussels FabLab. The electronics inside consist of a 19″ LCD monitor, a Raspberry Pi, and a few jumbo size buttons.

It’s pretty freaking awesome. It runs Retropie which allows you to play pretty much whatever game you want. Check it out after the break.

Continue reading “The Biggest Game Boy Ever?”